OpenL Tablets BRMS OpenL Studio User Guide
Preface
This preface is an introduction to the OpenL Studio User Guide. The following topics are included in this preface:
Audience
This guide is intended for the following users:
| User type | Purpose | Required knowledge |
|---|---|---|
| Business users | View and modify company business rules stored in tables. | Knowledge of decision tables is required. |
| Developers | Manage technical details of rule tables. Organize and deploy rule projects. | Knowledge of OpenL Tablets technology is required. |
Related Information
OpenL Studio is a tool of the OpenL Tablets product. For information on OpenL Tablets Rules, see OpenL Tablets Reference Guide.
Typographic Conventions
The following styles and conventions are used in this guide:
| Convention | Description |
|---|---|
| Bold | Represents user interface items such as check boxes, command buttons, dialog boxes, drop-down list values, field names, menu commands, menus, option buttons, perspectives, tabs, tooltip labels, tree elements, views, and windows. Represents keys, such as F9 or CTRL+A. Represents a term the first time it is defined. |
Courier |
Represents file and directory names, code, system messages, and command-line commands. |
| Select File > Save As | Represents a command to perform, such as opening the File menu and selecting Save As. |
| Italic | Represents any information to be entered in a field. Represents documentation titles. |
| \< > | Represents placeholder values to be substituted with user specific values. |
| Hyperlink | Represents a hyperlink. Clicking a hyperlink displays the information topic or external source. |
Introducing OpenL Studio
This chapter introduces main OpenL Studio concepts. The following topics are included in this chapter:
- What Is OpenL Studio?
- Working with Projects in OpenL Studio
- OpenL Studio Components
- Security Overview
What Is OpenL Studio?
OpenL Studio is a web application employed by business users and developers to view, edit, and manage business rules and rule projects created using OpenL Tablets technology. For more information on OpenL Tablets, see OpenL Tablets Reference Guide.
By using OpenL Studio, users can modify rules directly in a web browser without installing additional tools. OpenL Studio provides an advanced functionality for creating and modifying rules, viewing errors, and executing tests.
Working with Projects in OpenL Studio
OpenL Studio is intended for a multi-user environment. It provides a centralized storage of rule projects called Design repository. Design repository is stored on the OpenL Studio server and can be accessed by any user. However, users cannot modify projects directly in Design repository. Instead, to make modifications to a project, users must execute the following procedure:
| Step | Action | Description |
|---|---|---|
| 1 | Open a project. | When a project is opened, its status is set to No Changes, and a copy of it is created in the user’s workspace, a specific location on the OpenL Studio server. Work copies of projects made editable by a particular user are stored there. Users can only access their personal workspaces. |
| 2 | Modify a project. | After any modification of a project, its status is set to In Editing. A project in the In Editing status is locked in Design repository to avoid loss of information. Other users cannot edit it until the project is saved. Other users can only open the project in read-only mode, with the No Changes status. Modifications to a project in the In Editing status are performed on the working copy stored in the user's workspace. Modifications do not become immediately visible to other users. |
| 3 | Save a project. | Saving a project copies the modified copy of the project from the user's workspace to Design repository. A new revision of the project is created in Design repository. A project can be restored to any of its previous revisions. In this case, its status is set to Viewing Revision. From this moment, changes are visible to other users and the project is available for editing. |
Closing a project deletes it from the user's workspace without saving changes and does not affect the revision in Design repository. Closed projects can be browsed in repository editor but are not available in Rules Editor.
The following diagram illustrates general rules project lifecycle. This is a simplified schema of rules development workflow where activities as opening, opening for editing, closing, deleting, and erasing the current project or deploying configuration are omitted.
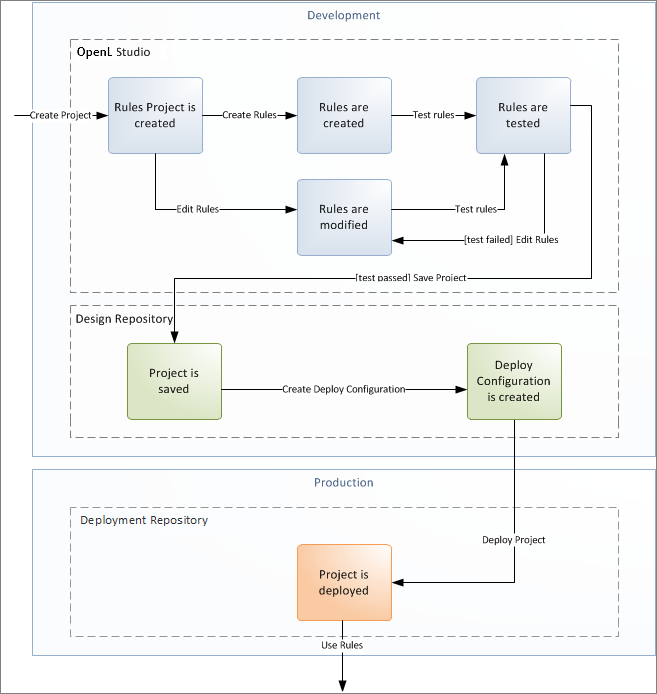
Rules project development workflow
Development of rules starts with creating a new project that will contain the rules. If the project already exists, it must be opened for editing. Then rules are created or updated and properly tested. After rules are completed and all tests are passed, a user saves the project. At this point, the updated revision of the project is saved to Design repository and applied changes of the project become available for viewing and editing by other users. If no more changes to the project are planned in the nearest future, a user can close the project.
Saved project revision is used to create deploy configuration. Several projects can be included in the same deploy configuration. Deploy configurations are used to deploy updates to the production environment.
If the project is not required any more, it can be deleted.
OpenL Studio Components
OpenL Studio consists of the following main components:
| Component | Description |
|---|---|
| Rules Editor | Graphic user interface running in a web browser allowing users to browse rule modules, modify table data, and run tests. Rule project configurations are browsed and updated there as well. Rules Editor is the default user interface displayed when a user opens OpenL Studio. Rules Editor does not display all rule module files but provides a logical view of rules stored in a module. This view is convenient for users who modify business rules. Rules Editor displays only modules available in projects stored in the user's workspace. To retrieve a project to the user's workspace, open the project as described in Working with Projects in OpenL Studio. For more information on using Rules Editor, see Using Rules Editor. |
| Repository editor | Graphic user interface running in a web browser allowing users to browse and manage projects in Design repository. Unlike Rules Editor, repository editor displays physical contents of rule projects. Users can easily switch between Rules Editor and repository editor in user interface. Repository editor provides the following main functions: - uploading projects from the file system to Design repository - editing, saving, opening, and closing projects - modifying project structure and properties managing project revisions - copying and deleting projects in Design repository - managing and tracing deploy configurations For more information on using repository editor, see Using Repository Editor. |
| Design repository | Centralized storage of rule projects accessible by all OpenL Studio users. Projects uploaded to Design repository are visible to other users. Design repository creates a separate project revision each time a project is saved. Any project revision can be opened. |
| Deploy configurations repository |
Centralized storage of final rule projects to be delivered to the production environment where solution applications use them. Projects can be deployed to deployment repository from Design repository using deploy configurations. Deploy configuration is a specific OpenL Studio project type. It identifies rule projects and project revisions to be deployed to deployment repository. Deploy configurations are saved and versioned so that developers can identify which specific rule project revisions are deployed. |
| Deployment repositories | Production storages of deployed rule projects where solution applications use them. |
| User workspace | Project storage on the server containing projects edited by users. Each user has a personal workspace unavailable to other users. |
Security Overview
OpenL Studio supports the following user modes:
| Mode | Description |
|---|---|
| Demo mode | This is a multi user mode with the list of users predefined in the database. All changes in the database will be lost after the application restart. The user’s projects will be located in the user-workspace\<user name> folder. |
| Single user mode | In this mode, only one user who is currently logged in on the computer can work in OpenL Studio. This mode is selected when OpenL Studio is installed on the local machine. All user projects are located in the root of the user-workspace directory. Single user mode is set by default and does not require additional settings, including logon to the system. Moreover, the system works faster in this mode but neither user management nor access control is provided. |
| Multi user mode | This mode enables multiple users to work in OpenL Studio and supports a security mechanism restricting access to certain product functions based on user access rights. Each OpenL Studio user is identified by a unique name. When a user opens OpenL Studio in a web browser, he or she must log into the system. Users can have varied levels of access in OpenL Studio. For example, system administrators usually have full access to all OpenL Studio functions, whereas other users may only have access rights to view or modify business rules. OpenL Studio is used to authenticate and manage user credentials/permissions. In this mode, user’s projects are located in the user-workspace\<user name> directory. |
| Active Directory | In this mode, multiple users can run OpenL Studio using their unique user names. The user’s projects will be located in the user-workspace\<user name> directory. Active Directory will be used to authenticate and manage user credentials. A place where user permissions will be managed can be OpenL Studio or Active Directory. |
| SSO: CAS | In this mode, multiple users can run OpenL Studio using their unique user names. The user’s projects will be located in the user-workspace\<user name> directory. CAS (Central Authentication Service) server will be used to authenticate and manage user credentials. A place where user permissions will be managed can be OpenL Studio or SSO identity provider. |
| SSO: SAML | In this mode, multiple users can run OpenL Studio using their unique user names. The user’s projects will be located in the user-workspace\<user name> directory. SAML (Security Assertion Markup Language) supporting Identity Provider server will be used to authenticate and manage user credentials. A place where user permissions will be managed can be OpenL Studio or SSO Identity provider. |
| SSO:OAuth2 | Multiple users can run OpenL Studio using their unique user names. User projects will be located in the user-workspace\<user name> directory. OAuth2 (Open Authorization) supporting the identity provider server is used to authenticate and manage user credentials. |
Getting Started
This chapter explains logging into OpenL Studio and briefly introduces the user interface. The following topics are included in this chapter:
- Signing In to OpenL Studio
- Modifying User Profile
- Displaying the OpenL Studio Help
- Signing Out of OpenL Studio
- Introducing Rules Editor
- Introducing Repository Editor
Signing In to OpenL Studio
To sign in to OpenL Studio, proceed as follows:
-
In the web browser address bar, enter the OpenL Studio URL provided by the system administrator. The OpenL Studio URL has the following pattern:
http://<server>:<port>/webstudioIn the single user mode, users are automatically signed in using the DEFAULT account. In the multi-user mode, the following form appears.
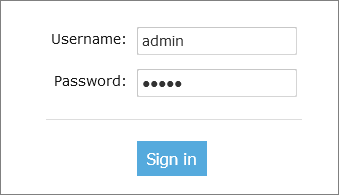
Login window
-
Enter the user name and password provided by the system administrator and click Sign in.
For more information on OpenL Studio UI, see Introducing Rules Editor and Introducing Repository Editor. For more information on the single and multi-user modes, see Security Overview.
Modifying User Profile
OpenL Studio provides a drop-down dialog located in the top-right corner of the application, under the user name, for updating user profile information, changing the password, and editing user settings. All data is stored in the user profile and includes User details and User settings sections.

Opening the user profile window
This section describes how to modify user profile information and includes the following topics:
Modifying User Details
To manage user details, proceed as follows:
- In OpenL Studio, in the top-right corner of the window, click an arrow icon next to the username.
-
In the actions list, click User Details.

Viewing user details
-
To update user’s first or last name, display name, or email, modify values as required.
If user data is retrieved from a third party system, such as Active Directory, these fields cannot be edited.
-
To update the password, in the Change Password section, enter the current and new password values.
- Click Save.
Synchronizing with a Third Party Service
When users are managed by a third party service, such as Active Directory, it is necessary to regularly check that the data in the OpenL Studio user storage is synchronized with the data defined in the third party service. Data is compared periodically or on specific events and if necessary, must be synchronized.
The following user information requires synchronization:
- first name
- last name
- display name
- email address
The following general guidelines apply:
- If the field value is synchronized with the third party service, the field becomes locked from editing.
- If the field is added locally and not synchronized, the field value remains available for editing.
The following synchronization rules apply:
- If the third party email address, first name, or last name value is empty or unavailable, the current email address, first name, or last name is not emptied.
- If the third party email address, first name, last name, or display name is not empty, the current values for local user email address, first name, last name, or display name is changed to the value received from the third party.
- If the display name value is empty or unavailable, the local display name is not modified.
An exception is the situation when the first or last name was changed.
- If the display name was set to “first name + space + last name”, it is updated to the new “first name + space + last name”.
- If the display name was set to the “last name + space + first name”, it is updated to the new “last name + space + first name”.
- If the display name is set to Other and its value in OpenL Studio is not empty, and in the third party service, it is empty, upon synchronization, the display name set locally is not changed.
- If the display name value is empty in OpenL Studio and the third party service, but the first name and last name values are not empty, the display name is set to “first name + space + last name”, regardless of the pattern specified upon local user creation.
If this user was not created as a local user previously but instead, created upon the external user logon, the display name value stays empty.
Modifying User Settings
To manage user settings, proceed as follows:
- In OpenL Studio, in the top-right corner of the window, click an arrow icon next to the username.
-
In the actions list, click User settings.

Viewing user settings
-
In the Table Settings section, identify whether table header and MS Excel formulas must be displayed.
-
In the Testing settings, select values for displaying rule test results.
By default, all test results are displayed with five test tables, or unit tests, and compound result is not displayed. For more information on testing settings, see Running Unit Tests.
-
In the Trace Settings, specify whether numbers must be displayed without formatting.
Displaying the OpenL Studio Help
To display the OpenL Studio help topics, in OpenL Studio, in the top-right corner of the window, click an arrow icon next to the username and select Help.
Signing Out of OpenL Studio
To sign out of OpenL Studio, proceed as follows:
- In OpenL Studio, in the top-right corner of the window, click an arrow icon next to the username.
- In the actions list, click Sign out.
Introducing Rules Editor
This section briefly introduces Rules Editor and includes the following topics:
For more information on tasks that can be performed in Rules Editor, see Using Rules Editor.
Rules Editor Overview
Rules Editor enables users to browse rule modules and modify table data. A default editor is displayed when a user opens a table in a module.

OpenL Studio Rules Editor
Rules Editor displays one module at a time. To switch between modules, select a module in the Projects tree or use breadcrumb navigation for quick switching between projects or modules of the current project.

Rules Editor breadcrumb navigation
One rule project can contain several modules.
The following table describes Rules Editor organization:
| Pane | Description |
|---|---|
| Left pane | Displays the module tree providing a list of elements in the currently displayed rule module. |
| Middle pane | Displays contents of the table selected in the left pane and provides controls for modifying table data, running tests, and checking test results. |
| Right pane | Displays properties of the currently displayed table. |
| Upper part of the window |
Contains toolbars with controls as described further in this section. |
The following table describes the Rules Editor toolbar controls:
| Control | Description |
|---|---|
 |
The following table describes the available options: - Revisions: displays project revisions. - Local Changes: opens a page for reverting module changes. - Table Dependencies: opens a graph displaying dependencies among tables of the module. - Compare Excel files: initiates a dialog for comparing Excel files. |
 |
Runs a simple search. For more information on performing searches, see Performing a Search. |
 |
Refreshes OpenL Studio with the latest changes in Excel files. |
 |
Initiates the table creation wizard. |
 |
Displays recently viewed tables instead of the module tree. |
 |
Returns to the module tree view. |
 |
Hides comment tables and dispatcher tables generated automatically when a rule table is overloaded by business dimension property. |
 |
Deploys the project. For more information on project deployment, see Deploying Projects. |
 |
Synchronizes and merges the updates made in the specified branches. |
 |
Copies the project. For more information on project copying, see Copying a Project. |
 |
Saves the changes and sets the project status to No Changes. |
  |
Updates the current module or project with uploaded file or zip file. Exports the current version of the module or project. |
 |
Switches user interface to repository editor. For more information on repository editor, see Introducing Repository Editor. |
 |
Switches user interface to Rules Editor. For more information on Rules Editor, see Using Rules Editor. |
 |
Switches user interface to the Administration mode. For more information on administrative functions, see Using Administration Tools. |
View Modes
OpenL Studio provides different modes for displaying rule elements. In this guide, modes are contingently divided into a simple view and extended view.
To switch between views, in the top right corner, select User settings and use the Show Header and Show Formula options.
When a table is opened in a simple view, OpenL Studio hides various technical table details, such as table header and MS Excel formulas. An example of a table opened in a simple view is as follows.
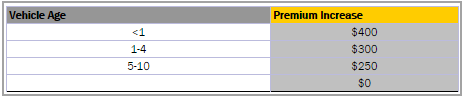
A rule table in a simple view
In the extended view, all table structure is displayed. An example of a table opened in an extended view is as follows.
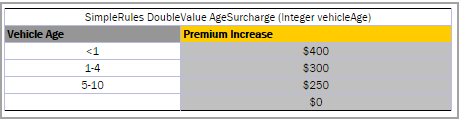
A rule table in an extended view
Rule tables can be organized, or sorted, and displayed in the module tree in different way depending on the selected value.
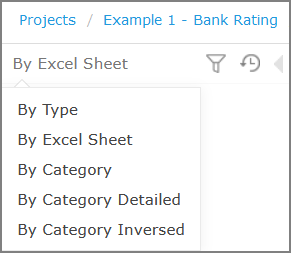
Modes for sorting tables in the module tree
By default, tables are sorted by their location in Excel sheets.
| Mode | Description |
|---|---|
| By Category | The tree structure is rather logical than physical. Rule tables are organized into categories based on the Category table property or, if the property is not defined, based on the Excel table sheet names. This view is simple. An example of a module tree sorted by the category parameter is as follows: 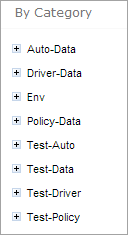 Module tree sorted by category |
| By Category Detailed |
The By Category Detailed view displays modules sorted by the first value of the Category property. In the following example, the same module tree is sorted by Category Detailed and, for example, Test > Auto category is displayed in the Test node and Auto sub-node:  Module tree sorted by Category Detailed |
| By Category Inversed |
The following example provides the module tree sorted by Category Inversed where modules are sorted by the second value of the Category property: 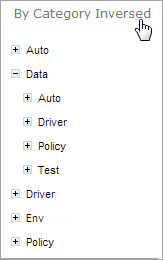 Module tree sorted by Category Inversed |
Note: If the scope in a Properties table is defined as Module, in the By Category view, this table is displayed in the Module Properties sub-node as in the last example. If the scope is defined as Category, the table is displayed in the Category Properties sub-node.
The two following modes display a project in a way convenient to experienced users, with module tree elements organized by physical structure rather than logically, in an extended view.
| Mode | Description |
|---|---|
| By Type | An example of a module tree displayed in extended view and sorted by type is as follows: 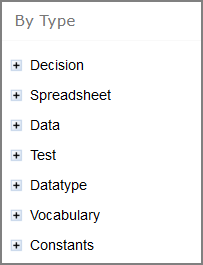 Module tree sorted by type |
| By Excel Sheet | The following tree is sorted by the order the tables are stored in the Excel file: 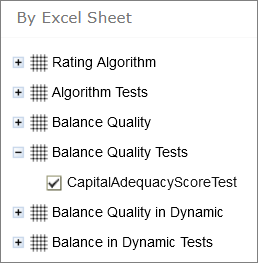 Module tree sorted by order in the Excel file |
Introducing Repository Editor
Repository editor provides controls for browsing and managing Design repository. A user can switch to repository editor by clicking the Repository control. Repository editor resembles the following:

OpenL Studio repository editor
The following table describes repository editor organization:
| Pane | Description |
|---|---|
| Left pane | Contains a tree of projects stored in Design repository and user's workspace. Unlike Rules Editor, repository editor displays physical project contents in terms of files and folders. |
| Middle pane | Displays content for the element selected in the tree. For each project, the following actions are available: - copying a project  - archiving a project  - closing a project  - opening a project  - deploying a project  |
A user can switch to Rules Editor by clicking the Rules Editor control.
For more information on tasks that can be performed in repository editor, see Using Repository Editor.
Using Rules Editor
This chapter describes basic tasks that can be performed in Rules Editor. For more information on Rules Editor, see Introducing Rules Editor.
The following topics are included in this chapter:
- Filtering Projects
- Viewing a Project
- Viewing a Module
- Managing Projects and Modules
- Defining Project Dependencies
- Viewing Tables
- Modifying Tables
- Referring to Tables
- Managing Range Data Types
- Creating Tables by Copying
- Performing a Search
- Creating Tables
- Comparing Excel Files
- Viewing and Editing Project-Related OpenAPI Details
- Reconciling an OpenAPI Project
Filtering Projects
To limit a list of projects displayed in the Projects list, start typing a project name in the field located above the list of projects.

Filtering projects by Name
To get a full list of projects, delete filter text value in the field.
Viewing a Project
Rules Editor allows a user to work with one project at a time. To select a project, in the Projects tree, select the blue hyperlink of the required project name. The project page with general information about the project and configuration details appears in the middle pane of the editor.
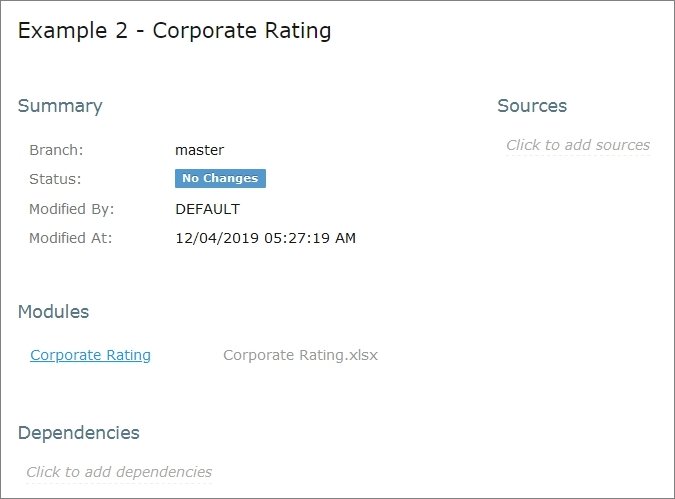
A project page in Rules Editor
If a particular project is not available, it must be opened as described in Opening a Project.
Viewing a Module
Rules Editor allows a user to work with one module at a time. To select a module, in the Projects tree, select the black hyperlink of the module name. The following module information is displayed:
- tree in the left pane displaying module tables
- general module information displayed in the middle pane, including project and module names, associated Excel file, number of tables, and module dependencies
If a particular module is not available, the project in which it is defined must be opened as described in Opening a Project.
By default, a project is opened in the multi-module mode. This is a common production mode. In the multi-module mode, all modules of the current project with all their dependencies are displayed, that is, modules of projects defined as the project dependencies.
For more information on project and module dependencies, see OpenL Tablets Reference Guide > Project and Module Dependencies.
The first opened module page is displayed right after the module is loaded, while loading of the whole project continues in the background. The loading progress bar is displayed in the Problems section. Errors and warnings are displayed dynamically while more modules are compiled.

Loading progress bar
If a module is modified during loading, this module is re-compiled and project loading continues. When the loading is complete, the progress bar is displayed for ten more seconds and then disappears.
The loading progress bar is not displayed for newly opened projects if a project has only one module or multiple small modules which loading takes less than one second. The loading progress bar is also not displayed if the project is already opened and fully compiled and the following actions happen:
- A page is refreshed using the browser refresh button.
- A user leaves the project by switching to the main Editor or Repository page and then returns to the project without opening other projects in the meantime.
- A user switches between modules of the same project.
If a user clicks the refresh button in OpenL Studio, loading restarts and progress bar appears again. While loading in process, the Run, Trace, Test, and Benchmark actions work only for currently opened module. That is why the Within Current Module Only check box is selected and cannot be edited in the menu of these actions while loading is in progress.
When loading is completed, the Within Current Module Only check box is cleared and becomes editable.
Managing Projects and Modules
This section explains the following tasks that can be performed on projects in Rules Editor:
- Editing and Saving a Project
- Saving a Project for Backward Compatibility
- Updating and Exporting a Project
- Copying a Project
- Exporting, Updating, and Editing a Module
- Comparing and Reverting Module Changes
- Copying a Module
Editing and Saving a Project
A project can be opened for editing and saved directly in Rules Editor.
-
To save the edited project, click Save
.Note: If a project is in the Local status, this option is not available in Rules Editor.
-
To modify the project in the Project page, modify the values as described in the following table:
| Project details | Available actions |
|---|---|
| General project information and configuration, such as OpenL version compatibility, description, project name, and custom file name processor |
Put the mouse cursor over the project name and click Edit  . . For more information on OpenL version compatibility, see Saving a Project for Backward Compatibility. Project name can be edited only for projects in a non-flat Git repository. The project name will be changed in OpenL Studio only, while the folder name remains unchanged. For more information on properties pattern for the file name, see OpenL Tablets Reference Guide > Properties Defined in the File Name. |
| Project sources | Put the mouse cursor over the Sources label and click Manage Sources . |
| Modules configuration | Put the mouse cursor over the Modules label or a particular module name and click Add Module  or Edit Module or Edit Module or Remove Module  . . |
| Project dependencies | Manage dependencies as described in Defining Project Dependencies. |
All changes are saved in the project rules.xml file. For more information on this XML file, see the OpenL Tablets Developers Guide.
Saving a Project for Backward Compatibility
For backward compatibility, a project can be saved in earlier OpenL versions, for example, 5.11.0 or 5.12.0.
It is important that the structure of rules.xml and rules-deploy.xml is changed after saving a project in a previous OpenL version, and may result, for example, in disappeared UI fragments.

Selecting an OpenL Tablets version for creating a backward compatible project version
Updating and Exporting a Project
To update or export a project, proceed as follows:
-
To update a project directly in Rules Editor, in the top line menu, click Update and make the necessary changes.
The Update button is available for projects in the In Editing status.
-
To export the project to the user’s local machine, for a project, in the top line menu, click Export and select a project revision.
The default project version for export is the one that a user has currently open in Rules Editor. If it contains unsaved changes, it is marked as In Editing, otherwise, it is called Viewing.
Exported project is downloaded as a .zip archive.

Importing and updating the project from a .zip file
Copying a Project
To create a copy of a project, proceed as follows:
- In the top line menu, click Copy.
- In the window that appears, enter the new project name.
- Modify Comment if needed.
- When you need to copy a project with revisions, select the Copy old revisions check box and provide the necessary number of revisions in the Revisions to copy field.
- Click Copy.
The new project appears in the project list.

Copying a project
Exporting, Updating, and Editing a Module
A user can export, update, or edit a module directly in Rules Editor. Proceed as follows:
- To upload a changed module file, for a module, in the top line menu, click Upload.
-
To export the module to the user’s local machine, for a module, in the top line menu, click Export and select a module revision.
The default module version for export is the one that a user has currently open in Rules Editor. If it contains unsaved changes, it is marked as In Editing, otherwise, it is called Viewing.
-
To modify module configuration, such as module name, path, and included or excluded methods, in the Module page place the mouse cursor over the module name and click Edit
.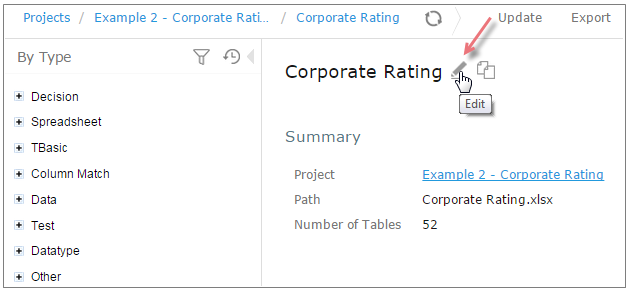
Initiating module editing

Editing module information
-
To save the changes, click Save
.
Notes: The 'Included Methods' and 'Excluded Methods' fields provide the ability to set method filters. For more information, refer to the Rule Services and Customization Guide > Dynamic Interface Support
Comparing and Reverting Module Changes
OpenL Studio allows comparing module versions and rolling back module changes against the specific date. To compare module versions, proceed as follows:
- In the Projects tree, select the module.
-
In the top line menu, select More > Local Changes. The Local Changes page appears displaying all module versions, with the latest versions on the top.
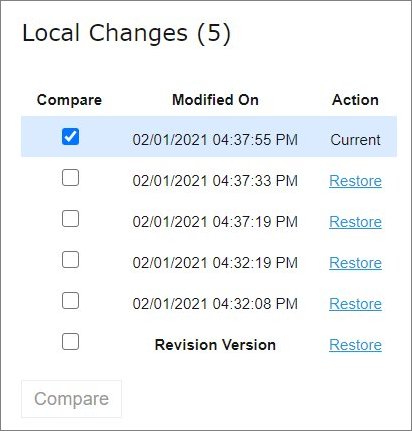
Displaying the Changes window
When a project is modified, upon clicking the Save icon
 , a temporary version of the module is created, and it appears in the list of local changes. When project update is complete, clicking Save removes all temporary versions from Local Changes, and a new version is added to the list of revisions.
Clicking Save to complete project update and save changes as a revision version
-
To compare the changes, select check boxes for two required versions and click Compare.

Comparing module versions
The system displays the module in a separate browser window where changed tables are marked as displayed in the following example.

Tables with changes
-
To view the changes, click the required table.
The result of the comparison is displayed in the bottom of the window.

The result of the module version comparison
-
To revert module changes, for the required module version, click the Restore link and confirm the changes.
When Restore is clicked, the corresponding changes are restored but this action is not added to the history as a change.
Copying a Module
OpenL Studio allows creating a copy of the existing module, in Editor, in either Project page, or in the Module page. The following topics are included in this section:
Copying a Simple Module
To create a copy of a module, proceed as follows:
- Do one of the following:
- To create a copy of a module using the Project page, in the project tree, select a project which module must be copied, in the modules list, put the mouse cursor over the selected module name, and click Copy Module
 .
. - To create a copy of a module using the Module page, in the project tree, select a module to be copied, put the mouse cursor over the module name, and click Copy Module .
- To create a copy of a module using the Project page, in the project tree, select a project which module must be copied, in the modules list, put the mouse cursor over the selected module name, and click Copy Module
-
In the window that appears, enter the new module name.
When the new module name is entered, the Copy button becomes enabled.
-
Optionally, edit the New File Name field value.
The file name can differ from the module name.
-
Optionally, to copy the module to the specific folder, in the New File Name field, enter the file name and its location.
The original path cannot be modified other than by entering the specific path in the New File Name field. For example, if the original module is located in
folder1, the new module will be copied tofolder1.Folder1cannot be changed, but a user can define a new file name, such asfolder2/Bank Rating ver2.xlsx,and then the new module will be created infolder1/folder2/Bank Rating ver2.xlsx. -
Click Copy.
A new simple module is displayed in the modules list.

Creating a copy of a module
Copying a Module Defined Using the File Path Pattern
If the module is defined using File Path Pattern, to copy such module, proceed as follows:
- Do one of the following:
- To create a copy of a module using the Project page, put the mouse cursor over multiple modules, click Copy Module , in the window that appears, click Select module, and in the File Path drop-down list, select the name of the module to copy.
- To create a copy of a module using the Module page, in the project tree, select a module to copy, put the mouse cursor over the module name, and click Copy Module .
- To create a copy of a module using the Project page, put the mouse cursor over multiple modules, click Copy Module
- Click Select module and in the File Path drop-down list, select the name of the module to copy.
- Enter the new module name.
- Click Copy.
The new module is displayed in the modules list.

Copying a module with the defined file path and properties patterns
If the new module name does not match the properties pattern for the file name, no business dimension properties will be applied to the rules inside the module.
Defining Project Dependencies
A project dependency can be defined when a particular rule project, or root project, depends on contents of another project, or dependency project. Project dependencies are checked when projects are deployed to the deployment repository. OpenL Studio displays warning messages when a user deploys projects with conflicting dependencies.
To define a dependency on another project, proceed as follows:
- In Rules Editor, in the project tree, select a project name.
- If the project is not editable, make it editable as described in Editing and Saving a Project.
- Put the mouse cursor over the Dependencies label and click Manage Dependencies .
- In the window that appears, update information as required and click Save.

Managing project dependencies
If the All Modules option is selected in the multi-module mode, tables of all modules of the dependency project are accessible from any module of the root project.
If the All Modules option is cleared or the single module mode is selected, the root project module has access to the particular module of the dependency project only if an appropriate dependency is added in the Environment table of the root module.
Note: Module names of the root and dependency projects must be unique.
Note: Dependency projects must be available in Rules Editor to make dependency work.
For more information on project and module dependencies, see the OpenL Tablets Reference Guide > Project and Module Dependencies.
Viewing Tables
OpenL Tablets module tables are listed in the module tree. Table types are represented by different icons in Rules Editor. The following table describes table type icons:
| Icon | Table type |
|---|---|
 |
Decision table. |
 |
Decision table with unit tests. |
 |
Column match table. |
 |
Column match table with unit tests. |
 |
Tbasic table. |
 |
Tbasic table with unit tests. |
 |
Data table. |
 |
Datatype table. |
 |
Method table. |
 |
Unit test table. |
 |
Run method table. |
 |
Environment table. |
 |
Property table. |
 |
Table not corresponding to any preceding types. Such tables are considered comments. |
 |
Spreadsheet table, Constants table. |
For more information on table types, see OpenL Tablets Reference Guide. If a table contains an error, a small red cross is displayed in the corner of the icon.
To view contents of a particular table, in the module tree, select the table. The table is displayed in the middle pane. If the project is not in the In Editing status, the table can be viewed but cannot be modified.
Modifying Tables
OpenL Studio provides embedded tools for modifying table data directly in a web browser. To modify a table, proceed as follows:
-
In the module tree, select the required table.
The selected table is displayed in the middle pane in read mode.

Table opened in OpenL Studio
-
To switch between simple and extended view, in User settings, select or clear the Show Header and Show Formula options as required.
-
To switch the table to the edit mode, perform one of the following steps:
- Above the table, click Edit.
- Right-click anywhere in the table and click Edit.
- Double click the cell to edit.
Alternatively, the file can be edited in Excel. Clicking the Open button initiates file download. After editing the file locally, it can be uploaded back to the project in Rules Editor as described in Exporting, Updating, and Editing a Module or via the repository.
The following table is switched to the edit mode:

Table in the edit mode
The edit mode provides the following functional buttons:
Button Description 
Saves changes in table. 
Reverses last changes. 
Reapplies reversed changes. 
Inserts a row. 
Deletes a row. 
Inserts a column. 
Deletes a column. 
Aligns text in currently selected cell with left edge. 
Centers text in currently selected cell. 
Aligns text in currently selected cell with right edge. 
Make the text font bold. 
Applies italics to the cell text. 
Underlines the cell text. 
Sets the fill color. 
Sets the font color. 
Decreases indent. 
Increases indent. -
To modify a cell value, double click it or press Enter while the cell is selected.
-
To enter a formula in the cell, double click it, perform a right click, and select Formula Editor.
Now a user can enter formulas in the selected cell.
-
To save changes, click Save
.If a table contains an error, the appropriate message is displayed.
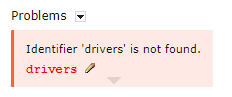
Example of an error in a table
The arrow under the message allows viewing all stack trace for this error.

Error stack trace example
Referring to Tables
OpenL Studio supports references from one table to another table. A referred table can be located in the same module where the first table resides, or in the different module of the same project.
Links to the following tables are allowed:
- data table
- datatype table
- rule table types
Links to the rule tables are underlined and marked blue. When a mouse cursor is put over the link, a tooltip with method name and input parameters with types is displayed.

A tooltip for the linked method to a decision table
Links to the data and datatype tables are underlined with a dotted line and has an appropriate tooltip with description.

Links to the datatype tables from the decision and datatype table
All fields of the datatype tables are also linked and contain tooltips.

A link to the field of the Corporate datatype table
Managing Range Data Types
OpenL Studio provides a special tool, Range Editor, for adding and editing range data types, such as IntRange and DoubleRange, in rule tables and test tables.
This section briefly introduces Range Editor and provides examples of its functionality.
The main Range Editor goal is to move to a single range format in OpenL rules, namely, the ‘..’ format. For more information on ranges on OpenL Tablets, see OpenL Tablets Reference Guide > Representing Range Types.
Consider the following principles while working with Range Editor:
- The default range format is set to ‘..’ in OpenL Studio.
- When a new range is created, the ‘..’ format is used.
- When a range format other than ‘..’ is edited, if only range values are edited, the format remains the same.
If any editor control is used, for example, a check box or the Done button, the range format is set to ‘..’.
The following example displays the decision table with data represented as a range:
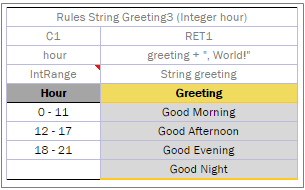
Decision table with a range data type
In this table, the Hour column contains hours with the IntRange Data type. All range sells are filled except for the last one. This example is used further in this section to demonstrate how Range Editor works.
The following controls are available in Range Editor:
- From — indicates the left border of the range
- To — indicates the right border of the range
- Include — indicates whether the border is included in the range
- ‘>’ — indicates values greater than the specified border
- ‘\<’ — indicates values smaller than the specified border
- ‘=’ — indicates a constant
- ‘-’ — indicates a range
To create a range, proceed as follows:
-
Double click the cell to be edited.
For example, edit the cell containing 18-21. The table is extended by the pop-up window with a set of controls for editing the range.

Creating a range in Range Editor
-
In the From field, enter the left border of the range, which is 22 for the example described in this section.
-
In the To field, enter the right border of the range.
In this example, the To value must be 24, but an erroneous value 23 is entered for further editing of this border.
-
Clear the Include check box.
-
Click Done to complete.
The last cell in the Hour column is filled as follows:
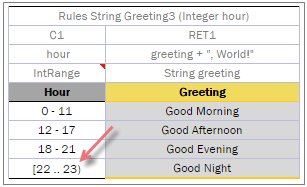
New range created in Range Editor
-
To modify the range in Range Editor, double click the cell with the [22-23) range.
The table resembles the following:
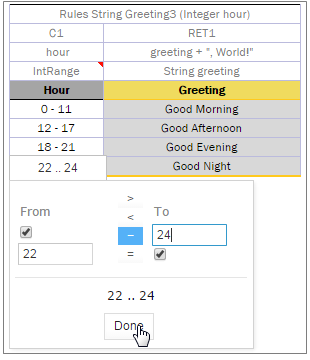
Editing a range in Range Editor
-
Select the To field, set the right border to 24, and select Include.
-
Click Done to save the work.
The range resembles the following:
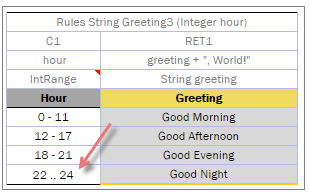
The range edited in Range Editor
A range can also be modified using ‘>’, ‘\<’ and ‘=’ controls as described in the beginning of this section.
Creating Tables by Copying
A table can be created based on another table using one of the following methods:
- Copying the Existing Table
- Creating a New Version of the Table
- Creating a Table as a New Business Dimension Version
Copying the Existing Table
To create a table as a copy of the existing table, proceed as follows:
- In the module list, select a table to copy.
-
Click the Copy Table icon
 .
The system displays the Copy Table form with New Table selected by default.
.
The system displays the Copy Table form with New Table selected by default.
Copying the existing table
-
If necessary, modify the Name field value.
- To change the workbook and worksheet where the copy must be saved, click the link in the Save To area and in the corresponding drop-down list, select the required module and category.
- To save the copied table in a new category, use the New option.
- Click Copy to save your changes.
The table appears in the module list.
Creating a New Version of the Table
To create a new version of the existing table, proceed as described in Using Table Versioning. In that case, dimensional properties of a new version are exactly the same as for the original one. OpenL Tablets allows creating an overloaded table from an existing one.
Creating a Table as a New Business Dimension Version
To create a table as a new business dimension version, proceed as follows:
- In the module list, select a table and click the Copy Table icon.
- In the Copy as list, select New Business Dimension Version.
- Specify business dimension properties as required.
- If necessary, modify the workbook and worksheet values in the Save as area.
- Click Copy to save the table.
Performing a Search
OpenL Studio provides search functionality to look through all module tables data for a particular project. The following topics describe search modes in OpenL Studio:
Performing a Simple Search
In the simple search mode, the system searches for a specific word or phrase across all tables within the current module, the current project, or the current project and its dependency projects depending on the selected option. To perform a simple search, in the Search field, enter a word or phrase and press Enter.

Starting a simple search
OpenL Studio displays all tables containing the entered text. The View Table link opens the table in Rules Editor.
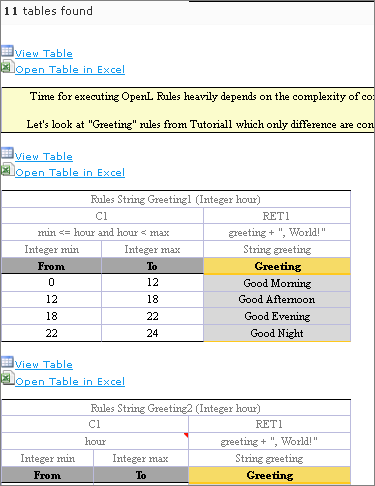
Search results
To search for any cell contents, right click the cell and in the context menu, select Search. The table is opened in the read mode.
Performing an Advanced Search
Advanced search allows specifying criteria to narrow the search through tables. To limit the search, specify the table type, text from the table header, and table properties as described further in this section.
-
To launch an advanced search, click the arrow to the right of the search window.

Initiating the advanced search
-
In the Search field on the top, select whether search must be performed within the current module, or within the project, or within the current project and its dependent projects.
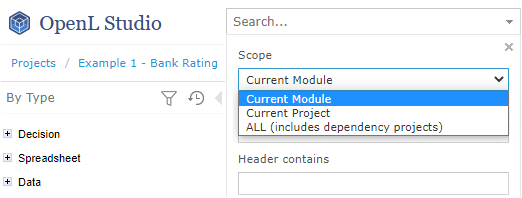
Specifying search area
-
In the filter form, click the Table Types field and select the required table type or select Select All to search in all table types.
- In the Header contains field, enter the word or phrase to search for.
-
Expand the Table Properties list, select the required table property, and then click the Add button on the right.
The text field for entering the property name appears.
-
Enter the property name.
- In the similar way, add as many table properties as required.
-
To remove a property, click the cross icon to the right of the property.
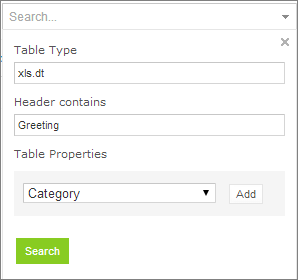
A filled form for advanced search
-
Click Search to run the search.
As a result, the system displays the tables matching the search criteria along with links to the relevant Excel files and the Edit Table links leading to the table editing page.
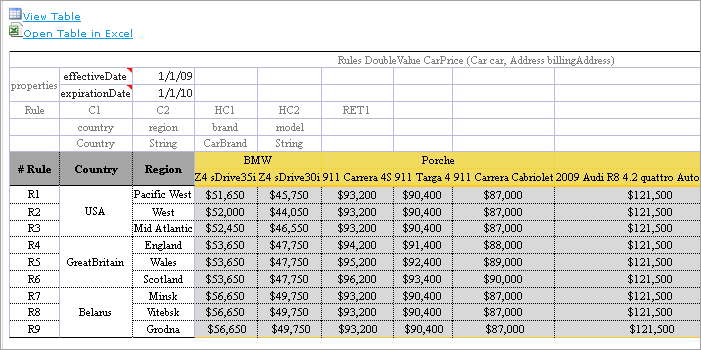
Advanced search result
Creating Tables
OpenL Studio allows creating tables of the following types: - datatype table - vocabulary table - data table - test table - properties table - simple rules table
Tables are created via the wizard initiated by clicking the Create Table button . The wizard creates a table for the current module. The table is available for all included modules and modules linked by dependencies. For more information on dependencies, see OpenL Tablets Reference Guide > Project and Module Dependencies.
The following topics are included in this section:
- Creating a Datatype Table
- Creating a Data Table
- Creating a Test Table and Defining the ID Column for Test Cases
- Creating a Simple Rules Table
Creating a Datatype Table
To create a datatype table, proceed as follows:
- In OpenL Studio, click Create Table.
-
In the list of table types, select Datatype Table and click Next.
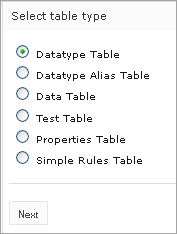
Creating a datatype table
-
Enter the data type name and if necessary, select the existing data type as a parent.
If a parent data type value is specified, the newly created data type will have access to all fields defined in the parent data type as described in OpenL Tablets Reference Guide > Inheritance in Data Types.This option is unavailable if no custom data types are created in the module.
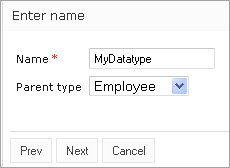
Specifying the data type name and parent type
-
To define data type fields, click Add parameter, specify values as required, and then click Next.
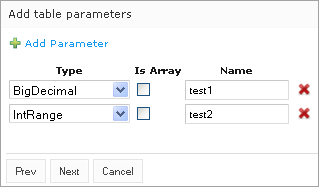
Defining data type fields
-
To indicate the new datatype table location, in the Select destination window, select an existing sheet, or in the New field, enter the new sheet name.
The Module value cannot be changed. All created tables go to the current module.
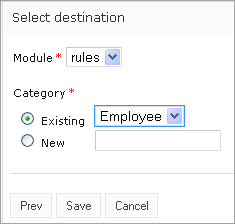
Specifying table location
-
Click Save to complete table creation. The datatype table is created and becomes available in OpenL Studio.
Creating a Data Table
Creating a data table resembles creating a datatype table described in Creating a Datatype Table. Proceed as follows:
- In OpenL Studio, click Create Table.
-
Select the Data Table item and click Next.
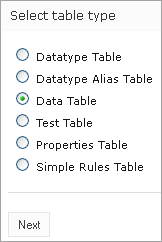
Initiating data table creation
-
Select the table type, enter the table name, and click Next.
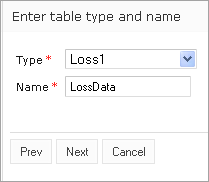
Defining table type and name
-
Define the table columns configuration. For the Loss1 type selected in the previous window, column configuration resembles the following:
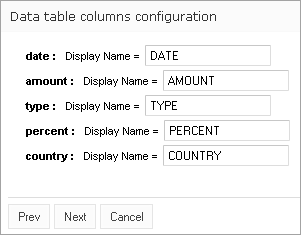
Defining column configuration
-
To indicate new data table location, in the Select destination window, select an existing sheet, or in the New field, enter the new sheet name. The Module value cannot be changed. All created tables go to the current module.
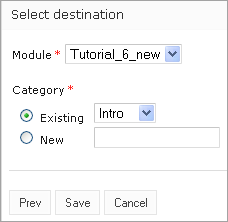
Specifying table location
-
Click Save to complete table creation. The new data table is created and can be modified as needed.
OpenL Tablets supports array value definition in data tables as described in OpenL Tablets Reference Guide > Representing Arrays.
Creating a Test Table and Defining the ID Column for Test Cases
This section describes how to create a test table and define the ID column for test cases and includes the following topics:
Creating a Test Table
To create a test table, proceed as follows:
- In OpenL Studio, click Create Table.
-
Select Test Table and click Next.
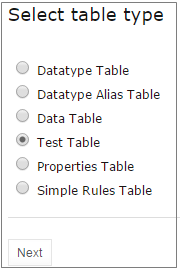
Creating a test table
-
In the Select table window, select the rule table and click Next.
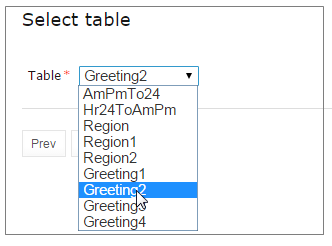
Selecting a rule table to create a test table for
Note: If there is no rule table available in this module, a test table cannot be created, and an error message is displayed.
-
In the Input name window, if necessary, modify the generated test table name and click Next.
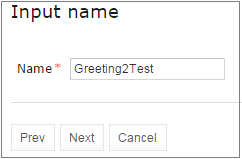
Reviewing the test table name
-
To define the test table location, in the Select destination window, select an existing sheet, or in the New field, enter the new sheet name. The Module value cannot be changed. All created tables go to the current module.
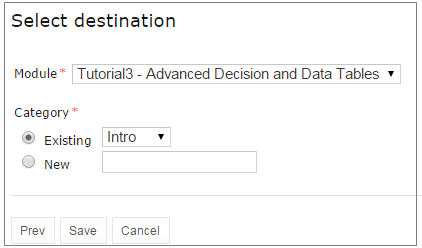
Specifying table location
-
To complete table creation, click Save. The test table is created and becomes available in OpenL Studio.
OpenL Tablets supports array value definition in test tables as described in OpenL Tablets Reference Guide > Representing Arrays.
Defining the ID Column for Test Cases
The ID column is not mandatory in a test table. A user can define the ID column and set the appropriate unique value for each test case.
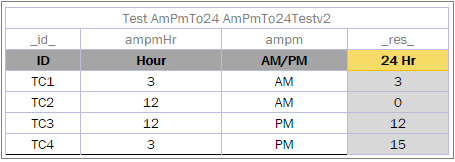
A test table with the ID column defined
If the ID column is not defined for the test table, default numeric values are displayed beside each test case. When running a test table, to run the test cases, expand the additional settings for the Run button and select the required cases.
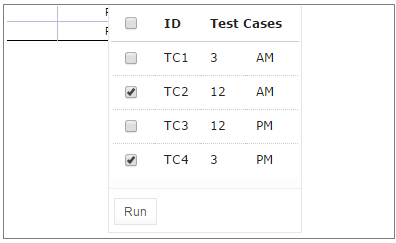
Running the specified test cases
To use ranges of IDs for executing the required cases, enable the Use the Range setting and in the Range of IDs field, specify the ID values separated by dash or comma.
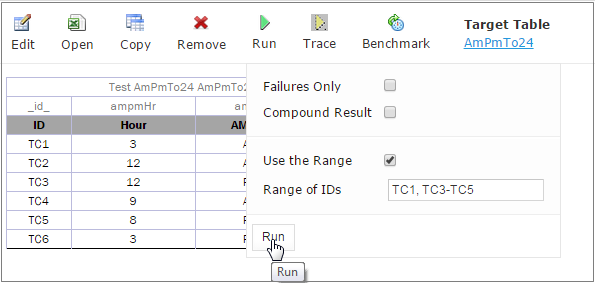
Specifying test cases ID range
Creating a Simple Rules Table
This section describes how to create a new simple rules table in OpenL Studio.
- In OpenL Studio, click Create Table.
-
Select Simple Rules Table and click Next.
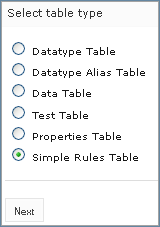
Initiating table creation
-
Enter table name and select the required data type to return.
-
Click Add Input Parameters and specify values as required.
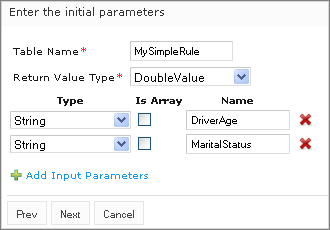
Specifying table parameters
-
When finished, click Next.
In the Construct a table window that appears, a blank simple rules table with the header constructed based on the previously entered values appears.
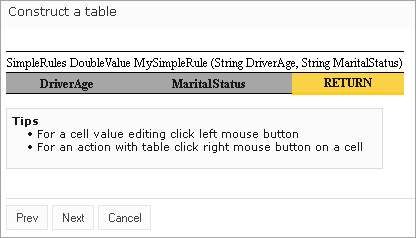
Adding data to a table
Now the table can be filled with data.
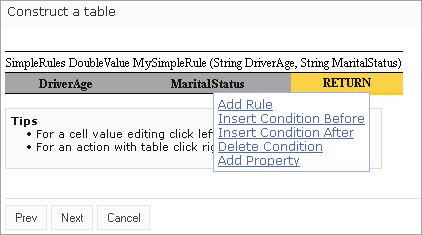
Selecting an action from the context menu
-
Right click any cell and select one of the following actions:
Action Description Add Property Appears after selecting a property in the drop-down list and indicating its value. Add Rule Allows entering data. An example is as follows: 
Entering table data
This action can be repeated as many times as required.Insert Condition Before
/ Insert Condition AfterAdds a condition column to the specified position. An example of the added DriverOccupation condition column is as follows: 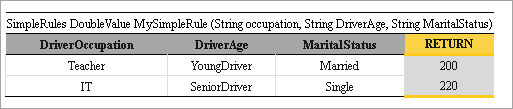
Adding a condition columnDelete Condition / Delete Rule Removes a condition or rule. -
When finished, click Next.
-
To indicate new table location, in the Select destination window, select an existing sheet, or in the New field, enter the new sheet name.
The Module value cannot be changed. All created tables go to the current module.
-
Click Save to save the changes. The new simple rules table is created and appears in the project.
Comparing Excel Files
OpenL Studio supports comparing contents of Excel files displaying tables and Excel elements that are modified. To compare two Excel files, proceed as follows:
-
In OpenL Studio Rules Editor, in the top line menu, select More > Compare Excel Files.
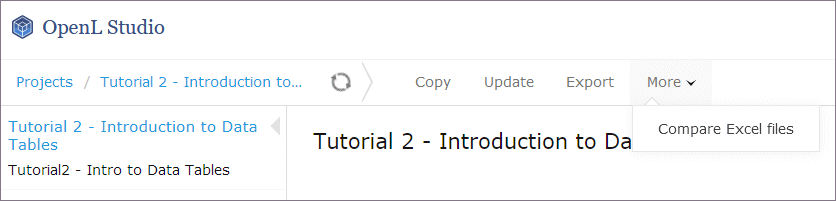
Initiating Excel comparison functionality
-
In the window that appears, click Add and select two Excel files to compare.
-
Click Upload and wait until file status is changed to Done.
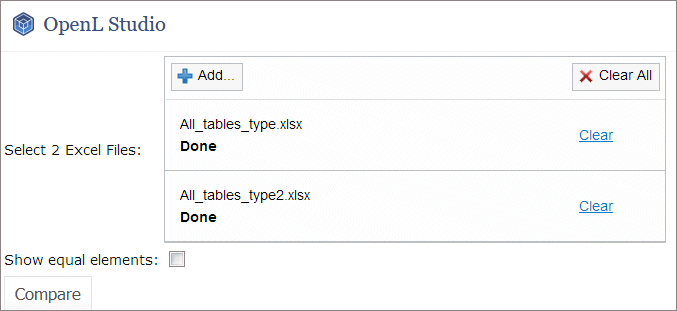
Excel files ready for comparison
-
To display tables and other Excel file elements that differ in the selected Excel files, click Compare.
The list of tables and Excel elements is displayed, grouped by Excel sheets. Clicking on the table or element in the list displays the changes in the section below.
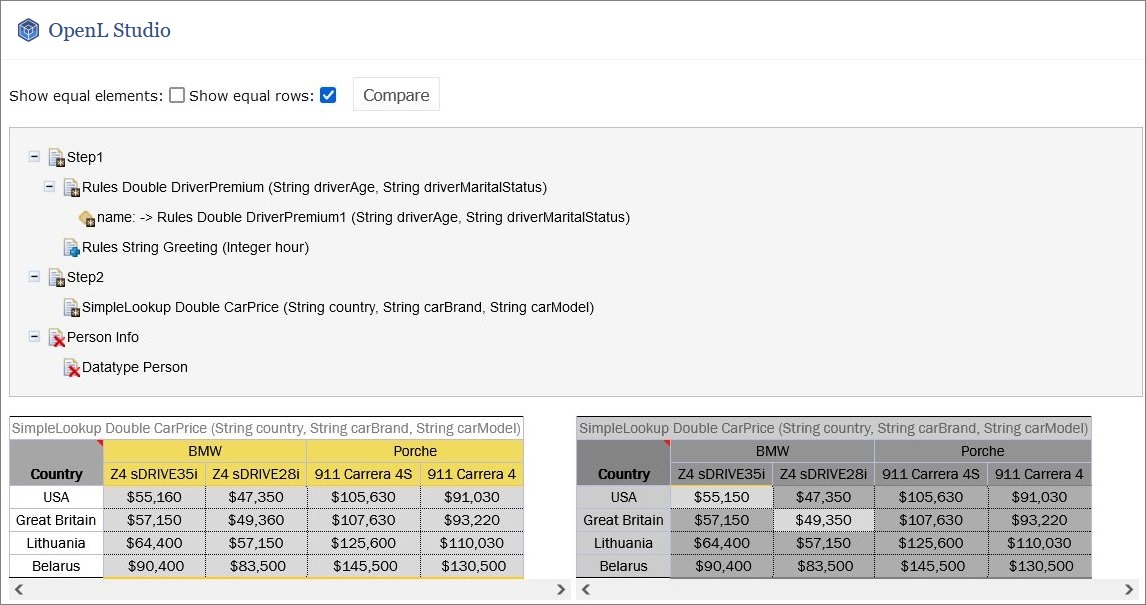
Excel file comparison results
Elements and tables that changed the location or contents are marked with the asterisk icon
 . Added elements are marked with the plus sign icon
  . Removed elements or tables are marked with the deletion icon
  .
. -
To view or hide equal rows in the table, select or clear the Show equal rows check box.
- To display all equal tables and Excel file elements in the selected Excel files, select Show equal elements check box and click Compare.
All elements that are equal in the selected Excel files are displayed, grouped by Excel sheets. Elements that are relocated, added, or removed are marked with an appropriate icon.
If contents of two Excel files with different names is completely identical, the File elements are identical message is displayed.
Viewing and Editing Project-Related OpenAPI Details
When a project is generated from the imported OpenAPI file, it becomes available in Rules Editor.
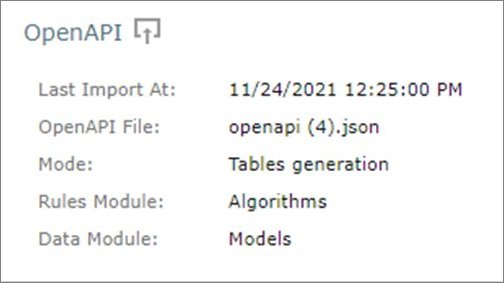
The generated project contains information about the last file import date, name of the OpenAPI file, mode, and modules names in rules.xml. This information is available in OpenL Studio, the OpenAPI section.
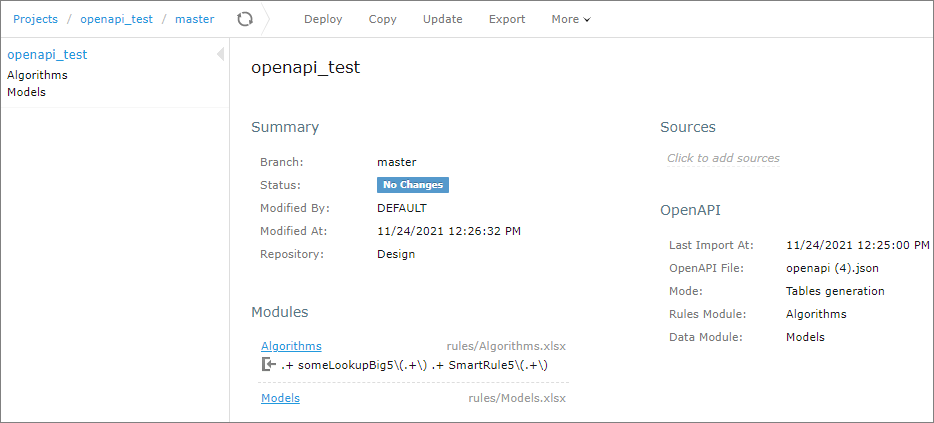
OpenAPI project in Rules Editor, in the Tables Generation mode
It contains the following information:
| Field | Description |
|---|---|
| Last Import At | Date of the last upload of the OpenAPI file. The OpenAPI file can be replaced in the Repository tab or generated or regenerated from rules tables and datatype tables. |
| OpenAPI File | Location and name of the OpenAPI file, such as openAPI.json and files/example.json. |
| Mode | Last operation performed with this OpenAPI project. - Tables generation mode means that the last performed operation is generation or regeneration of the project based on the OpenAPI file. For the Tables generation option, project reconciliation is done, too. - Reconciliation mode is set to validate the project against the newly uploaded OpenAPI file with a new name. |
| Rules Module | Name of the module that contains rules. |
| Data Module | Name of the module that contains data types. |
The following topics are described in this section:
- Generating an OpenAPI File from Rules and Datatype Tables for Reconciliation
- Adding OpenAPI for Reconciliation to an Existing Project
- Regenerating a Project from Another OpenAPI File
- Updating the OpenAPI File
Generating an OpenAPI File from Rules and Datatype Tables for Reconciliation
If a project is not generated from an OpenAPI file and it is necessary to add the OpenAPI file, this file can be generated in Rules Editor from the existing rules and datatypes tables. Proceed as follows:
- In Rules Editor, open the project overview page.
-
Click the OpenAPI section.
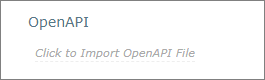
Initiating OpenAPI file generation
-
If an OpenAPI file does not exist, ensure that the Generate from Rules and Datatype tables and Reconciliation options are selected.
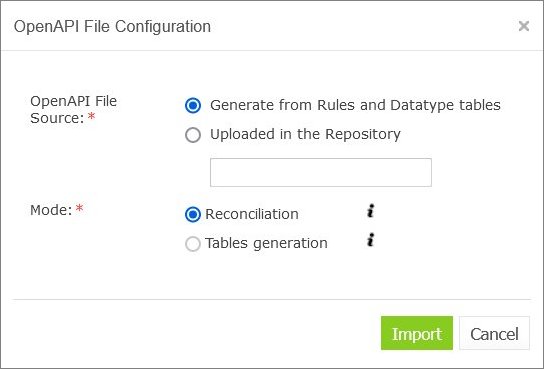
Reviewing settings for the OpenAPI file generation
If the OpenAPI file already exists, the Uploaded in the Repository option is selected by default and the file name is displayed in the field. If the file must be regenerated according to the current project tables, the Generate from Rules and Datatype tables and Reconciliation options must be selected.
-
Click Import.
The file creation confirmation message is displayed. The OpenAPI file is added to the project and appears in the OpenAPI section.
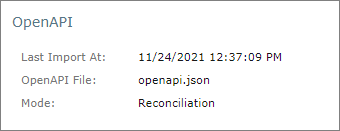
The OpenAPI file added to the OpenAPI section
Note that successful generation of the OpenAPI file requires that the project has no compilation errors and tables contain data for the OpenAPI methods.
Adding OpenAPI for Reconciliation to an Existing Project
If a project is not generated from the OpenAPI file, but it is required to add the OpenAPI file and generate modules from it, proceed as follows:
- Ensure that the OpenAPI file is uploaded to the project via the Repository tab.
-
In Rules Editor, click Click to Import OpenAPI File.
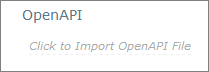
Initiating OpenAPI file import
-
Enter the name of the OpenAPI imported file, such as example.json.
-
Select the Tables generation mode.
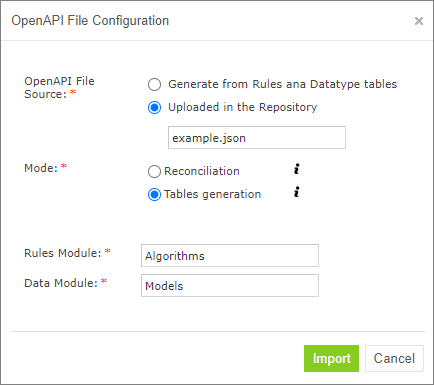
Selecting the generation mode
-
If necessary, modify the default values for the rules and data modules and click Import.
-
If no module with the entered name is found, set up the path to the generated file and click Import.
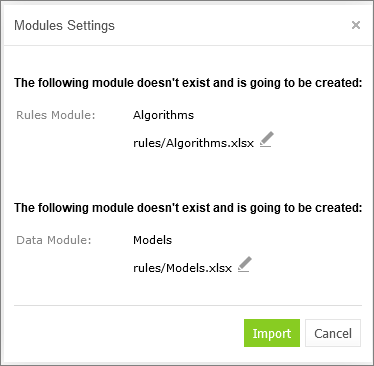
Module settings window, both modules are new
If a module already exists, it will be overwritten, and the corresponding warning message is displayed. In this case, there is no option to define a file name.
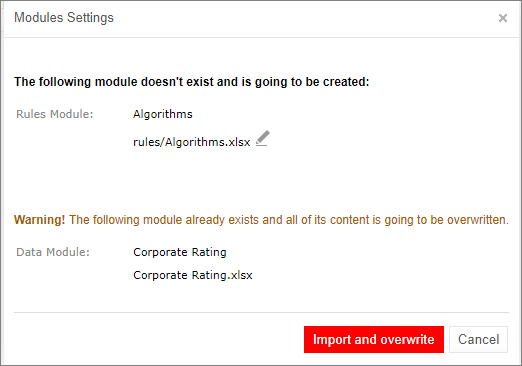
Module settings window, one of modules already exists
-
Click on the Import and overwrite.
The rules and model modules are created or updated. The OpenAPI data is updated.
Regenerating a Project from Another OpenAPI File
If a project is initially created from an OpenAPI file, it can be regenerated from another OpenAPI file. For project regeneration, follow the steps described in Adding OpenAPI for Reconciliation to an Existing Project. The name of the OpenAPI file is preset for regeneration.
Updating the OpenAPI File
When the project is generated from the OpenAPI file and reconciliation is done, the system automatically validates the generated OpenL Tablets rules and data types. If the file is updated in the Repository tab and the name is not changed, reconciliation is completed immediately.
To reconcile a project using an OpenAPI file with a different name, proceed as follows:
- Ensure that the OpenAPI file is uploaded to the project via the Repository tab.
-
In Rules Editor, click OpenAPI Import icon
 .
.
Initiating OpenAPI import
-
In the Import OpenAPI File window, enter the OpenAPI file location, select Reconciliation, and click Import.
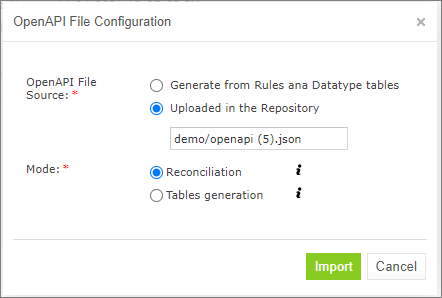
Selecting an OpenAPI file for reconciliation
The project is validated using the newly imported file.
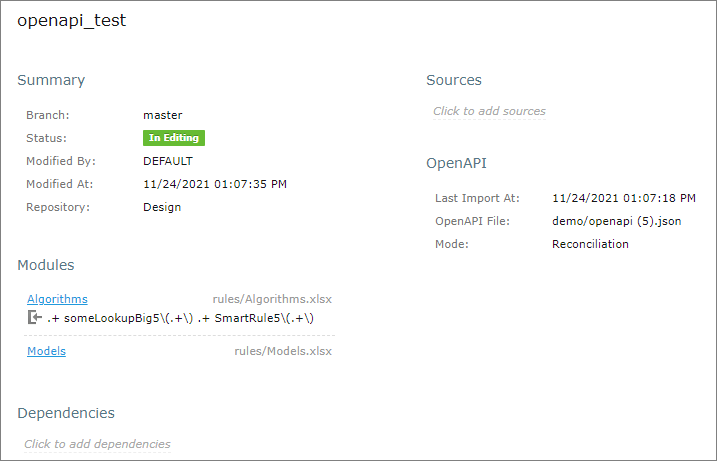
Viewing results of the last reconciliation
Reconciling an OpenAPI Project
If an OpenAPI file is set for a project, during project compilation, the system automatically checks whether the project matches the defined OpenAPI file. If the generated OpenAPI for the deployed project does not match the existing OpenAPI file, errors and warnings are displayed. This process is called reconciliation.
Reconciliation does not expect exactly the same OpenAPI generated by the project and checks the following:
- All paths defined in the existing OpenAPI file are generated by the project.
- All paths generated by the project are defined in the existing OpenAPI file.
- All operations for each path in the existing OpenAPI file are the same as operations in the generated OpenAPI file for the correspond path.
- Operation parameters in the existing OpenAPI file and parameters in OpenAPI generated based on the project for a corresponding operation are the same and all parameter types are compatible.
- Schemas that are not a part of API are ignored in the reconciliation process.
- All schemas in the existing OpenAPI file that are a part of API must be generated by the project.
- All schemas generated by the project must be defined in the existing OpenAPI file.
- All fields defined in schemas must exist in schemas generated by the project.
- All fields generated by the project for corresponding schemas must be defined in the existing OpenAPI file.
- Field types in schemas must be compatible.
| OpenAPI type defined in the file | OpenAPI type generated by the project |
|---|---|
| Integer (int32) | Integer (int32) |
| Integer (int64) | Integer (int32), Integer (int64) |
| Integer(no format) | Integer (int32), Integer (int64), Integer(no format) |
| String | String |
| String (date/date-time) | String (date/date-time) |
| Number(float) | Number(float) |
| Number (double) | Number(float), Number (double) |
| Number(no format) | Number(float), Number (double), Number(no format) |
| Boolean | Boolean |
Editing and Testing Functionality
This chapter describes advanced OpenL Studio functions, such as table editing, performing unit tests, rule tracing, and benchmarking. The following sections are included in this chapter:
Editing Tables
This section describes table editing and includes the following topics:
- Editing a Comma Separated Array of Values
- Editing Default Table Properties
- Editing Inherited Table Properties
Editing a Comma Separated Array of Values
OpenL Studio allows editing comma separated arrays of values. A multi selection window displaying all values appears enabling the user to select the required values.
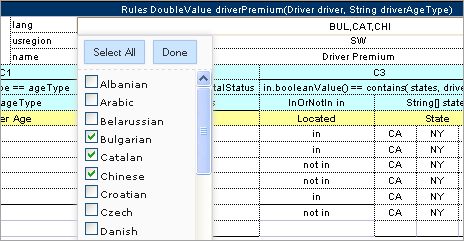
Editing comma separated arrays
Editing Default Table Properties
This section describes table properties available in OpenL Studio. For more information on table properties, see OpenL Tablets Reference Guide > Table Properties.
If default property values are defined for a table, they appear only in the right hand Properties section, but not in the table. In the following example, there are Active = true and Fail On Miss = false default properties.
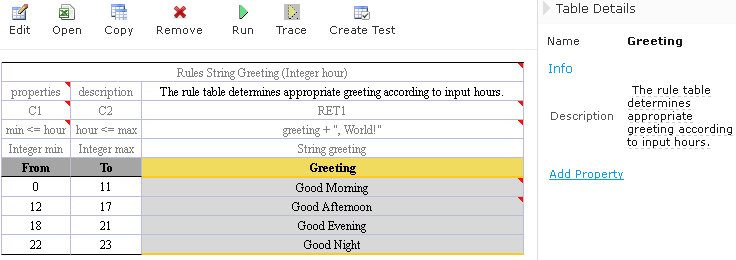
Default table properties example
Default properties can be overridden at the table level; in other words, they can be changed as follows:
-
In the Properties section, click the default property to be changed.
lnstead of the property value, a checkbox appears:
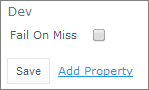
Updating a default property
-
Select or deselect the checkbox as needed and click the Save button.
The property appears in the table with its new value.
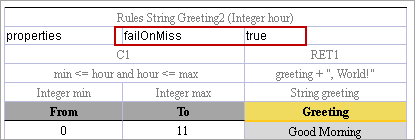
Default property was updated by a user
Editing Inherited Table Properties
Module or category level properties are those inherited from a Properties table as described in OpenL Tablets Reference Guide > Properties Table. In the Properties section of the given table, inherited properties appear in a different color and are accompanied with a link to the Properties table where they are defined. The values of the inherited properties are not stored in the table, they are displayed in the Properties section, since they are inherited and applied to this table. Inherited properties can be overridden at a Table level, i.e. they can be changed.
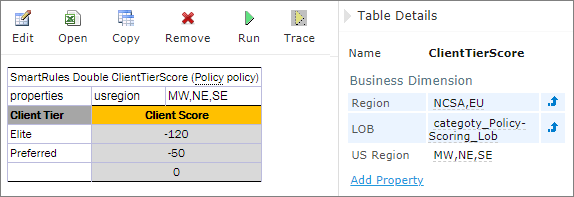
An example of inherited category-level properties
To change an inherited property, perform the following steps:
- In the Properties section, click the inherited property to be changed.
-
Enter or select the required values from the drop-down list and click Save.
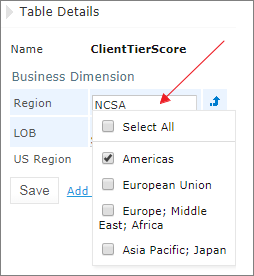
Updating an inherited property
The system displays the property in the table.
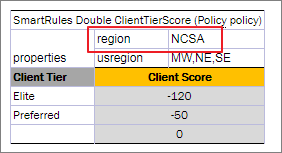
Inherited category-level property updated by a user
The following topics are included in this section:
Editing System Properties
By default, OpenL Studio applies system properties to each created or edited table. For information on how to switch off this option, please refer to Managing Common Settings. The values of the System properties are provided in the table and in the Properties section.
The modifiedBy property value is set using the name of the currently logged in user. The modifiedOn property is set according to the current date. These properties are applied upon each save.
The createdBy property value is set using the name of the currently logged in user. The createdOn property is set according to the current date. These properties are applied on the first save only while creating or copying a table in OpenL Studio.
The createdBy and modifiedBy properties are only applied in the multi-mode as described in Security Overview.
System properties cannot be edited in UI. The OpenL Studio users can delete those properties if required.
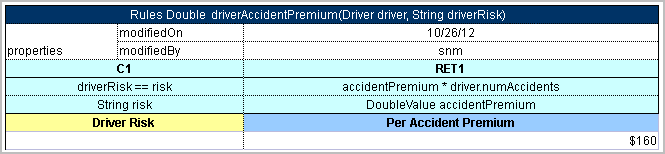
An example of system properties
Editing Properties for a Particular Table Type
Some properties are only applicable to particular types of tables. When opening a table in OpenL Studio, the properties section displays properties depending on the type of the table.
For example, such property as Validate DT is available for Decision Tables. That means it can be selected in the drop-down list after clicking the Add link at the bottom of the Properties section. The following figure shows properties applied to a Decision Table:
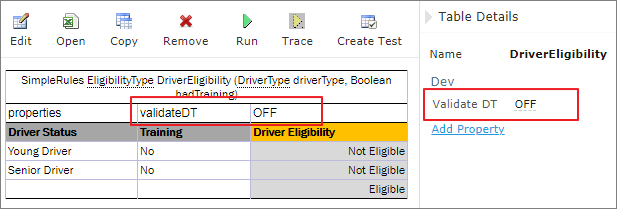
Properties for the Decision table type
When opening a Data Table in the same project, these properties are not available for selecting from the drop-down list in the Properties section.
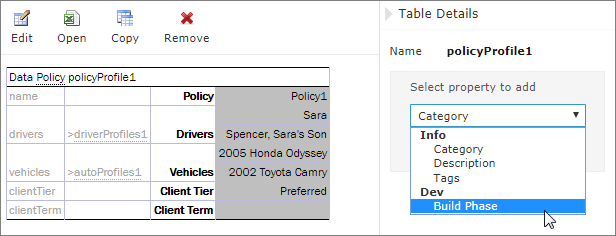
The Decision table properties that are not available for a Data table
When performing the “Copy” action, properties unsuitable for the current table type do not appear in the wizard.
To add a new property for the selected table, perform the following steps:
-
In the Properties pane, click the Add Property link.
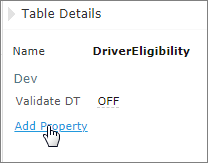
Add new property for the current table
-
Enter the required property or select it from the drop-down list and click the Add button.
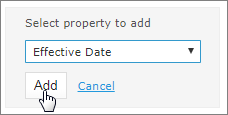
Selected table property to be added
-
Specify the property value and then click the Save button to complete.
All steps are collected in the following figure:
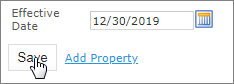
Saving a new property for the current table
Using Table Versioning
The table versioning mechanism is based on copying the existing table and is initiated in OpenL Studio by clicking the Copy button. Then select New Version in the Copy as list, enter the data as needed and click Copy to save.
A new table version has the same identity, that is, signature and dimensional properties of the previous version. When a new table version is created, the previous version becomes inactive since only one table version can be active at a time. By default, all tables are active. The following is an example of an inactive table version.
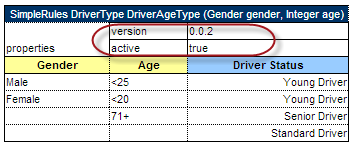
An inactive table version
Versions of the same table are grouped in the module tree under the table name. Clicking the table name displays the active version. If all tables are set to inactive, the latest created version is displayed.
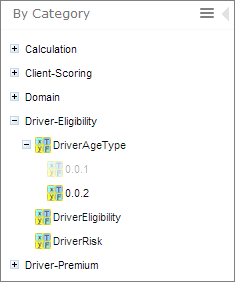
Displaying table versions in the module tree
The table version is defined in a three digit format, such as 4.0.1. Table versions must be set in an increasing order.
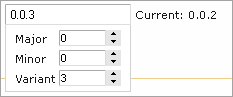
Entering a new version number
Performing Unit Tests
Unit tests are used in OpenL Tablets to validate data accuracy. OpenL Tablets Test tables with predefined input data call appropriate rule tables and compare actual test results with predefined expected results.
For example, in the following diagram, the table on the left is a decision table but the table on the right is a unit test table that tests data of the decision table:
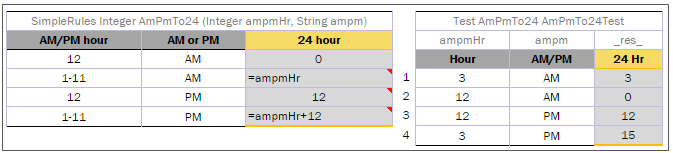
Decision table and its test table
OpenL Studio supports visual controls for creating and running project tests. Test tables can be modified like all other tables in OpenL Studio. For information on modifying a table, see Modifying Tables. Test results are displayed in a simple format directly in the user interface.
The following topics are included in this section:
Adding Navigation to a Table
OpenL Studio adds a view navigation link to the appropriate test table and vice versa. See the following example:
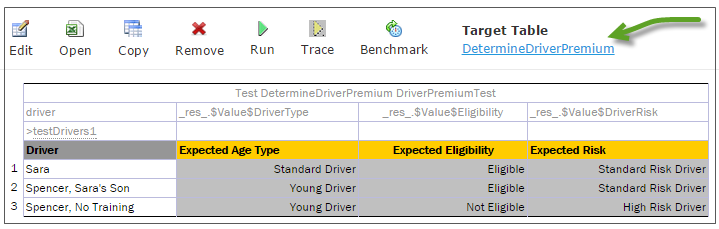
Navigation link to target table
Running Unit Tests
This section provides the methods used to run unit tests. The following topics are included in this section:
- Executing All Module Tests at Once
- Executing Tests for a Single Table
- Displaying Failures Only
- Displaying Compound Result
Executing All Module Tests at Once
The system automatically executes all test runs, test cases, in every unit test in a module, including tests in module dependencies, and displays a summary of results.
Test results display resembles the following sample:
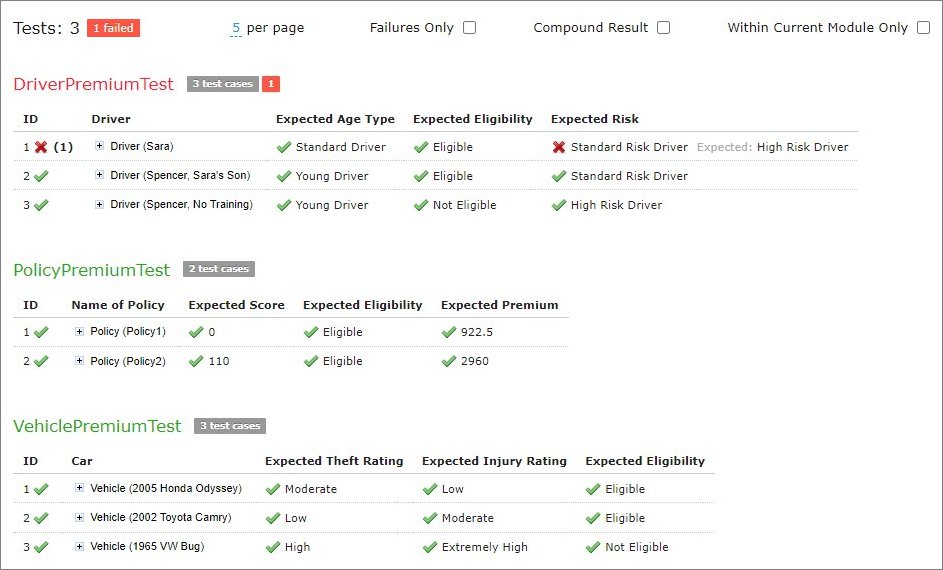
Results of running all project tests
-
To run all module tests, click the Run Tests
 icon in the top line menu of Rules Editor.
Failed test cases are represented by
 mark. Passed tests are represented by
  mark.
mark.By default, all tests are run in multi-module mode, and the system executes all tests of the project, including project dependencies.
-
To run the tests in the current module and its dependent modules only, select the Within Current Module Only check box in the button menu or test results page.
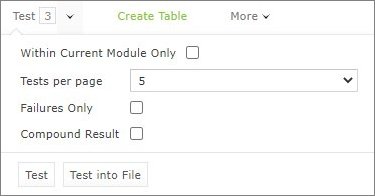
Defining test settings
In the example above, test results are displayed with five test tables, unit tests, per page. This setting is configured for each user individually in User Profile as Tests per page setting.
-
To change the setting for a particular test run without updating user settings, click the arrow to the right of the Run Tests
 and choose a required number of Tests per page. There is an alternative way: the same setting options are displayed on the top of the window after executing all tests. The following picture provides an illustration: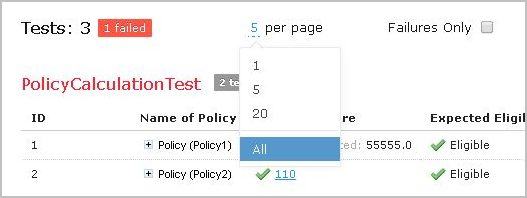
Number of tests per page setting
-
To export test results into an Excel file, in the Run or Test drop-down menu, select Run into File or Test into File. The generated file contains both results and input parameters.
Executing Tests for a Single Table
This section describes test execution. Proceed as follows:
-
To execute all test runs for a particular rule table, select the rule table in the module tree and, in the upper part of the middle pane, click Test
 .
.Test results resemble the following:
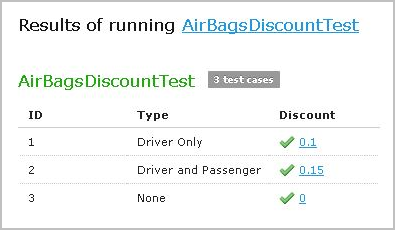
Results of executing all test runs for one rule table
If the table contains Value types, such as IntValue, the results are clickable and enable a user to view the calculation history.
-
To test a rule table even if no tests have been created for the given table yet, proceed as follows:
-
In the module tree, select the required rule table and click the green Run arrow
 above the table.
The form for entering required values to test rule table appears.
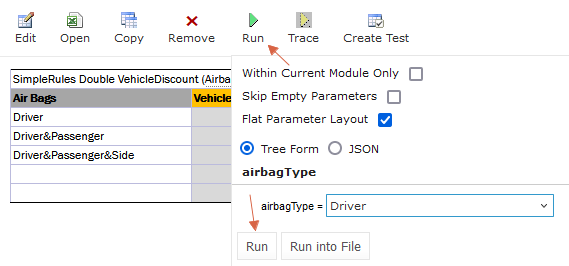
Testing a rule table without tests 1. To run a test for the currently opened module and its dependent modules only, ensure that the Within Current Module Only option is selected. 2. In the pop-up window, click Run.
The results of the testing are displayed.
Result of running virtual test 3. To export the results to an Excel file, click the "Run Into File" button. This action will generate an Excel file named "test-results.xlsx", which includes two sheets: 'Result' and 'Parameters'.
By default, the 'Parameters' sheet lists each attribute's name and value on separate rows. For a more compact table format, deselect the Flat Parameter Layout option.
To exclude any empty input values, select the Skip Empty Parameters checkbox. The following examples illustrate how Flat Parameter Layout and Skip Empty Parameters affect the "test-results.xlsx" file:
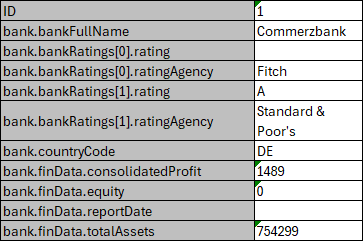
"Flat Parameter Layout” = True, “Skip Empty Parameters” = False (default)
"Flat Parameter Layout” = False, “Skip Empty Parameters” = False
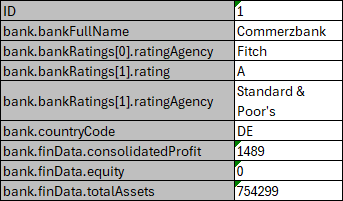
"Flat Parameter Layout” = True, “Skip Empty Parameters” = True**** -
For test tables, to select test cases to be executed, proceed as follows:
- Navigate to the Run button above the Test table and click the small black arrow
 .
. -
In the pop-up window that appears, select or clear the check boxes for the appropriate IDs, and to run several particular test cases, define them in the Use the Range field.
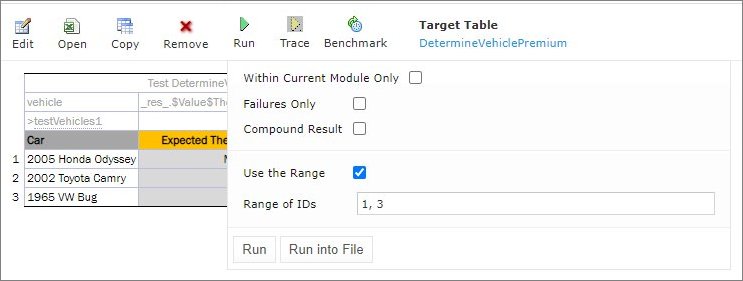
Select test cases via Range field to be executed
-
If necessary, specify whether the test must be run in the current module only.
-
In the pop-up window, click Run.
Only the selected test cases are executed.
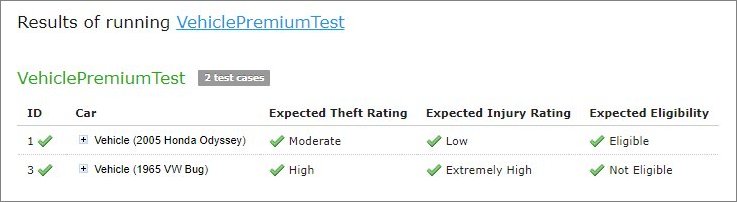
Result of selective testing
-
To export test results into an Excel file, click Test and select Test into File.
Displaying Failures Only
There are cases when a user wants to examine results of failed test cases only. For example, the project contains a test with more than 50 test cases and a user just needs to know whether project rules are operating correctly, that is, whether all test cases are passed. If a user runs the test, a huge table of results is returned, which is difficult to review and find failures to correct the rule or case. For such situations, OpenL Studio provides an option to display failed test cases only.
This option is configured for each user individually in User Profile as the Failures Only setting. There are multiple ways to change the setting for a particular test run without updating user settings:
- Click the arrow to the right of the Run Tests and in a pop-up window that appears, clear or select Failures only.
- Select the Test table, navigate to the Run button above the table, click the Run arrow
 , and in the pop-up window that appears, select or clear Failures only.
 - Select or clear the Failures only setting that appears on the top of the window upon executing all tests at once as displayed in Figure 107: Number of tests per page setting.
Additionally, the number of failed test cases displayed for one unit test can be limited. For example, a user is testing rules iteratively and is interested just in the first several failures in order to analyze and correct them, and re-execute tests, sequentially correcting errors. To do this, change All on an appropriate value next to Failures per test label or first label (for method 3). The setting is available only if Failures only is selected.
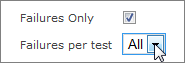
Settings for displaying failed test cases only
Displaying Compound Result
The result of a rule table execution can be a single value or compound value such as spreadsheet. A test table specifies what is tested, full result or particular parts of it, and their expected results of each test case. In the following example, IncomeForecastTest is intended to check Minimal and Maximal Total Salary values in the resulting spreadsheet:
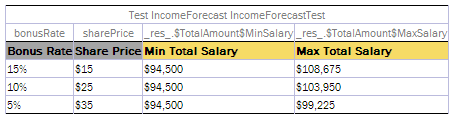
Testing tables with compound result on
After running the test, OpenL Studio displays each test case with input values and actual results marked as passed or failed.
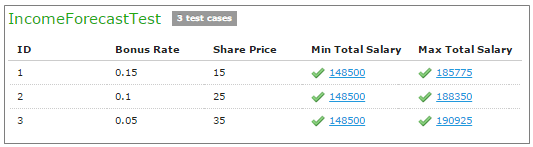
Testing spreadsheet result
In cases when test result is complex (compound), there is an option to display the full result of running test cases as well, not only values which are being tested. It is configured for each user individually in User Profile as “Compound Result” setting. If the option is switched on, the result of running IncomeForecastTest looks as follows:
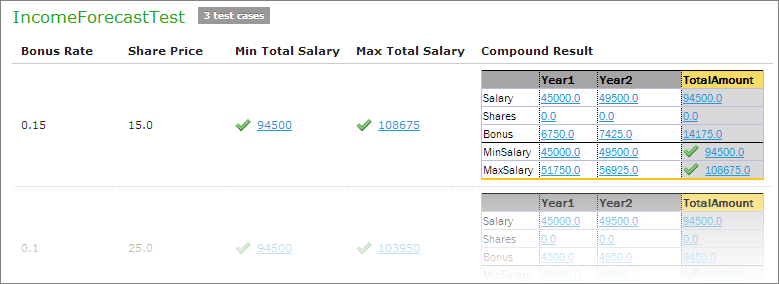
Displaying compound result
This setting for a particular test run (without updating user settings) can be changed in the same ways as it is described in Displaying Failures Only.
Creating a Test
OpenL Studio provides a convenient way to create a new test table.
When an executable table, such as Decision, Method, Spreadsheet, ColumnMatch, or TBasic table, is created, the Create Test item becomes available.
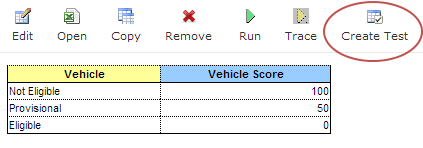
Create new test table
Proceed as follows:
-
To create a Test table for the current table, click the Create Test button.
OpenL Studio runs a two-step wizard for creating an appropriate Test table.
-
Enter test input values and expected result values to complete the Test table.
Tracing Rules
OpenL Studio provides a rule tracing view for all appropriate OpenL Tablets methods. These methods include the following:
- All test tables
- All Rule tables with the possibility of specifying input parameters
- Method tables with preset parameters
Tracing of a rule enables users to determine how results for complex rules are obtained.
Note: Before tracing, ensure that the browser does not block pop-up windows. Otherwise, trace results will not be displayed. For more information on how to unblock pop-up windows, refer to the specific browser Help.
When using the tracing functionality, users can check the result of each step of the rule and how the result was obtained without creating test cases. For that, perform the following steps:
- In Rules editor, open a rule table to be traced and click Trace
 in the middle pane.
 - Enter parameters to be traced in the pop-up window.
-
If necessary, specify whether tracing must be applied to the rules of the current module and its dependent modules only.
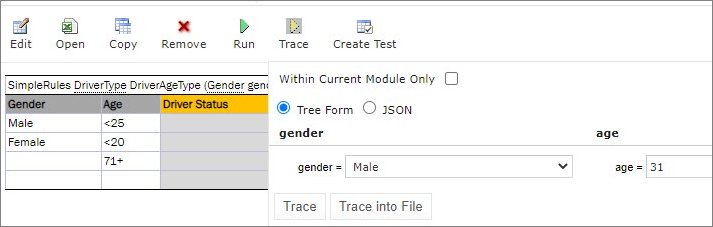
Tracing a rule for a rule table
-
To use JSON data and prefill fields with data extracted from log or provided by developers, select JSON.
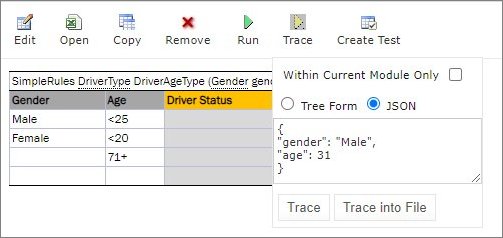
Selecting the JSON option for tracing
The same functionality is available for running rules. Settings defined in rule deploy configuration are applied to the JSON input as well. For example, if Provide runtime context is set to true, in JSON, context must be defined. Thus, the same JSON request can be used in OpenL Tablets Rule Services and OpenL Studio.
-
Click the Trace button.
If there is a set of test cases and the result of each step of the rule and how the result was obtained need checking, trace the Test table as follows:
- Open the required Test table.
-
To open a pop-up with test cases to be traced, click the Trace button.
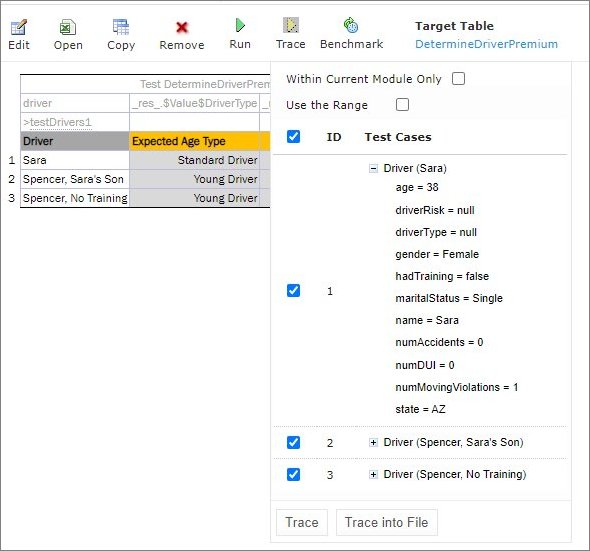
Tracing of a Test table
-
In the pop-up, select or deselect the test cases as needed.
All test cases can be checked or unchecked by using the checkbox on the left of Test Parameter(s).
-
If necessary, specify whether tracing must be limited to the current module only.
-
Click Trace to start the process.
The system displays the tracing results in a separate browser window as illustrated in the following example:
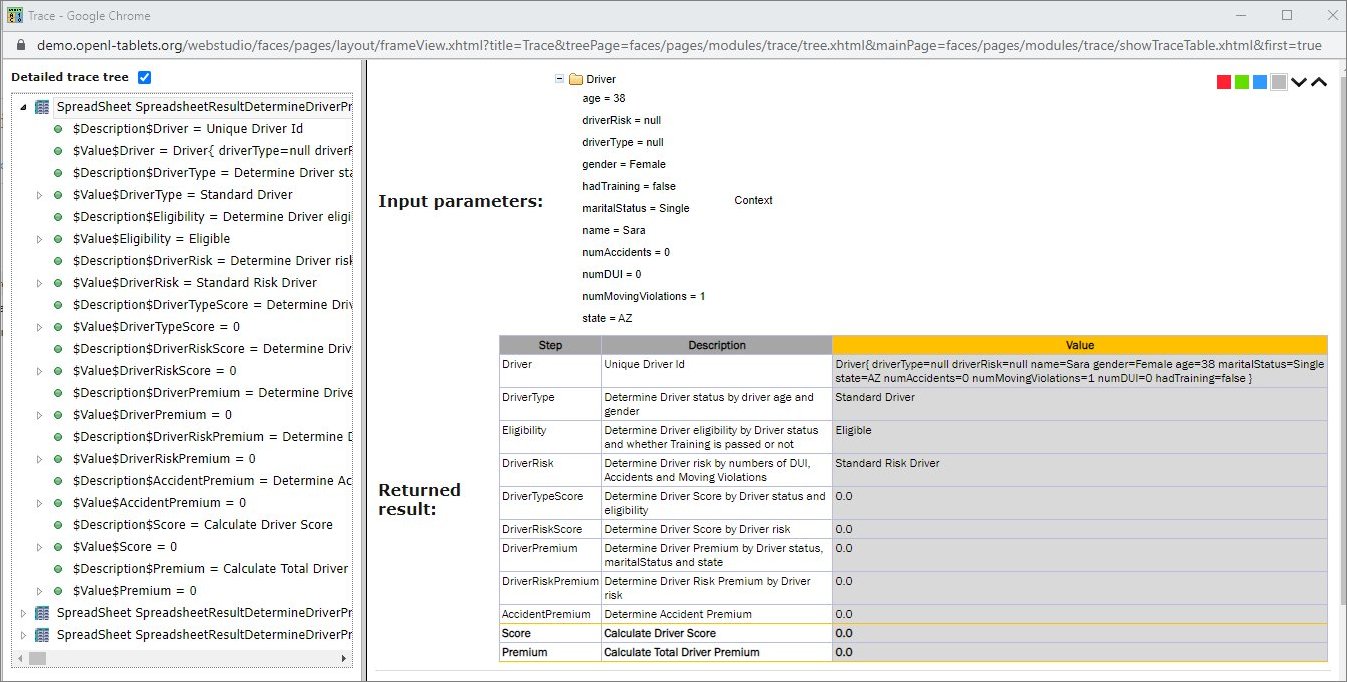
Tracing results
The left side displays a tree consisting of rule tables as tree nodes and fired rule rows as tree leaves. Selected Detailed trace tree option enables to view all rule calls.
-
If that option is cleared, only successful calls will be displayed.
This option can only be used for a Decision table or if a Decision table is used in complex rules.
-
If an element in the tree is selected, the corresponding rule table is displayed in the right pane.
The fired rule rows are highlighted using the specified color. The highlight color and transparency level can be configured by clicking the
 buttons above the rule table. Note that the gray button is selected by default.
In addition, the right pane displays the actual parameters used in the particular rule call and the returned result. The example above demonstrates the results of tracing a decision table. For other rule tables, the picture slightly differs but the meaning is essentially the same.
For a decision table, the tracing results are displayed as follows:
- The rules that were traced are not highlighted and appear as white rows.
- Successfully completed or returned rules are boxed with green lines.
- The failed rules are displayed in red.
Using Benchmarking Tools
OpenL Studio provides benchmarking tools for measuring execution time for all appropriate OpenL Tablets elements. In OpenL Tablets, everything that can be run can be benchmarked too. Benchmarking is useful for optimizing the rule structure and identifying critical paths in rule calculation.
The benchmarking icon is displayed above the table to be traced.
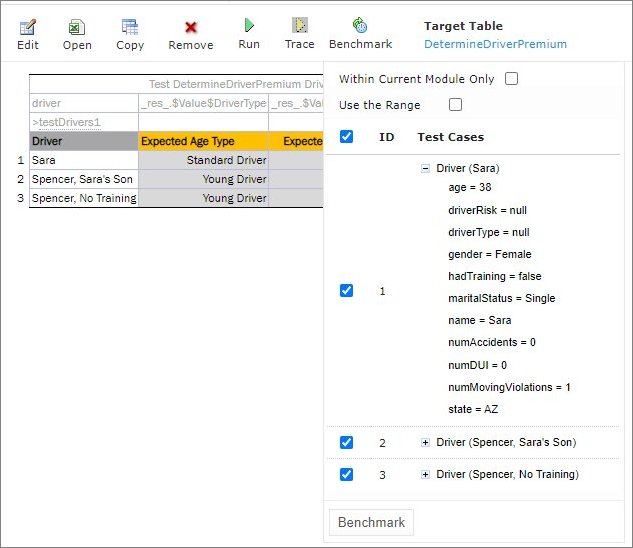
Controls for measuring performance
For a test table, select the test cases as follows:
- Open the required test table.
- Navigate to the Benchmark button above the test table and click the small right-hand black arrow to open a pop-up with test cases as needed.
-
Select or deselect the test cases as needed.
By default, all cases are selected. All test cases can be also checked or unchecked by using the checkbox on the left of Test Parameter(s).
-
Click the Benchmark button within the pop-up.
Clicking the benchmarking icon runs the corresponding method or set of methods and displays the results in a table.
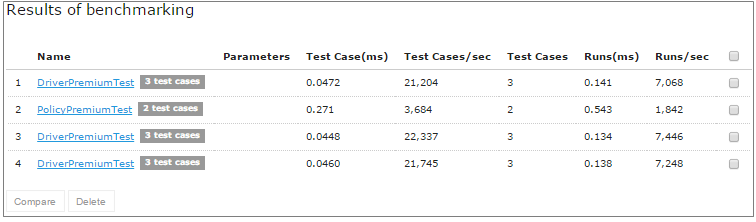
Benchmarking results
Benchmark is displayed using the following parameters:
| Parameter | Description |
|---|---|
| Test Case (ms) | Time of one test case execution, in milliseconds. |
| Test Cases/sec | Number of such test cases that can be executed per second. |
| Test Cases | Number of test cases in a Test table. |
| Runs (ms) | Time required for all test cases of the table, or rule set, execution, in milliseconds. |
| Runs/sec | Number of such rule sets that can be executed per second. |
OpenL Studio remembers all benchmarking runs executed within one session. Every time a new benchmark is run, a new row is added to the results table. Benchmarking results can be compared to identify the most time consuming methods. Select the required check boxes and click Compare to compare results in the results table. Comparison results are displayed below the benchmarking table.
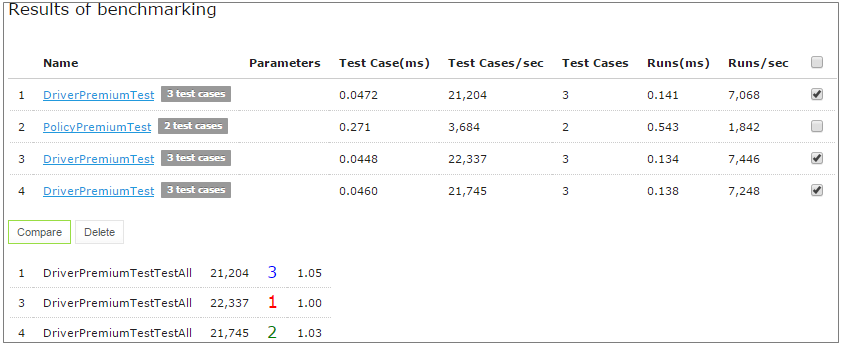
Comparing benchmarking results
Using Repository Editor
This chapter describes tasks that can be performed in repository editor. For general information on repository editor, see Introducing Repository Editor.
The following topics are included in this chapter:
- Browsing Design Repository
- Filtering and Grouping the Project Tree
- Creating Projects in Design Repository
- Opening a Project
- Closing a Project
- Saving a Project
- Viewing Project Properties
- Modifying Project Contents
- Copying a Project
- Removing a Project
- Deploying Projects
- Comparing Project Revisions
- Exporting a Project or a File
- Unlocking a Project
- Browsing the Deployment Repository
- Committing with Missing User Data
Browsing Design Repository
Repository editor displays all projects in user's workspace and Design repository. The project tree is organized into the following categories:
| Category | Description |
|---|---|
| Projects | Contains OpenL Tablets rule projects. |
| Deploy Configurations | Contains deploy configurations for deploying rule projects to deployment repository. For information on using deploy configurations, see Deploying Projects. |
Projects from all repositories are displayed in a common list that is sorted alphabetically.
The status of each project in the tree is identified by a specific icon. The following table describes the icons in the project tree:
| Icon | Description |
|---|---|
 |
Project is closed. It is available only in Design repository and must be opened to copy it to user's workspace. |
 |
Project is opened for viewing. It is copied to user's workspace and can be modified. If the product is restored from the previous revision, its status is set to Viewing Revision, otherwise its status is set to No Changes. |
 |
Project is edited by the current user. It is copied to user's workspace and is modified. Other users cannot edit the project. To save changes, the project must be saved. |
 |
Project is closed by the current user but edited by another user (Closed – Locked). Current user cannot edit the project. |
 |
Project is opened for viewing by the current user but edited by another user (Viewing Revision - Locked). Current user cannot edit the project but can browse the project in Rules Editor. |
 |
Project exists only in user's workspace but not in Design repository (Local). Other users do not see this project. User can delete the project or import it into Design repository as described in the Creating Projects in Design Repository. |
 |
Project is marked for deletion. In OpenL Studio, deletion of a project takes place in the following phases: - Deleting a project: Project is removed from user's workspace and marked for deletion. In this phase, the project can be restored using the undelete function. For information on deleting a project, see Deleting a Project. - Erasing a project: Deleted project is permanently removed from Design repository. After this phase, the project cannot be restored. For information on erasing a project, see Erasing a Project. |
Filtering and Grouping the Project Tree
Projects in the repository editor are filtered the same way as in Rules Editor.
To filter projects by name, enter the name in the filter text box. All projects matching the name are displayed in the Projects list.
To group projects by repository or tag types, click the Group Projects icon  and select the required values. Please note that values of tags for grouping are taken from the most recent version of a project. If user has changed project tags in an opened project, a project is required to be saved in order for a change to be reflected in a tree. For more information on tag definition for a project, see Managing Tags.
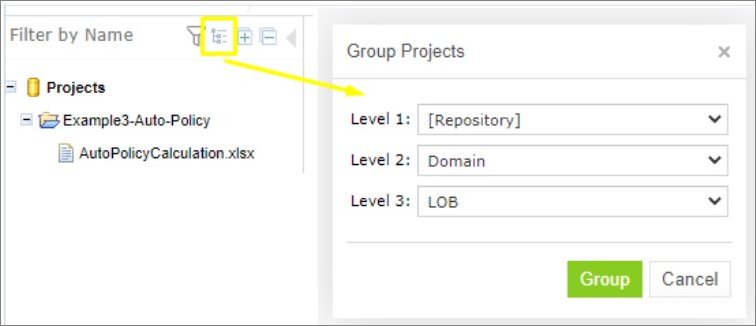
Grouping projects by tags
To expand or collapse the repository tree, use the expand and collapse icons  .
.
To view archived deleted projects, click the advanced filter icon  and clear that the Hide deleted projects option.
Creating Projects in Design Repository
OpenL Studio allows users to create new rule projects in the Design repository in one of the following ways:
| Way | Section |
|---|---|
| Create a rule project from a template | Creating a Project from Template |
| Create a rule project from Excel files | Creating a Project from Excel Files |
| Create a rule project from an OpenAPI file | Creating a Project from OpenAPI file |
| Create a rule project from a zip archive | Creating a Project from ZIP Archive |
| Import a rule project from workspace | Importing a Project from Workspace |
| Create a rule project from repository | Creating a Project from a Repository |
Whatever the way used, new projects are created in the No Changes status that means they are open and can be modified.
Projects with the same name can be created in different repositories. These projects cannot be in the same status. If the first project is in the No Changes status, the second one is assigned the Closed status. After closing the first project, the second can be opened.
Creating a Project from Template
This section describes how to create a project using a template and includes the following topics:
Creating a Project Using a Default Repository Template
This is the easiest way to create a rule project in the Design repository that must be preferably used for demonstration or introductory purposes.
While creating a project from template, use the following template types:
| Template type | Description |
|---|---|
| Simple Templates | Include the following: - Sample Project is a very simple project consisting of one rule table and hence, one Excel file. - Empty Project allows creating a project with an empty Excel file. Open the project and create tables as needed. |
| Examples | Provide several simple projects demonstrating how OpenL Tablets can be used in various business domains. |
| Tutorials | Represents projects designed to familiarize users with OpenL Tablets step-by-step, from simple features and concepts to more complex ones. |
Projects represented as Examples and Tutorials can be used not only to learn how they are organized and work, but also to create user’s own projects from them.
To create a new project from template, proceed as follows:
-
In the top line menu, click Create Project.
The Create Project from window appears.
-
Clicks the Template tab.
Note: This tab is normally selected by default.
All project templates are organized into three areas: Simple Templates, Examples and Tutorials described above in this topic.
-
Navigate to the required template and click its name.
The name appears in the Project Name field. The following example demonstrates creating a project based on the example.
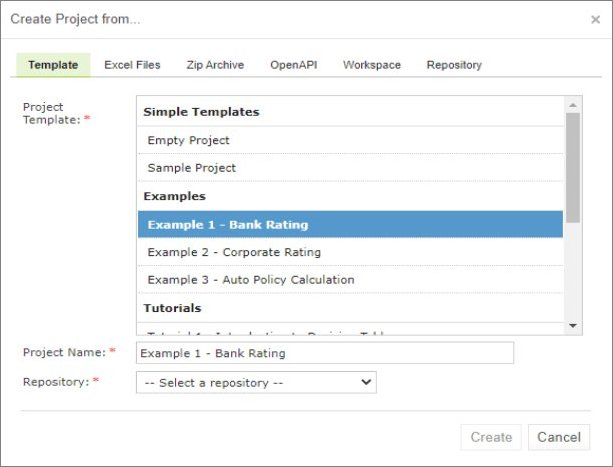
Creating a simple project from a template
-
Select a repository.
If there is only one repository, it is selected by default. Otherwise, a list of repositories is displayed. If a Git repository with non-flat structure is selected, the Path field with the / default value is displayed and can be modified as required. The path is defined inside the repository and can start with or without /.
-
Click Create.
If tag types are defined as described in the Managing Tags section, a tag pop-up window appears. For more details, see the Specifying tags for a new project section.
A new project is created in Design repository. Initially, project structure corresponds to the selected project template but can be constructed manually.
-
To construct the project structure, add folders and upload files as described in Modifying Project Contents.
Creating a Project Using a Custom Template
A custom project template can be created and then used during new projects definition. To create a new custom project template, proceed as follows:
-
If the OpenL Studio home directory
\<OPENL_HOME>,create the following directory:\<OPENL_HOME>\project-templates -
Create a subfolder with a template category name.
An example is
\<OPENL_HOME>\project-templates\My Custom Templates. -
For project templates that store files with project rules, create subfolders.
For example,
\<OPENL_HOME>\project-templates\My Custom Templates\MyRule1\rating.xlsxwill be presented as the MyRule1 template project in theMy Custom Templatescategory containing therating.xlsxfile.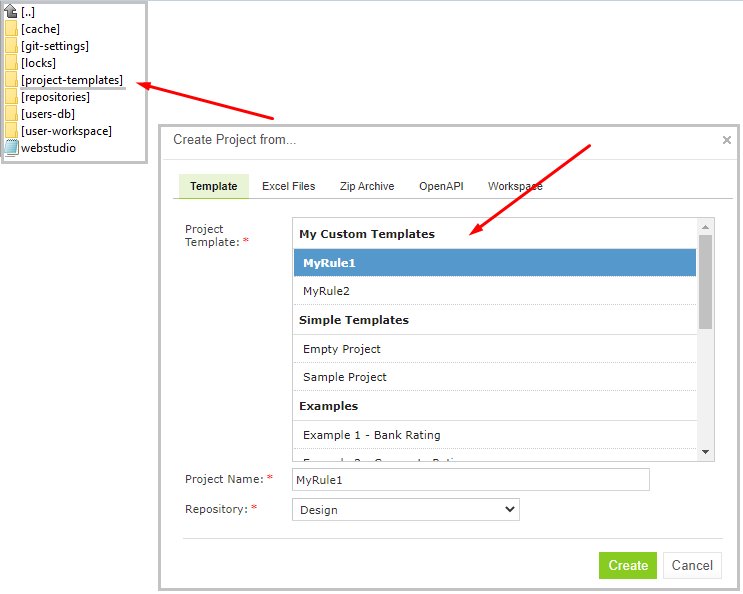
Creating a custom project template
Creating a Project from Excel Files
A rule project in the Design repository can be created by loading one or more Excel files that contain OpenL rule tables or entire rule projects.
Proceed as follows:
- Click Create Project in the top line menu.
- In the Create Project from dialog, click the Excel Files tab.
- Click the Add button, locate the necessary Excel file in a file system and click Open.
-
If required, repeat the previous step to add more files for the project.
All files are listed in the File area.
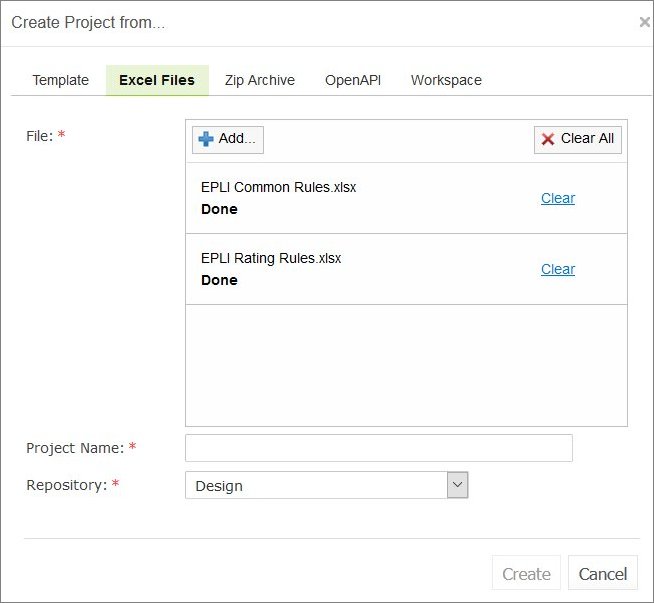
Creating a project from Excel files
A file can be removed from the list by clicking the corresponding Clear link. To delete all files, click Clear All.
-
In the Project Name field, enter the name by which the project must be represented in Design repository.
-
Select a repository.
For more information on available repositories, see Creating a Project from Template.
-
Click Create to complete.
If tag types are defined as described in the Managing Tags section, a tag pop-up window appears. For more details, see the Specifying tags for a new project section.
Creating a Project from OpenAPI file
A rule project in the Design repository can be created by uploading the OpenAPI file.
The OpenAPI Specification (OAS) defines a standard, language-agnostic interface to RESTful APIs which allows both humans and computers to discover and understand the capabilities of the service without access to source code, documentation, or through network traffic inspection.
The algorithm for generating a project from an OpenAPI file is described in the Appendix B: OpenAPI Project Generation Algorithm.
The OpenAPI file must have a valid structure and a JSON, YAML(YML) extension.
To create a project from the OpenAPI file, proceed as follows:
- Click Create Project in the top line menu.
- In the Create Project from window, click the OpenAPI tab.
- Click Add, select the required OpenAPI file in a file system, and double click it or click Open.
-
To remove an uploaded file, click Clear.
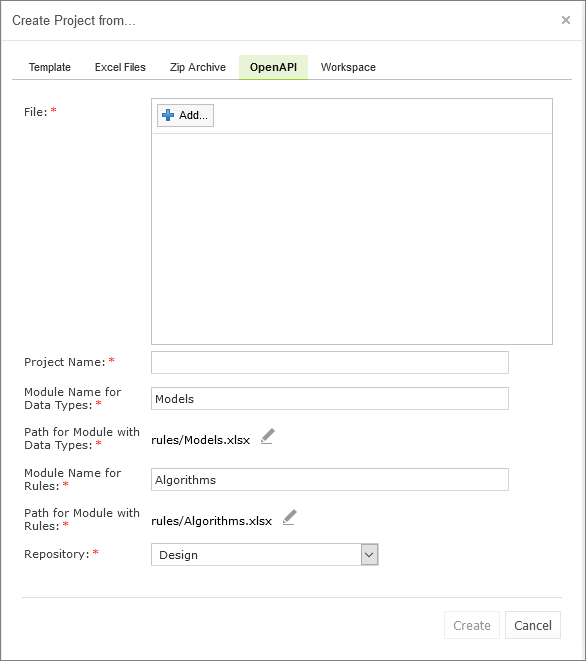
Creating a project from an OpenAPI file
-
In the Project Name field, enter the name by which the project must be presented in the Design repository.
- If necessary, modify the file location and generated modules name.
-
Select a repository.
For more information on available repositories, see Creating a Project from Template.
-
Click Create.
If tag types are defined as described in the Managing Tags section, a tag pop-up window appears. For more details, see the Specifying tags for a new project section.
Creating a Project from ZIP Archive
OpenL Studio provides a control for loading rule projects archived in a ZIP file into Design repository. The procedure resembles creating a project from Excel files described above although there are a few differences.
A project can only be created from a zip archive. The .rar or .7zip archives cannot be used.
- Click Create Project in the top line menu.
- In the Create Project from dialog, click the Zip Archive tab.
-
Click the Add button, locate the necessary zip archive and click Open.
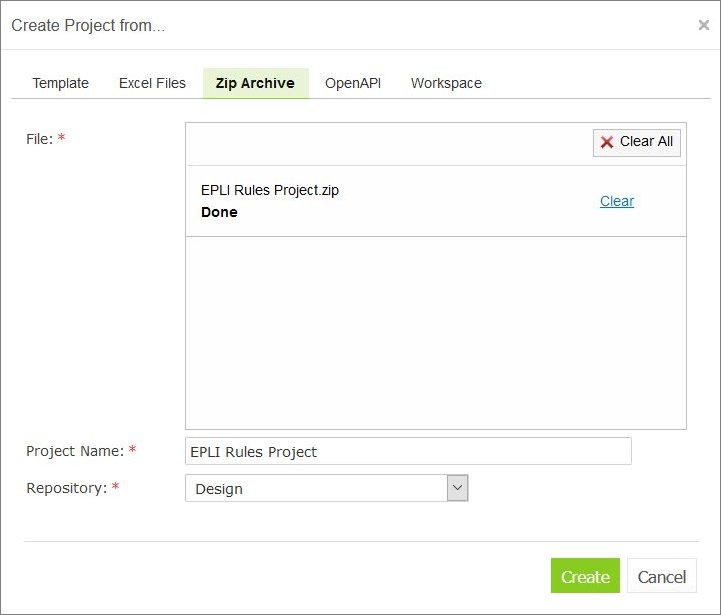
Creating a project from ZIP file
Project Name text box is automatically populated with the project name defined in
rules.xml,if the uploaded ZIP file containsrules.xml,or with the file name. -
If necessary, modify the project name.
It will be updated in
rules.xmlaccordingly. -
Select a repository.
For more information on available repositories, see Creating a Project from Template.
-
Click Create to complete.
If tag types are defined as described in the Managing Tags section, or if the project already contains tags, a tag pop-up window appears. For more details, see the Specifying tags for a new project section.
Importing a Project from Workspace
A new project can be created in Design repository by loading a project with the Local status from user workspace.
- Click Create Project in the top line menu.
-
In the Create Project from dialog, click the Workspace tab.
The system displays rule projects available in the workspace:
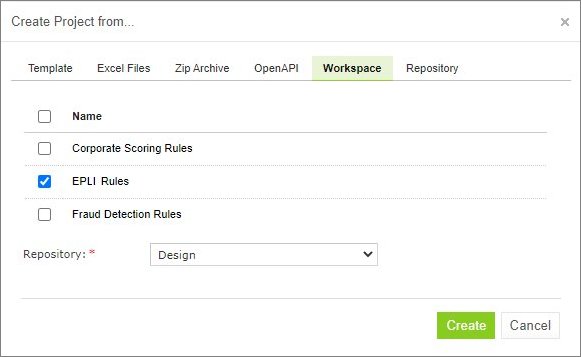
Creating a project from Workspace
-
Select check boxes for projects to be uploaded.
- To complete creation, click Create.
If tag types are defined as described in the Managing Tags section, or if the project already contains tags, a tag pop-up window appears. For more details, see the Specifying tags for a new project section.
Creating a Project from a Repository
A project existing in the Git repository can be imported into OpenL Studio as follows:
- Click Create Project in the top line menu.
- In the Create Project from dialog, click the Repository tab.
- Select a repository and path and click Import.
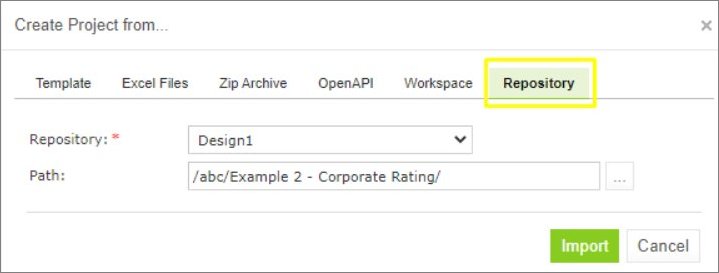
Importing a project from a Git repository
If tag types are defined as described in the Managing Tags section, or if the project already contains tags, a tag pop-up window appears. For more details, see the Specifying tags for a new project section.
Specifying tags for a new project
Project tags are stored in the tags.properties file located in the root directory of the project.
A new project may already contain tag values. This can happen, for instance, when a ZIP file is imported or an existing project is copied. In such cases, a project might include tags that are not configured or incorrectly configured in OpenL Studio. This occurs when the corresponding tag type is not configured at all, or if the tag type is not extensible and the specified tag value is not allowed.
If the project contains tags that cannot be applied, a Missing tags pop-up window is displayed. This window lists the tag values, explains why they cannot be applied, and indicates what will happen next. If a tag type is not configured in OpenL Studio, the corresponding tag will be ignored. If a tag value is not permitted, a follow-up dialog prompts the user to enter a valid value.
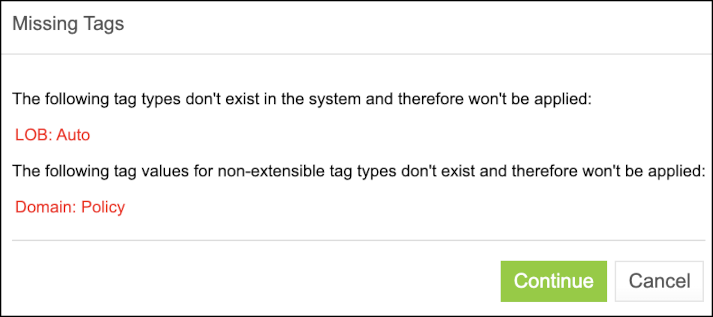
Some tags are not configured properly
If the tag types are defined as described in the Managing Tags section, a pop-up window appears, prompting the user to specify project tags.
Default tag values are determined in the following order:
- If the project already contains a tag value, it is used as the default.
- If a tag value can be derived from the project name templates, it is applied.
- Otherwise, None is set as the default.
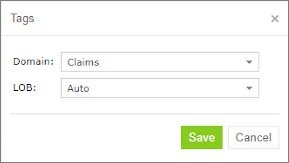
Selecting project tags
If a tag type is defined as optional, the project can remain with the tag value None. If the tag type is defined as extensible, new tags can be created in the pop-up window by clicking on the required tag field and entering a new value. Otherwise, only predefined tag values can be used.
Opening a Project
An opened project is copied to user's workspace and becomes available for selection in Rules Editor. The project is opened for viewing and can be modified if it is not locked by another user. When a user modifies a project, its status is set to In Editing and it becomes locked for other users who now can only view it.
To open a project, in the project tree, select the project and, in the right pane, click one of the following buttons as required:
| Button | Description |
|---|---|
| Open | Opens the latest revision of project. |
| Open Revision | Displays window where user can specify which project revision must be opened. |
Any project revision can be opened, with the project status set to Viewing Revision, as follows:
- Opening a Project Revision Using the Open Revision Button
- Opening a Project Revision Using the Revisions Tab
Opening a Project Revision Using the Open Revision Button
To open a project revision using the Open Revision button, proceed as follows:
- Click the Open Revision button.
-
In the Project Revisions field, select the required revision.
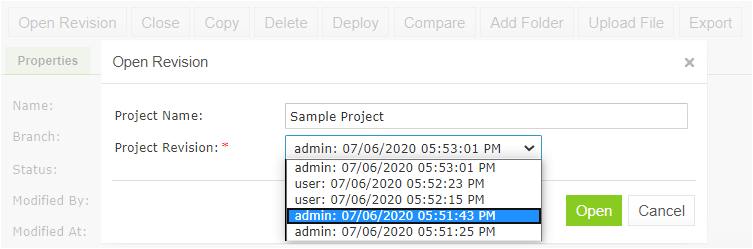
Opening a project revision using the Open Revision button
-
Click Open.
Opening a Project Revision Using the Revisions Tab
To open a project revision using the Revisions tab, proceed as follows:
- In the Projects tree, select a project.
-
Click the Revisions tab.
A list of revisions appears.
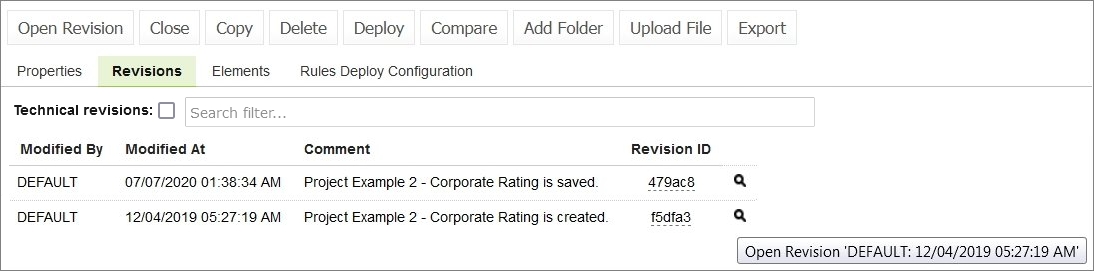
List of project revisions
-
Navigate to the revision that needs to be opened and click the corresponding magnifier icon in the Action column.
- In the information message, click OK.
If a project has the Viewing Revision status, the opened project revision becomes available for viewing and modifying, not the latest revision.
If user tries to modify an old revision of the project, the system displays the warning message, “You are trying to edit old revision of the project. Do you want to overwrite newer revision?” When user modifies the old revision, it becomes the current version of the project, and its status changes to In Editing.
Revisions can also be accessed through Editor by selecting More > Revisions for a project.
The features Technical Revision and Search Filter are available in OpenL Studio when the repository type is Git.
The Technical Revisions feature, when checked, allows users to see revisions that are not directly related to the current project (for example, changes related to code updates or changes in other projects).
The Search Filter field helps users quickly locate specific revisions by searching through the comments, modified by, and revision IDs.
Closing a Project
Closing a project deletes it from the user's workspace. No changes made to the project will be applied and stored. From that point, the project is not available for selection in Rules Editor. Users can still browse closed projects in repository editor.
To close a project, in the project tree, select the project and, in the right pane, click Close.
Saving a Project
A modified project is saved and copied from the user's workspace to Design repository as a new revision.
To save a project, proceed as follows:
-
In the project tree, select the project, and, in the right pane, click Save.
The Save changes window appears:
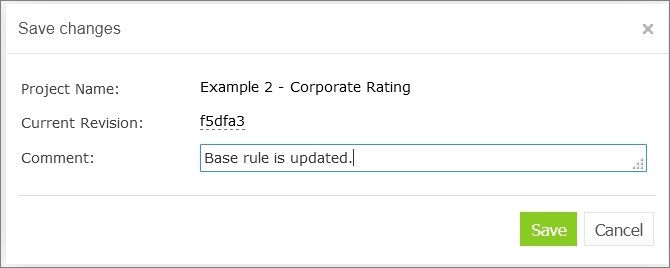
Save changes in a project
The number of a revision is updated automatically and is specified in the Next Revision field.
-
Enter comments if needed and click Save.
An editable project can be saved and closed directly from Rules Editor as described in Editing and Saving a Project.
Viewing Project Properties
Each rule project has a set of properties displayed in the Properties tab when a project is selected.
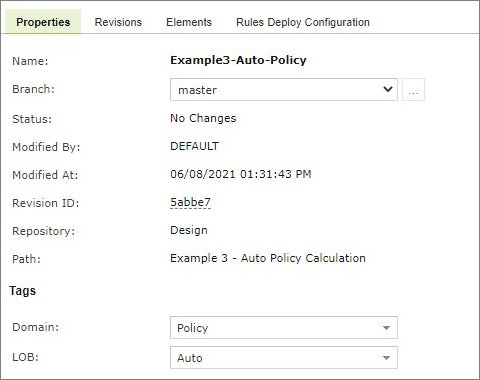
Project properties
Properties, such as Name and Created At / Created By, are updated automatically by the system, and users cannot edit them in the OpenL Studio UI. However, a user can modify tags in this tab.
If the user chooses to modify tag values, the project status will change to In Editing, unless it is already in this state.
There are scenarios where a project has a tag that does not have a configured tag type, as described in the Managing Tags section, or contains a value that is not permitted. This can occur if a project was created before tag types were reconfigured or removed.
In cases where a tag type is missing, the user can only change its value to None, effectively removing the tag.
If a tag contains a value that is not permitted, the user can only update it to a permitted value.
If a tag is used for grouping in a project tree, its value in a tree gets updated only when the project is saved.
Note that in case of the Git repository, in the Modified By field, the user’s display name is used, not the username, and the tooltip for this field displays the user’s email.
Modifying Project Contents
This section describes modifying the physical structure of the project and includes the following topics:
Creating a Folder
To create a new folder in the project structure, proceed as follows:
-
In the project tree, select the parent folder in which the new folder must be created.
To create a root level folder, the project name must be selected in the project tree.
-
In the right pane, click Add Folder.
- In the Add Folder window, enter the folder name and click Add.
Uploading a File
To upload a file to a project folder, proceed as follows:
-
In the project tree, select the folder where the file should be uploaded.
To upload a file to the root level, the project name must be selected in the project tree.
-
In the right pane, click Upload File.
The Upload File window appears:
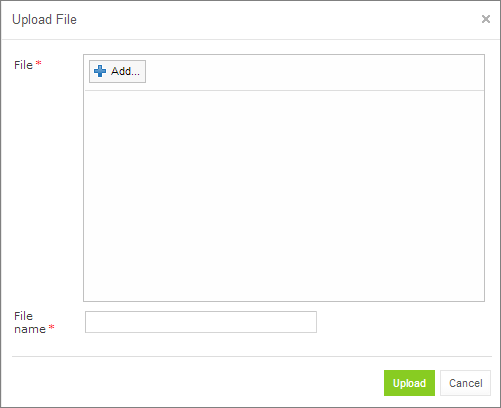
Uploading a file
-
Click Add in the File area and select the file to be uploaded.
- Click the upper Upload button (with a green arrow).
- In the File name field, enter or modify the name of the file to be used in Design repository.
- Click the Upload button at the bottom.
Updating a File
To update a file of a project via repository editor, proceed as follows:
- In the project tree, select the file to be updated and, in the right pane, click Update file.
- In the window that displays, click Add and choose the required file for updating.
- Click the Upload button to load the file.
- Click Update to end the action.
Deleting a Folder or a File
To delete a folder or a file in the project structure, proceed as follows:
-
Perform one of the following steps as required:
- Expand the project tree, select the folder or file to be deleted and, in the right pane, click Delete.
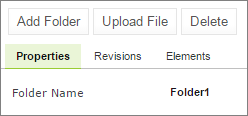
Deleting a project element
- To delete an element inside the parent folder, select that folder, click Elements to expand the folder and then click Delete
 at the right of the item to be deleted.
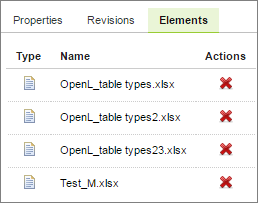
Deleting project elements from the Elements tab
-
In the confirmation window, click OK.
Copying a File
A user can create a copy of a file using the repository editor. The current revision of the file or any revision stored in the repository can be used for copying. Proceed as follows:
- Select a project that contains a file to copy and in the files tree, select the required file.
- In the upper left corner of the page, click Copy file
 .
. - In the window that appears, select the Current Revision or clear it and in the File Revision field, select a value.
- Optionally, enter the New File Path property value.
-
In the New File Name field, enter the file name.
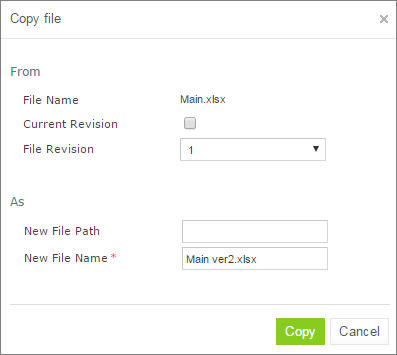
Copying a file in repository editor
-
Click Copy.
The newly created file appears in the file tree.
Copying a Project
Copying a project creates a new project with identical contents and a different name in Design repository. This function can be used for copying local projects to Design repository with a different name.
To copy a project, proceed as follows:
- Perform one of the following steps as required:
- In the Projects tree, select the required project and, in the right pane, click the Copy button.
- Click Projects in Navigator to get a list of projects, navigate to the project you want to copy and click the corresponding Copy item
 on the right.
- In the Copy Project window, enter the new project name.
-
Select whether a new project must be linked to the origin project.
In case of linked projects, a new project branch is created. For more information on branches, see Working with Project Branches. For unlinked projects, if there are mandatory tag types, tags must be defined for a new project.
-
Specify whether old revisions must be copied to the newly created project.
-
If necessary, select a repository and specify the path to the destination project.
A project can be copied to another repository with the same or a new name.
-
Optionally, provide comments.
- Click Copy.
The new project appears in the list of projects.
Removing a Project
Removing a project is executed in the following phases:
Deleting a Project
A deleted project is removed from user's workspace and marked as deleted in Design repository. All users can see that a project is deleted. Physically, it still remains in Design repository.
Note: Projects in the Local status that were not uploaded to Design repository will be removed physically and cannot be restored.
To delete a project, proceed as follows:
- Perform one of the following steps as required:
- In the Projects tree, select the project and, in the right pane, click Delete.
- Click Projects in Navigator to get a list of projects, navigate to the project you want to remove and click the corresponding Delete item on the right.
-
In the confirmation window, click Delete or OK.
Deleted projects, except for those in the Local status, can be restored by using the Undelete button.
To make deleted projects visible, uncheck the Hide deleted projects checkbox in the filter pop-up window, which appears after clicking the Filter button above the Projects tree, and click Apply.
To restore a deleted project, proceed as follows:
-
Navigate to the deleted project in the Projects tree.
- Click the Undelete button in the right pane.
- Click Undelete in the confirmation window.
Erasing a Project
Erasing a project permanently removes it from Design repository.
Warning: Erased projects cannot be restored.
To erase a project, proceed as follows:
- Delete the project as described in Deleting a Project.
- Ensure that the Hide deleted projects option is cleared.
- In the Projects tree, select the project and, in the right pane, click Erase.
-
If the project is erased from the non-flat Git repository, to delete a project from the repository project tree but keep it in the Git repository, ensure that the Also erase it from repository check box is cleared.
In this case, it can later be imported into the repository as described in Creating a Project from a Repository.
If this check box is selected, the project is erased from both repository project tree and Git repository and becomes no longer available for import.
-
In the confirmation window, click Erase.
Deploying Projects
This section describes tasks related to deploying rule projects to deployment repository.
The following topics are included in this section:
- Creating a Deploy Configuration
- Defining Projects to Deploy
- Deploying a Deploy Configuration
- Opening Deployed Configurations
- Redeploying Projects
- Configuring Additional Rules Deploy Configuration Settings
- Defining Rule Service Version
Creating a Deploy Configuration
Deployment to deployment repository is performed by using deploy configurations. A deploy configuration is a list of rule projects and specific project revisions to be deployed together to deployment repository. Deploy configurations are useful for recording the history of project deployments.
Deploy configurations are listed in the Deploy Configurations tree. Like rule projects, deploy configurations are stored in Design repository and can be versioned.
To create a deploy configuration, proceed as follows:
- Click Create Deploy Configuration in the top line menu.
-
In the New Deploy Configuration window, enter the deploy configuration name and click Create.
The new deploy configuration appears in the Deploy Configuration tree.
-
Define deploy configuration projects as described in Defining Projects to Deploy.
Defining Projects to Deploy
A Project to Deploy is a reference to one specific revision of a rule project to be included in the deploy configuration. Project to Deploy must be added to the deploy configuration specifying which rule projects and project revisions are deployed.
To add a new project to deploy to the deploy configuration, proceed as follows:
-
In the Deploy Configurations tree, select the deploy configuration and, in the right pane, select the Projects to Deploy tab.
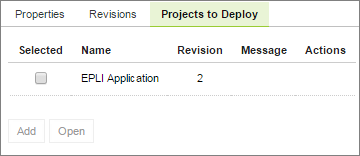
Deploy configuration with projects to deploy
The Projects to Deploy tab displays existing projects to deploy of the selected deploy configuration.
-
To add a new project to deploy, click Add and specify the repository, project name, branch, and revision to be included in the deploy configuration.
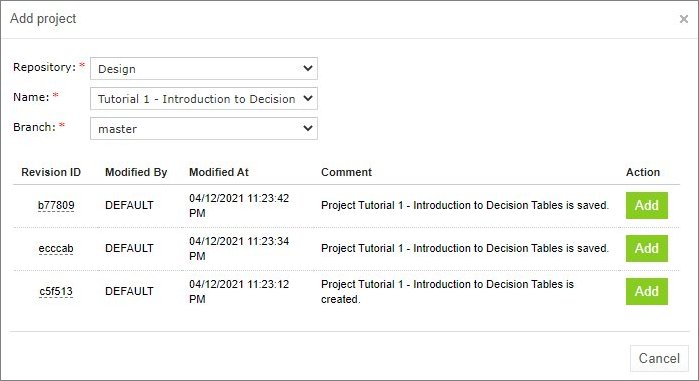
Adding a project to deploy
-
Repeat this procedure to add as many projects as required.
Deploying a Deploy Configuration
To deploy a deploy configuration, click Deploy.
Note: The Deploy button is disabled if deploy configuration is in the In Editing status.
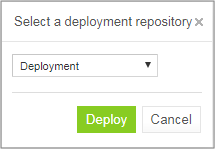
Deploying configuration to deployment repository
The specified projects are deployed to deployment repository and a deployment message is displayed.

Deployment message
Note: Deploy configuration cannot be deployed if any dependency projects are missed in it. Check messages on the Projects to Deploy tab.
Opening Deployed Configurations
Deploy configurations provide the means for tracking the deployment history of project revisions. OpenL Studio provides functionality for quickly opening the deployed configuration revisions. This is especially useful when some time has passed since deployment and a review of files during specific deployments is required.
To open the specific project revisions included in a deploy configuration, proceed as follows:
- In the Deploy Configuration tree, select the deploy configuration.
- In the right pane, select the Projects to Deploy tab.
- In the Selected column, select the check boxes for projects to be opened.
- Click Open.
The selected project revisions are opened in repository editor.
Redeploying Projects
OpenL Studio provides a function that allows a simple update and redeployment of many related deploy configurations when a particular rule project is modified. This function considers the revision of the opened rule project and works correctly, even with older project revisions.
To update related deploy configurations and redeploy a rule project, proceed as follows:
- In the Projects tree, select the modified rule project.
-
In the right pane, click Deploy.
Note: The Deploy button is disabled if the selected project has the Local status or if it is edited.
The Auto Deploy window appears listing all existing deploy configurations which’s latest revision contains a reference to the selected rule project. Deploy configurations marked for deletion are not displayed.
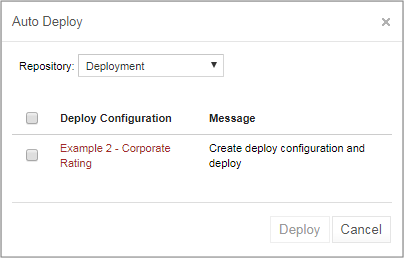
Deploying a project
The Message column displays the current status of displayed deploy configurations. If a particular deploy configuration cannot be deployed, the check box is gray. Possible reasons for a deploy configuration to be disabled are the following:
- The deploy configuration is saved.
- The deploy configuration is locked by another user and cannot be updated.
If the selected rule project is not referenced by any existing deploy configuration, the system offers to create a new deploy configuration containing only the rule project with an identical name.
-
Select check boxes for the deploy configurations that must be updated and deployed.
- Click Deploy.
Update and deployment results are displayed in the user interface.

Redeployment results
Deployment functionality is also available in the Rules Editor.
Configuring Additional Rules Deploy Configuration Settings
Deployment rules can be added before deploying a project to deployment repository. If a project already has the rules-deploy.xml configuration file, it can be edited via the Rules Deploy Configuration menu.
Proceed as follows:
- In the top line menu, click Rules Deploy Configuration.
- Click Create rules deploy configuration.
-
In the window that appears, enter the following information about the rules:
- Provide runtime context.
- Use the Rule Service runtime context.
- Define variations.
- Create services specifying the versions of web services to support, which is either the RESTful service, or RMI, or both of them.
-
Enter the service name.
The service name is displayed for a deployed project only in the embedded mode.
-
Define the service class.
- Define an RMI service class.
-
Define the service version.
For more information on service version definition, see Defining Rule Service Version.
-
Enter URL of the service.
-
In the Template class field, define Annotation template class.
Note: In OpenL Tablets versions prior to 5.24.1, separate fields for Intercepting template class and Annotation template class are supported. Since Annotation template class completely covers Intercepting template class and have a higher priority, from 5.24.1, only Annotation template class is displayed in the Template class field. If the existing configuration have both Annotation template class and Intercepting template class, only Annotation template class is displayed on UI and saved in the file after editing.
Exception: For projects with OpenL version compatibility and version prior to 5.16, only the Intercepting template class: field is displayed instead of Template class.
-
Define comma separated service groups.
-
Add configuration description to the XML file.
For more information on the Rules Deploy Configuration tab settings configuration, see OpenL Tablets Rule Services Usage and Customization Guide > Service Configurer.
-
Click Save Configuration.
The selected rules are displayed in the Rules Deploy Configuration tab.
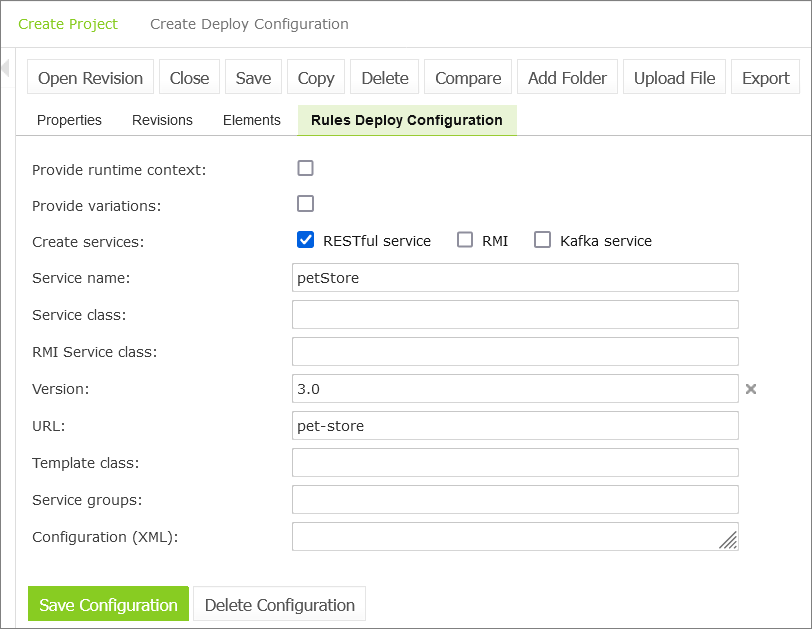
Defining rules deploy configuration settings
Defining Rule Service Version
OpenL Studio supports versioning definition for rule services. This functionality allows specifying a version for the project revision to be deployed. The required version of the deployed project can be called from deployment repository. All specified versions of the project appear on the OpenL Tablets Rule Services page with a version number defined in brackets.
To check the services version deployment, in OpenL Tablets Rule Services, find the name of the deployed project. Services version is set both in the services header and in the services URL.
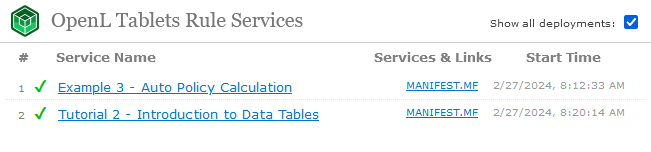
Services header and URL with the version number
To define the rule service version, proceed as follows:
- In the Projects tree, select a project.
- In the top line menu, click Rules Deploy Configuration.
-
In the window that appears, click the Version field.
By default, the Major 0, Minor 0 scroll list appears.
-
For more information on how to configure deployment configuration settings, see Configuring Additional Rules Deploy Configuration Settings.
-
In the scroll list, select the services version.
For example, to create the services version 1.0, Major = 1 and Minor = 0 must be selected.
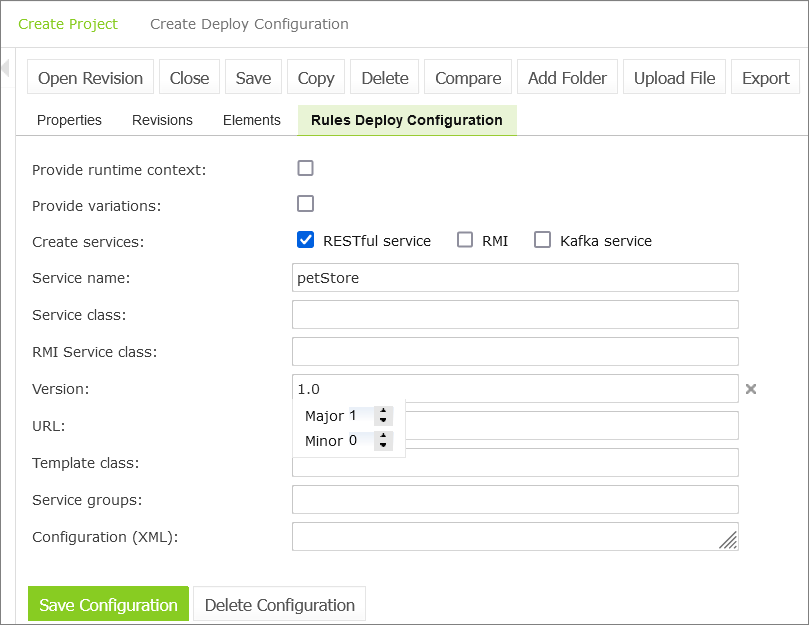
Defining services versioning
-
Click Save Configuration.
The selected services version is displayed in Rules Deploy Configuration for the selected project. For the example displayed in this section, the project version is 1.0.
Comparing Project Revisions
OpenL Studio provides a function for comparing files and sheets in Excel files between two project revisions. To compare contents of the currently opened project revision with any other revision, proceed as follows:
- In the project tree, select the project.
-
In the right pane, click Compare.
A window appears listing contents of the currently opened project version on the left side and contents of another project revision on the right side.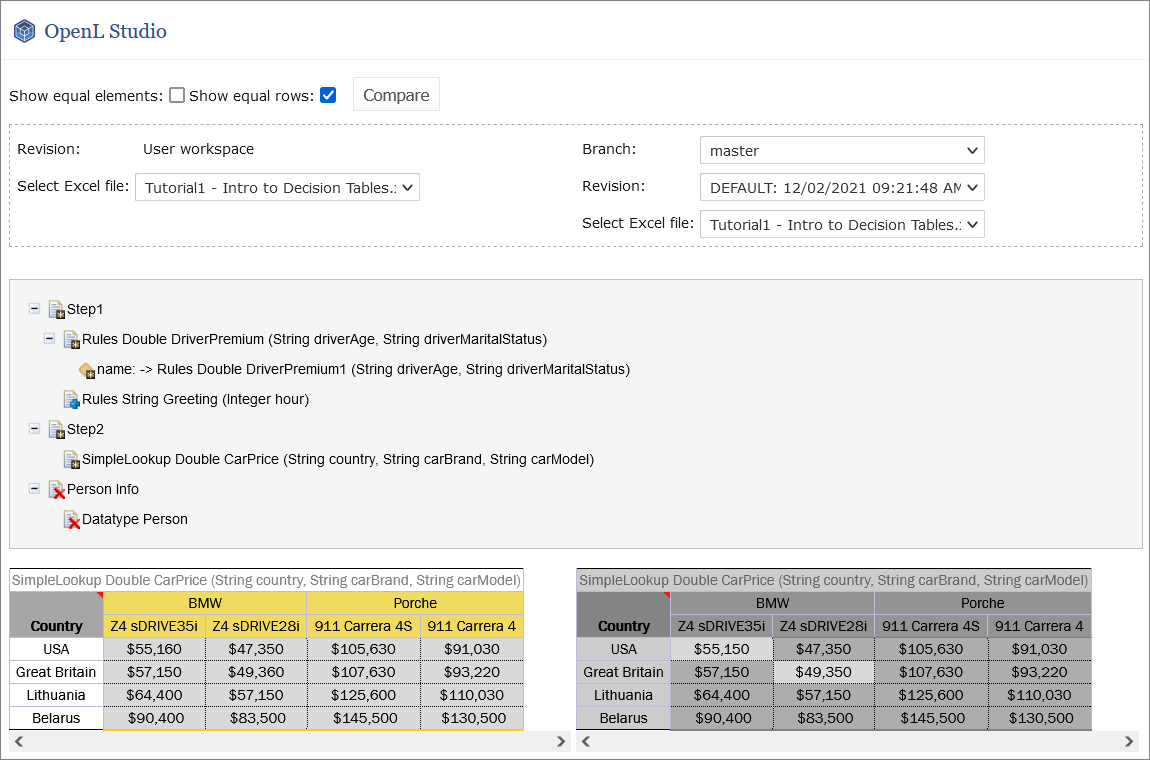
Comparing the current project revision from user workspace to the second project revision
-
To view or hide equal rows in the table, select or clear the Show equal rows check box.
- To compare the current project revision with a different revision, select the branch and revision.
Exporting a Project or a File
To export a project from repository editor, proceed as follows:
- In the project tree, select the project.
- In the right pane, click Export.
- In the displayed window, select the required project revision, click Export and a full project in the selected revision will be exported.
The default project version for export is the one that a user has currently open in Rules Editor. If it contains unsaved changes, it is marked as In Editing, otherwise, it is called Viewing.
To export any revision of a file from Repository, proceed as follows:
- In the project tree, select the project.
- Expand the project tree and select the file to be exported.
- In the right pane, click Export file.
- In the displayed window, select the required file revision and click Export.
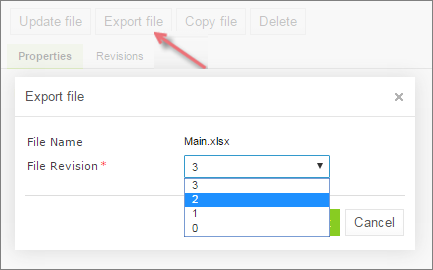
Exporting a file from a project
Note: If the project is in the Local status, these options are not available.
Unlocking a Project
OpenL Studio provides a function for a user to unlock a project which is edited and, therefore, locked by another user. Be aware that after unlocking, all unsaved changes made by another user will be lost and the project will be closed. The name of the user who locked the project appears in project summary, next to the project status.
To unlock a project, proceed as follows:
- Perform one of the following steps as required:
- In the Projects tree, select the project and, in the right pane, click Unlock.
- Click Projects in Navigator to get a list of projects, navigate to the project that needs to be removed and click the corresponding Unlock item
 on the right.
- In the confirmation window, click OK.
It is recommended to grant permission to the “Unlock” functionality only for administrators.
Browsing the Deployment Repository
The Deployment repository contains project deployments and is also the location from where solution applications use them. OpenL Studio allows connecting several deployment repositories. For information on how to configure deployment repositories, refer to Managing Repository Settings.
To browse a deployment repository, proceed as follows:
- Switch from the Design repository view to the Deployment repositories view by clicking Deployment in the top of the left pane.
-
In the project tree, select the deployment repository to be browsed (repositories are marked by
 icon).
The list of project deployments or deployed configurations – deploy configurations which consist of rule projects and specific project revisions and deployed to the selected deployment repository – are displayed in the middle pane.
-
If needed, expand the repository tree and browse project deployments.
OpenL Studio displays only the latest revisions of each deployed configuration in the deployment repository.
Also, when browsing deployed configurations in the deployment repository, users can see their content, namely what rules projects are deployed.
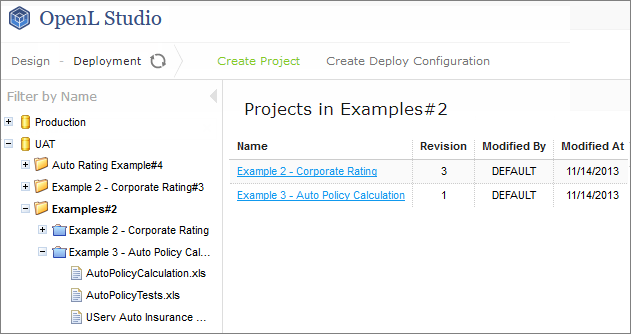
Deployment repository with deployed projects
Committing with Missing User Data
Upon user logon, the user’s display name and email are used for Git commits if the repository type for the action is Git. This applies to the following actions:
- create a project or deploy configuration
- save a project or deploy configuration
- delete a project or deploy configuration
- undelete a project or deploy configuration
- erase a project or deploy configuration
- deploy a project or deploy configuration
- synchronize a project or configuration
If the display name and email data is missing, the Configure commit info popup window appears on commit attempt. Once all the required information is entered and saved, the action that triggered the commit is completed automatically.
Working with Project Branches
This section introduces project branches and describes how to use them. Branches are useful when several users work on the same project simultaneously and then merge the changes or keep them as separate project versions.
The following topics are included in this section:
Creating a Branch
A branch is created by copying an existing project. Both predefined and user-defined names can be used for a branch. For more information on name patterns, see Setting Up a Connection to a Git Repository.
Proceed as follows:
- In OpenL Studio, in the editor or repository, select a project.
- Click Copy.
- In the New Branch Name field, proceed with the default value or enter a new branch name.
The newly created project branch is displayed as an active branch and ready for work.
Note: When a project in the Closed status is copied, the project in the newly created branch has the No changes status.
Working with Branches
This section describes how to view existing branches, switch between them in the editor and repository, enable and disable branches, and delete branches. Proceed as follows:
-
To display a current project branch, in OpenL Studio, in the editor or repository, open a project.
The current project branch is displayed.
-
To switch between branches in the editor, click the last link in the address bar identifying the branch name and in the list that appears, select the required branch.
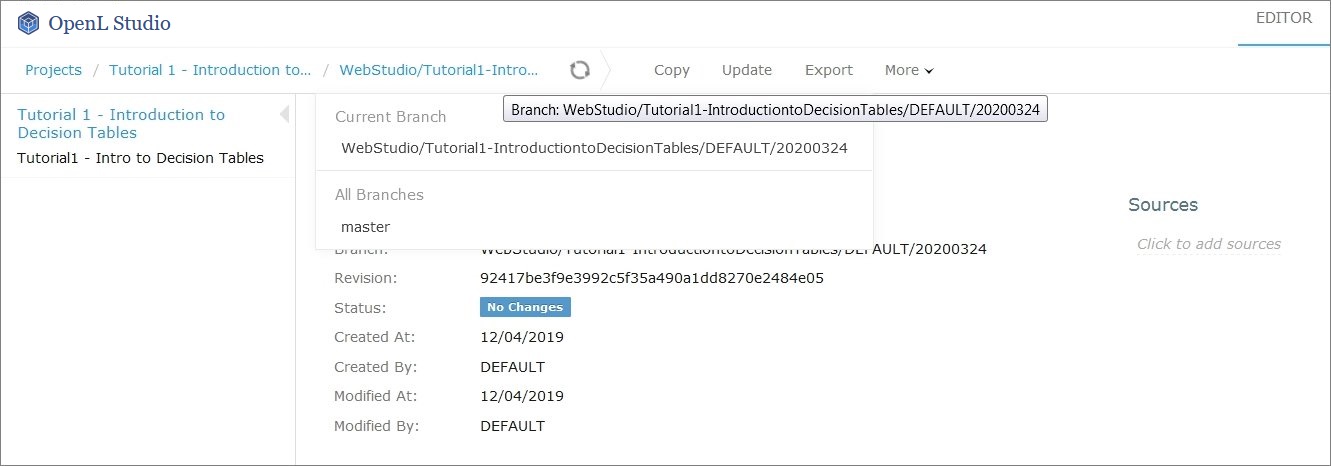
Switching between branches in the editor
-
To switch between branches in the repository, for a project, in the Branch field, select the required branch.
-
To disable or enable a branch for a project, in the repository, click the dots next to the branch name field and in the window that appears, clear or select the appropriate branch check box.
This list also contains branches created outside of OpenL Studio.
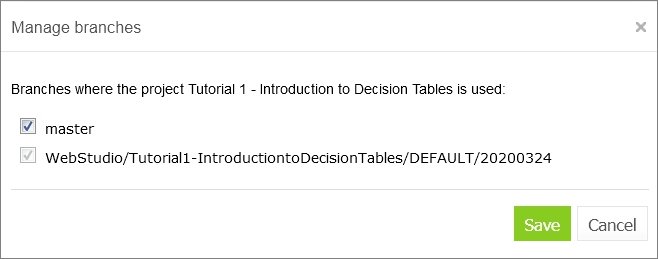
Enabling and disabling branches for a project
-
To delete a non-default branch, switch to this branch in the project properties and click Delete Branch.
The non-default branch is deleted completely, it cannot be later restored, and it does not appear in the Manage branches list. The project in the branch is erased. If the non-default branch contains commits not merged to the default branch, a warning message is displayed upon deletion attempt.
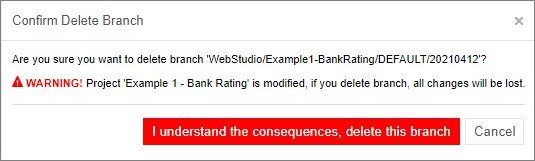
Deleting a non-default branch with unmerged commits
-
To delete a default branch, in the repository, select the required project branch and click Delete.
The project is archived and disappears from the list of active projects.
-
To completely delete the default branch or restore the archived project, proceed as follows:
- Click the filter icon and clear the Hide deleted projects check box.
- In the branch drop-down list, select an archived branch.
- To restore an archived project, select it in the list of projects and click Undelete.
- To completely remove the project and the branch, click Erase.
-
To merge two branches, click Sync and select one of the following options:
Option Description Receive their updates Changes from a selected branch are copied to the currently active branch. Send your updates Changes from the currently active branch are uploaded to the selected branch. If upon saving there is a conflict due to updates in the same module sheet, the Resolve conflicts window appears.
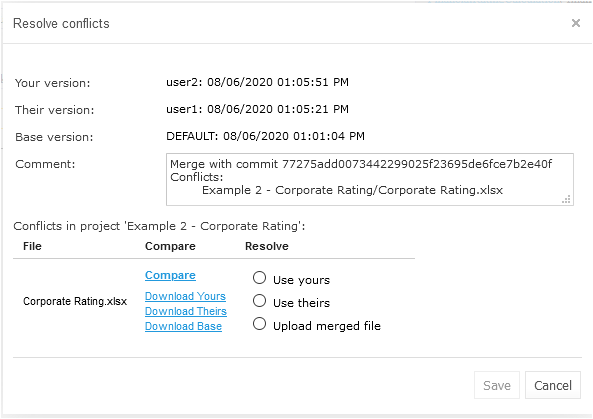
Resolving conflicts on merging branches
Conflicts can be resolved by selecting one of the following options:
Option Description Use yours Changes in the currently active branch are applied on merge. The changes applied by another user are lost. Use theirs Changes in the selected branch are applied on merge. The changes made by you are lost. Upload merged file Depending on the selected merging options, changes in the manually updated and uploaded file override changes in the branch. -
To view the changes made by another user, compare them to your changes, or view the base version of the file, select a corresponding option in the Compare column.
Resolving Conflicts
If the same version of the project is edited by several users, upon submitting their changes using different clients, the conflict error message appears asking which version must be saved. Changes in other versions are discarded.
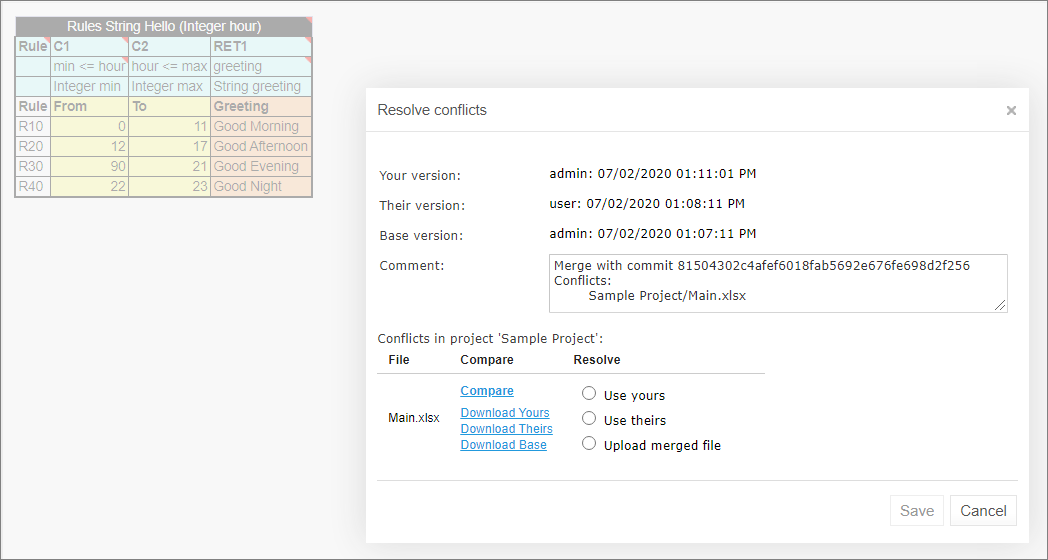
An error message upon saving conflicting versions
The error message contains the Compare link that allows viewing both conflicting versions for comparison.
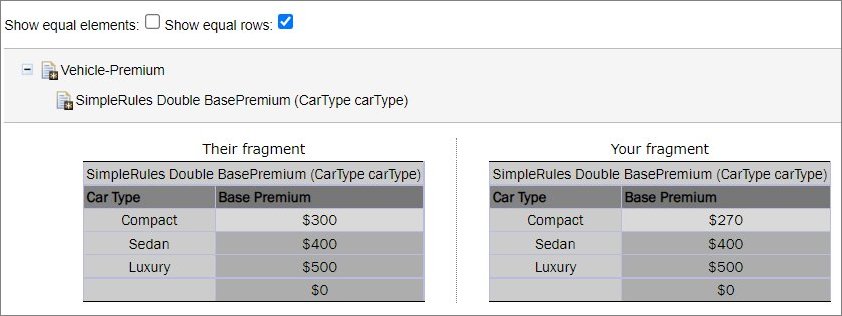
Comparing conflicting versions
Using Protected Branches
OpenL Tablets allows defining a list of protected branches for Git design repository to avoid pushing erroneous changes into main or release branches.
If a branch is marked as protected, all actions that can impact Git history, such as deleting a project or module or synchronizing to a protected branch, are forbidden. In this case, separate branches are modified and then merged into the protected branch only via the Git CI process.
Branches can be defined as protected using the following property:
repository.design.protected-branches
Branches must be separated by comma.
Wildcards can be used to specify a group of branches, such as release-*, so all branches that start with release- keyword are protected.
By default, branches are not protected.
Branches can also be defined as protected in OpenL Studio administrative tab as described in Setting Up a Connection to a Git Repository.
Using Administration Tools
This section explains how to view and control OpenL Studio system settings and manage user information in the system.
To perform administration tasks, in the top line menu, click ADMIN.
By default, the Common tab is displayed. The system settings are organized into the Common, Repository, System, Users, Groups & Privileges, and Notification groups. To open the group, click the corresponding tab on the left.
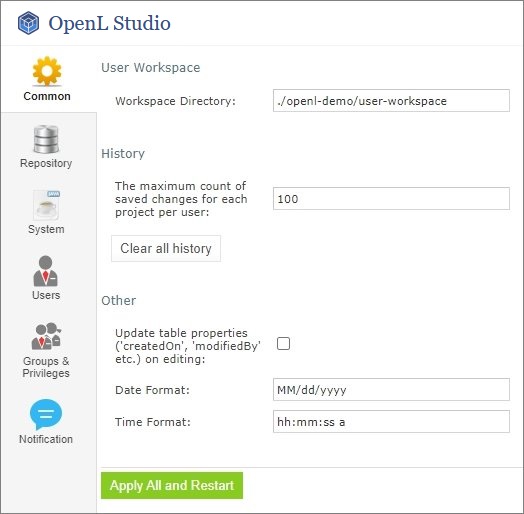
OpenL Studio administration
Normally, the default settings are recommended, but users with appropriate permissions can change them as required. After making changes, click Apply All and Restart and refresh the page. To restore the original settings, in the System tab, click the Restore Defaults and Restart button.
The following topics are included:
- Managing Common Settings
- Managing Repository Settings
- Managing System Settings
- Managing User Information
- Managing Notifications
- Managing Tags
- Managing Email Server Configuration
Managing Common Settings
The Common tab defines the following general OpenL Studio settings:
Managing User Workspace Settings
The User Workspace section is used to define the workspaces directory where user projects are located.
Managing History Settings
To manage history settings, proceed as follows:
-
In The maximum count of saved changes for each project per user field, enter the required number.
By default, this field value is set to 100. If no value is provided, the number of records in history is unlimited.
-
To clean all history files for the project, click the Clear all history button and confirm deletion.
Managing Other OpenL Studio Settings
The following table describes other general OpenL Studio settings:
| Option | Description |
|---|---|
| Update table properties | Indicates whether table properties controlled by the system must be updated and can be viewed in OpenL Studio UI. If this option is cleared, information about the time of table creation and modification and changes authors, such as Created By/On, Modified By/On, is not added to the table properties. |
| Date Format | Enables changing the date format in the OpenL Studio UI. |
| Time Format | Enables changing the time format in the OpenL Studio UI. |
Managing Repository Settings
This section describes repository settings management and includes the following topics:
Managing General Repository Settings
The Repository section contains connection settings of design and deployment repositories. To modify the repository settings, proceed as follows:
- In the Name field, enter the repository name to be displayed in repository editor.
-
Select the connection type and enter corresponding location of the repository to be used as a data source as described in the following table.
Type Description Git The repository can be configured on the local or remote machine. Database The repository is located in a local or remote database. Repository URL field displays URL for access to the database.
A user can create connection to different databases, such as MySQL, MS SQL, Oracle etc.
For more information on supported versions, see https://openl-tablets.org/supported-platforms.AWS S3 The repository is located in Amazon Simple Storage Service (AWS S3).
A “bucket” is a logical unit of storage in AWS S3 and it is globally unique.
Choose a region for storage to reduce latency, costs, and so on. An Access key and a Secret key are needed to access storage.
If empty, the system retrieves it from one of the known locations as described in AWS Documentation. Best Practices for Managing AWS Access Keys.
The Listener period is the interval in which to check repository changes, in seconds.For more information on repository settings, see OpenL Tablets Rule Services Usage and Customization Guide > Configuring a Data Source.
-
Provide the URL value.
The following table provides examples of deployment repository URL values for different databases.
Database URL value sample MySQL, MariaDB jdbc:mysql://localhost:3306/prodRepository, jdbc:mariadb://localhost:3306/ prodRepository (for MariaDB driver) PostgreSQL jdbc:postgresql://localhost:5432/ prodRepository MS SQL jdbc:sqlserver://localhost:1433;databaseName=prodRepository;integratedSecurity=false Oracle jdbc:oracle:thin:@localhost:1521:prodRepository -
To set up a secure connection for connecting to remote or database-located repositories, select the Secure connection check box and fill in the login and password fields.
For more information on repository security, see OpenL Tablets Installation Guide > Configuring Private Key for Repository Security.
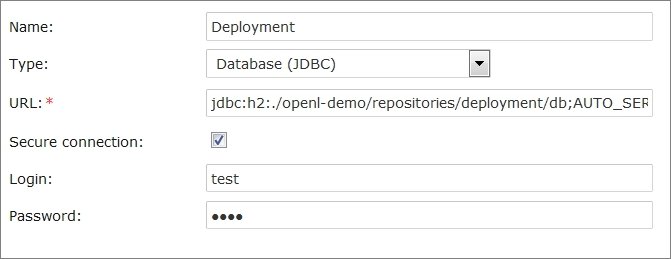
Configuring deployment repository settings
Connection to a local deployment repository is configured by default.
-
To store deploy configurations in the Design repository, in the Repository > Deploy configuration tab, select the Use Design Repository check box and provide required parameter values.
-
To add design or deployment repositories, click Add Repository and enter required information.
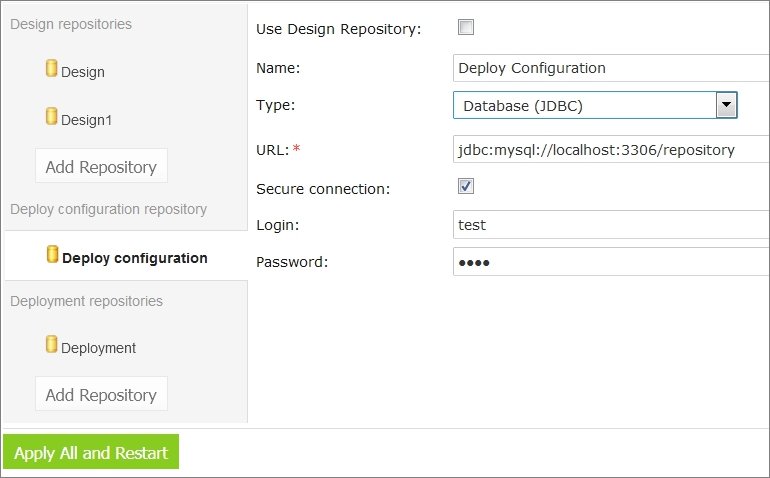
Using another repository for deployment configurations
-
When finished, click Apply All and Restart to save the changes and refresh the page.
To enable storing large files in a Git repository, Git Large File Support (LFS) can be used.
- To enable the Git repository use LFS before it is cloned by OpenL Studio, perform the necessary configuration as described in https://git-lfs.github.com/.
- If the Git repository is already cloned by OpenL Studio, to enable using Git LFS, proceed as follows:
- Close all projects in the workspace.
- Delete all deployment configuration settings.
- Stop OpenL Studio.
- Drop the local folder with the Git repository to the OpenL Studio home directory.
- Start OpenL Studio. OpenL Studio will re-clone the directory.
- Recreate the required deployment configuration settings that were deleted previously.
Managing Git Repository Settings
Git is a free and open source distributed version control system designed to handle everything from small to very large projects with speed and efficiency. For more information on Git, see https://git-scm.com/.
A Git repository is the .git/ folder inside a project. This repository tracks all changes made to files in the project, building a history over time.
This section describes how to set up a connection to a Git repository, configure Git functionality, and resolve conflicts when modifying the same version of the project.
Setting Up a Connection to a Git Repository
In the ADMIN tab, in the Repository section, define values for the following connection properties:
| Parameter | Description |
|---|---|
| Name | Repository name. This value cannot be modified. |
| Type | Type of the repository. The value must be set to Git. |
| URL | URL for the remotely located Git repository or file path to the repository stored locally. |
| Login | Username for accessing a remote Git repository. Ignored for local repositories. |
| Password | Password for accessing a remote Git repository. Ignored for local repositories. |
| Branch | Project branch that is used by default. |
| Protected branches | Branches that can be set as protected from any modifications. For more information on protected branches, see Using Protected Branches. |
| Changes check interval | Repository changes check interval in seconds. The value must be greater than 0. Ignored for local repositories. |
| Connection timeout | Repository connection timeout in seconds. The value must be greater than 0. Ignored for local repositories. |
| Default branch name | Pattern for a default branch name. The default value is WebStudio/{project-name}/{username}/{current-date}. |
| Branch name pattern | Additional regular expression to be used for validation of the new branch name. |
| Invalid branch name message hint |
Error message displayed when trying to create a branch with a name that does not match the additional regular expression. |
| Customize comments | Custom comment message template for Git commits. Comments can be customized using the following placeholders: - {user-message} represents a user defined commit message. It is also used as a commit message in OpenL Studio. - {commit-type} is used by commits to recognize the commit type of the message. - {project-name} is replaced by the current project in the message and used for user message templates for Create project, Save project, Archive project, Restore project, Erase project, and Copy project. - {revision} represents a project revision used for commit. By default, all commits are submitted to Git with a message in the following format: {user-message} Type: {commit-type} The following placeholders can be used for the Restore from old version user message templates: - {revision} is replaced by the old revision number. - {author} is replaced by the author of the old project version. - {datetime} is replaced by the date of the old project version. An additional validation rule can be set up for user message templates in the User message pattern field, in the form of a regular expression. If the validation according to the pattern fails, an error text set in the Invalid user message hint field is displayed to a user. |
| Flat folder structure | Flag that denotes repository structure. For a flat structure, all projects are stored in the directory specified in the Path in repository property, each project in its own folder. Otherwise, if the parameter is set to false, the repository is considered as a Git repository with non-flat structure, and projects can reside in folders and subfolders defined by a user upon project creation or copying, with each project having its own level of nesting. Project index is stored in \<openl-home>/repositories/settings/\<repo-id>/openl-projects.yaml and is updated automatically. Branches information is stored in \<openl-home>/repositories/settings/\<repo-id>/branches.yaml. Folder name limitations are the same as those applied to folder names by the used OS. |
| Path | Directory where all flat repository structure projects are stored. |
The URL field determines whether a repository is local or remote. - If the URL is a valid Git URL, the repository is treated as remote. - If the URL points to a local path, the repository is considered local.
The location where remote repositories are cloned is controlled by the following property:
| Property | Default value | Description |
|---|---|---|
| repo-git.local-repositories-folder | ${openl.home}/repositories | Directory where cloned remote repositories are stored locally |
If the password is changed on the server side, by default, OpenL Studio makes three attempts to log into the remote Git server, and then the Problem communicating with "Design" Git server, will retry automatically in 5 minutes. error is displayed. After that, OpenL Studio stops login attempts to prevent a user account from blocking, and the Problem communicating with 'Design' Git server, please contact admin. error is displayed. Define the following properties in the properties file to configure this behavior:
| Property | Description |
|---|---|
| repo-git.failed-authentication-seconds | Time to wait after a failed authentication attempt before the next attempt. It is used to prevent a user account from blocking. The default value is 300 seconds. |
| repo-git.max-authentication-attempts | Maximum number of authentication attempts. After that, a user can be authorized only after resetting the settings or restarting OpenL Studio. No value means unlimited number of attempts. If the value is set to 1, after the first unsuccessful authentication attempt, all subsequent attempts are blocked. |
Managing System Settings
The System tab enables modifying core, project, and testing options and includes the following topics:
| Section | Property | Description |
|---|---|---|
| Core | Dispatching Validation |
Setting turns on/off the mechanism of dispatching for a rule table where the only one version of this rule table exists. By default, the dispatching.validation value is set to true in OpenL Studio. For more information on dispatching validation, see OpenL Tablets Rule Services Usage and Customization Guide>Table Dispatching Validation Mode. |
| Verify on Edit | Allows turning on/off checking of rules consistency and validity on each edit in Rules Editor. By default, the check box is selected. Automatic checks are executed after each edit. If this option is cleared, the verification process does not launch automatically when the Save button is clicked. Instead, a Verify button appears in Rules Editor, and the user must verify manually by clicking this button. |
|
| Testing | Thread number for tests |
Indicates the number of test cases executed simultaneously.By default, four threads are set. It means that after running a test table or all tests, up to four test cases will be in progress at the same time. When they are calculated, the next four test cases will be executed. |
| Restore Defaults and Restart |
Restores all settings to default values. All user defined values, such as repository settings, will be lost. |
Managing User Information
This section describes how to control user access in the OpenL Studio application based on users and user groups. All privileges in the system are assigned at a group level and will be granted to a particular user after he or she is included in a particular group.
Users and groups are managed in the Users and Groups & Privileges tabs. Only members of the Administrators group have rights to manage users and groups in OpenL Studio.
The following topics are included in this section:
Managing Groups
This section explains how to create, modify, and delete a user group with a certain set of privileges. The Administrators group cannot be deleted from the system.
The following topics are included in this section:
- Viewing a List of Groups
- Adding a Group
- Editing a Group
- Deleting a Group
- Managing a Group in Case of Third Party Identity Provider
Viewing a List of Groups
To view a list of groups, proceed as follows:
-
In the ADMIN tab, click Groups & Privileges.
The system displays a list of groups similar to the following one:
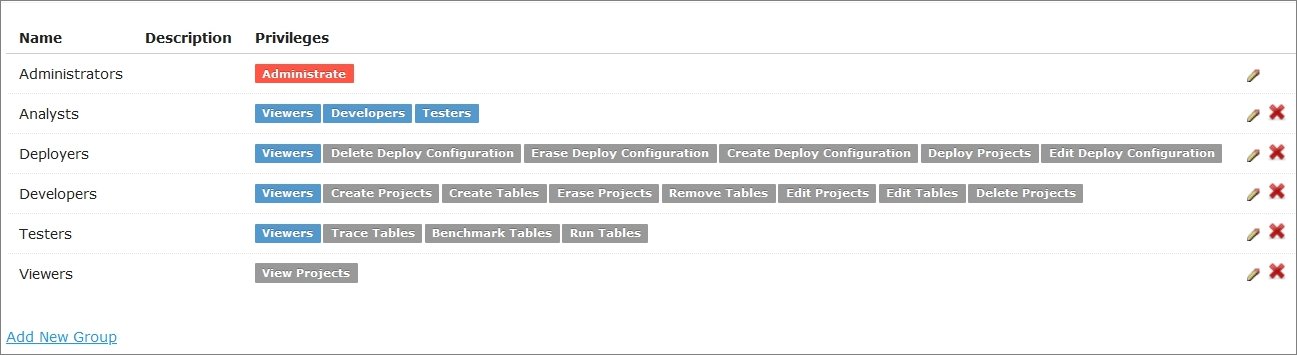
User groups in the Groups & Privileges tab
-
To create a new group, proceed as described in Adding a Group.
- To edit a group, proceed as described in Editing a Group.
- To delete an existing group, proceed as described in Deleting a Group.
Adding a Group
To add a new group, proceed as follows:
-
Click the Add New Group link.
The Add New Group form appears.
-
Enter the group name in the Name field.
- Optionally, provide group description in the Description text box.
-
In the Privilege area, define the privileges as needed.
To assign a set of privileges for a group, click the group name above the list of privileges, such as Developers, Testers, or Administrators. The Authenticated default group with the Viewer privilege is created if the All authenticated users have View access check box is selected in the installation wizard. The group is displayed in the user table if no other groups are assigned to this user.
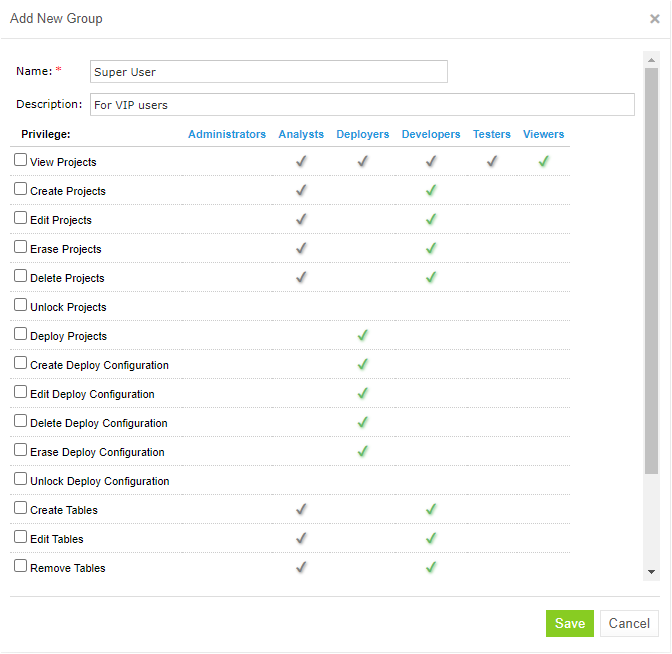
Adding a user group with required set of privileges
-
Click Save.
Editing a Group
To modify a user group, proceed as follows:
- In the list of groups, locate the group that needs to be changed and click the Edit icon
 .
. - In the Edit Group form, change the group name, add or modify its description, and change privileges as needed.
- Click Save to complete.
Deleting a Group
To delete a user group, proceed as follows:
- Locate the group to be deleted and click the red cross on the right:
 .
. - Click OK in the confirmation dialog.
Managing a Group in Case of Third Party Identity Provider
If OpenL Studio is installed with the option to sign in via a third party identity provider, such as SSO or Active Directory, groups created and edited in OpenL Studio must have the same names as available in Active Directory or SSO groups.
When a user from the third-party server logs into OpenL Studio, external user groups are pulled from the external server and displayed in the OpenL Studio user table.
-
If an external group cannot be matched with the OpenL Studio group, that is, no group with such name exists in OpenL Studio, the group is displayed as a collapsed number, for example, +1, and when the value is expanded, the group is highlighted grey.

Groups non-existing in OpenL Studio displayed as collapsed numbers
Groups highlighted blue are internal OpenL Studio groups.
-
If an external group is matched with the OpenL Studio group but it does not have the Administrator privilege assigned, the group is highlighted green.

Groups without the administrative privilege matched with the OpenL Studio groups
-
If a group has the Administrator privilege, the group is highlighted red in the user table.

Groups without the administrative privilege matched with the OpenL Studio groups
After each user login, OpenL Studio updates external groups as follows:
- If a user got a new group, it is added to the table.
- If a group is revoked from this user, it is deleted from the table.
External groups are checked and disabled for editing in the Edit user popup window. Administrators can add an additional group to a user, except for SSO CAS/SAML external user management.
Administrators cannot revoke the external group.
Managing Users
Users get access to OpenL Studio functions by including them in particular groups.
By default, there are the following users in OpenL Studio predefined in Demo mode:
| User name | User password | Groups |
|---|---|---|
| user | user | Viewers |
| u0 | u0 | Testers |
| u1 | u1 | Developers, Analysts |
| u2 | u2 | Viewers |
| u3 | u3 | Viewers |
| u4 | u4 | Deployers |
| a1 | a1 | Administrators |
| admin | admin | Administrators |
On the first start of OpenL Studio in the multi user mode, users with administrator permissions are defined in the installation wizard, Configure initial users section, Administrators field. Administrators password is set equal to their username and can be changed later as necessary. Administrators can then create new users or update existing users in OpenL Studio as needed. For information about the permissions of the groups, refer to Managing Groups.
The following topics are included in this section:
- Viewing a List of Users
- Creating a User
- Editing a User
- Deleting a User
- Managing Users in Case of Third Party Identity Provider
Viewing a List of Users
To view a list of users, proceed as follows:
-
In the ADMIN tab, click Users on the left.
The system displays a list of OpenL Studio users.
-
In the Users tab, perform either of the following:
- To create a user, proceed as described in Creating a User.
- To edit a user, proceed as described in Editing a User.
- To delete a user from the system, proceed as described in Deleting a User.
Creating a User
While creating a user, make sure to include the user in at least one group. Proceed as follows:
-
Click the Add New User link.
The system displays the Add New User form.
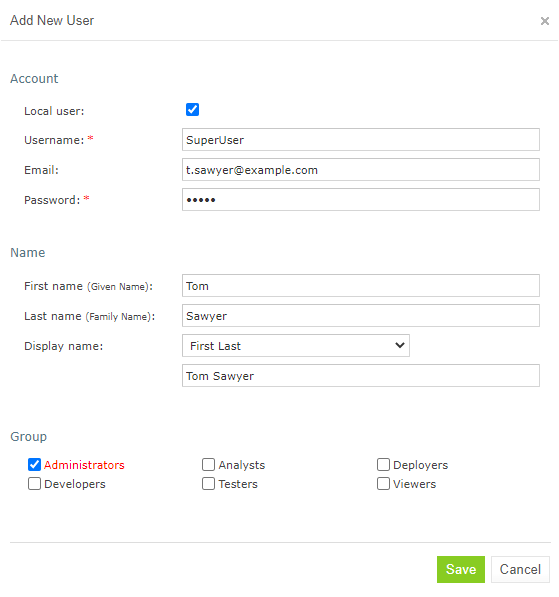
Creating a user
-
To create a user locally, ensure that the Local user check box is selected.
This option is selected by default. For local users, password information is stored in OpenL Tablets Web Studio and third party system user data is not used. This check box is available only if the Active Directory user mode and internal user management option are selected.
-
Specify the user’s login name in the Username field.
-
Optionally, enter the user email.
The email value is mandatory for committing to the Git repository.
-
In the Password field, enter user password value.
This field is unavailable for external users.
-
Optionally, enter the user’s first and last name.
By default, the Display name value is automatically generated as “First name”+space+”Last name”.
The display name is mandatory for committing to the Git repository.
-
To change the Display name pattern, in the appropriate field, select either First Last, or Last First.
If the Other option is selected, the field becomes editable and any display name can be entered.
-
Select one or more groups to assign the user to.
- Click Save to complete.
The system displays the new user in the Users list. If the username and password values are the same, an exclamation mark is displayed next to the username. A user can change the password to improve security.

A list of users
Editing a User
To edit a user, proceed as follows:
- In the Users list, locate a user that needs to be modified and click the username.
-
In the Edit User form, modify user data as required.
The username and administrator’s privilege set up in the
security.administratorsproperty cannot be changed. For external users synchronized with Active Directory or SSO, only fields that are not received from the third party are editable. -
Click Save to save the changes.
Deleting a User
The Administrators group in OpenL Studio must contain at least one administrator user. That it, the only OpenL Studio administrator cannot be deleted.
Initial users created during OpenL Studio installation and the currently logged in user cannot be deleted as well.
To delete a user, proceed as follows:
- In the Users list, locate the user for deletion and click the Delete icon: .
- Click OK in the confirmation dialog.
Managing Users in Case of Third Party Identity Provider
There are some differences in managing users when OpenL Studio is installed with an option to sign in with a third party identity provider, such as SSO or Active Directory.
An external user is created in OpenL Studio upon first user logon using the credentials stored in the third party identity provider, and it is not required to create a user in OpenL Studio in advance. All corresponding user information, such as first name, last name, display name, and email address, is retrieved from the third party and saved to the OpenL Studio, locked for editing. If some part of this information is not received from the third party, the corresponding fields are available for editing in OpenL Studio. An exception is external user management for SSO, where user data cannot be edited in Admin > Users and only part of data can be edited in the user details section.
If a user is first created in OpenL Studio as internal or external, and for logon, OpenL Studio username and third party password are used, a user becomes external, and only third party password stays valid. After such logon, synchronization with the third party is performed, information stored in OpenL Studio is overwritten by third party data information, and the corresponding fields are locked for editing. Exceptions are as follows:
- If the third party email address, first name, or last name value is empty or unavailable, the current email address, first name, or last name is not emptied.
- If the display name value is empty or unavailable, the local display name is not modified.
An exception is the situation when the first or last name was changed.
- If the display name was set to “first name + space + last name”, it is updated to the new “first name + space + last name”.
- If the display name was set to the “last name + space + first name”, it is updated to the new “last name + space + first name”.
- If the display name is set to Other and its value in OpenL Studio is not empty, and in the third party service, it is empty, upon synchronization, the display name set locally is not changed.
- If the display name value is empty in OpenL Studio and the third party service, but the first name and last name values are not empty, the display name is set to “first name + space + last name”, regardless of the pattern specified upon local user creation.
If this user was not created as a local user previously but instead, created upon the external user logon, the display name value stays empty.
User permissions can be assigned locally in OpenL Studio. Alternatively, to retrieve permissions from a third party identity provider, in OpenL Studio, create a user group with the same name as in third party and grant the required permissions to it. It is not required that the group is manually assigned to the user in OpenL Studio. Also, additional user groups can be assigned to a user in OpenL Studio unless the SSO external user management was set up.
Note: When creating a user, the username in OpenL Studio must match the username in the third party identity provider.
Managing Notifications
In the ADMIN > Notification section, users with the administrator privileges can send text messages to all OpenL Studio instances and users that are currently online or remove previously sent notifications.
When a notification is sent by clicking Post, a red bar with notification text appears for all users and OpenL Studio instances. To remove the message for all users and OpenL Studio instances, click Remove.
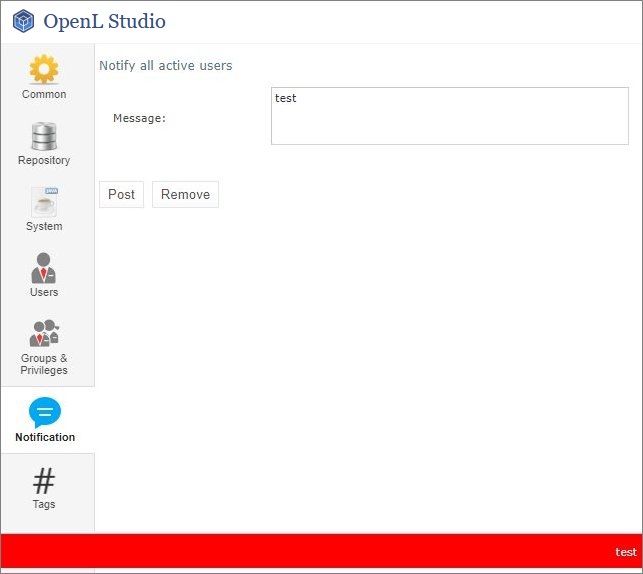
Red bar identifying a notification sent to all active users and instances
Managing Tags
In OpenL Tablets, tags can be assigned to a project. A tag type is a category holding tag values of the same group. An example is the Product tag that includes tags Auto, Life, and Home.
If a tag type is defined as optional, its value definition can be skipped when creating a project. Otherwise, tag definition is mandatory.
For extensible tag types, any user can create new tag values. For other tag types, values are configured by an administrator only.
To create project tags, proceed as follows:
-
In the ADMIN tab, click Tags on the left.
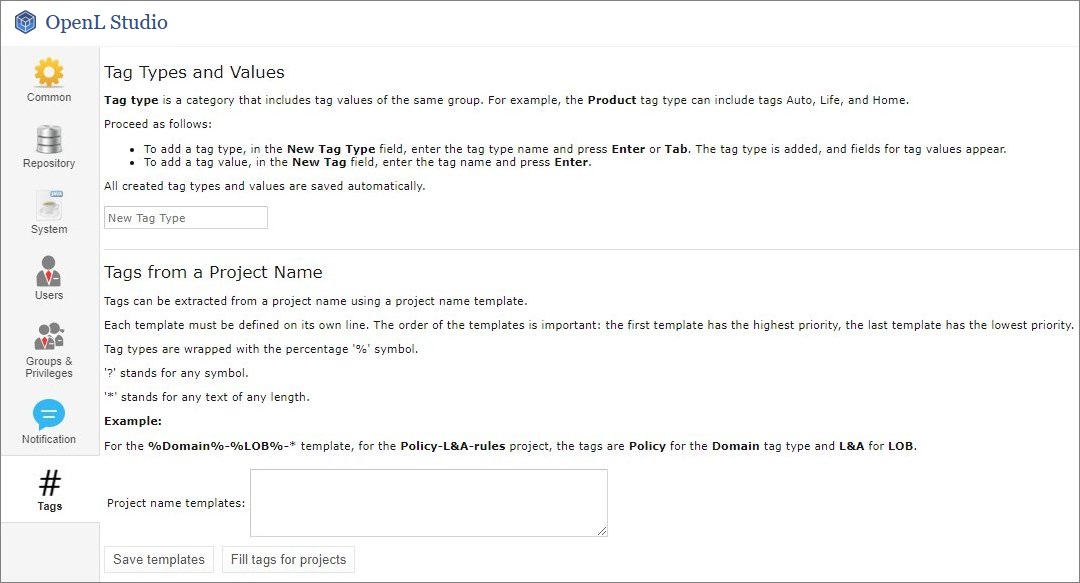
Selecting tags
-
To add a tag type, in the New Tag Type field, enter the tag type name and press Enter or Tab.
When at least one tag type is added, a field for adding tag values appears.
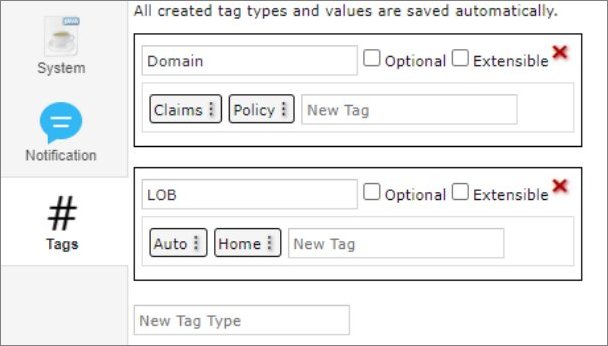
Adding tag values
-
To edit a tag type, click the tag type name field and make the necessary changes.
- To delete a tag type, click the red cross icon for the appropriate tag.
- To add a tag value, in the New Tag field, enter the tag name and press Enter.
- To edit a tag, click the menu icon
 , select Edit, modify the tag, and press Enter or click outside the field.
 -
To delete a tag, click the menu icon
and select Delete.All created tag types and values are saved automatically. These values are now available for selection when assigning tags to projects as described in Creating Projects in Design Repository.
Tag values can be derived from project names. Proceed as follows:
-
To define project name templates to be used for deriving tags, in the Tags from a Project Name section, enter the template value.
- To save project name templates, click Save Templates or simply click outside the field.
- To assign tags according to these project name templates to the projects that do not have tags defined yet, click Fill tags for projects.
The Projects without tags window appears. It contains all projects that have None selected for one or multiple tag types, or do not have tags defined at all, and which name matches the project name template.
Please note that only projects currently opened by the user can be modified. If a project exists in the repository but is not opened for the current user, it will appear in the pop-up but will be grayed out and cannot be selected.
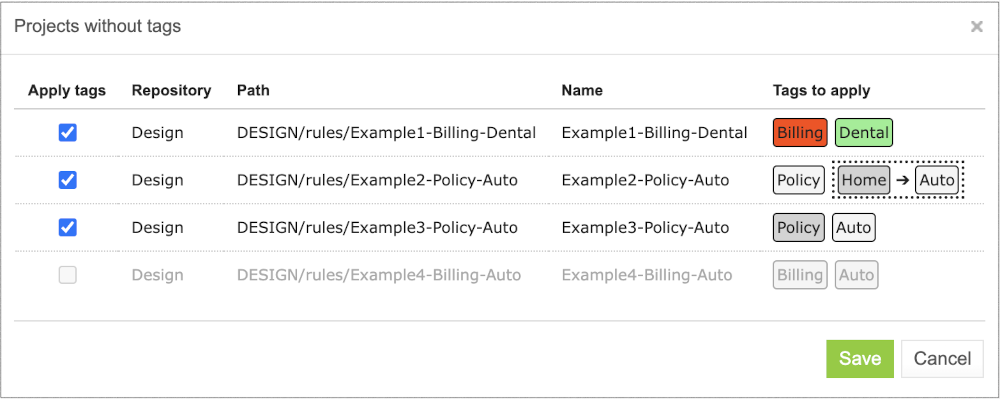
Applying tags for projects matching project name templates.
In this window, tags are marked with colors as follows:
| Tag color | Description |
|---|---|
| White | A tag exists in the list of tags and will be assigned to a project. |
| Green | A tag does not exist in the list of tags, but the tag type is defined as extensible, so the tag will be created and assigned to the project. |
| Red | A tag does not exist in the list of tags, and the tag type is not defined as extensible, so the tag will not be created, neither it will be assigned to the project. The tag for a project will remain None. |
| Grey | A tag is already assigned to the project. The project still appears on the list because it has other tag types with the None values. If the tag is already assigned, but a different tag value is derived from the project name according to the template, the existing value will be replaced with the derived value. The replacement is identified with the arrow. The derived value can be created if the tag type is extensible. In this case, a new value will be marked green. If the derived tag value does not exist and the tag type is not extensible, no replacement happens, and the old value appears in grey with no arrow. |
This logic is explained in the tooltips for each tag color type.
Note that if project tags are successfully modified, the project status will change to In Editing, unless it is already in this status. In order for those changes to be accessible for all users, the projects must be saved beforehand.
Managing Email Server Configuration
OpenL Studio supports sending emails for mailbox verification.
To manage email server configuration, proceed as follows:
- In the ADMIN tab, click Mail on the left.
- Ensure that the Enable email address verification check box is selected.
- Specify the sender’s URL, username, and password for dispatching verification emails through this email server.
-
Click Apply All and Restart.
When a sender is defined for the specific server, it can be used to send emails for verification of the non-verified mailboxes manually defined by a user.
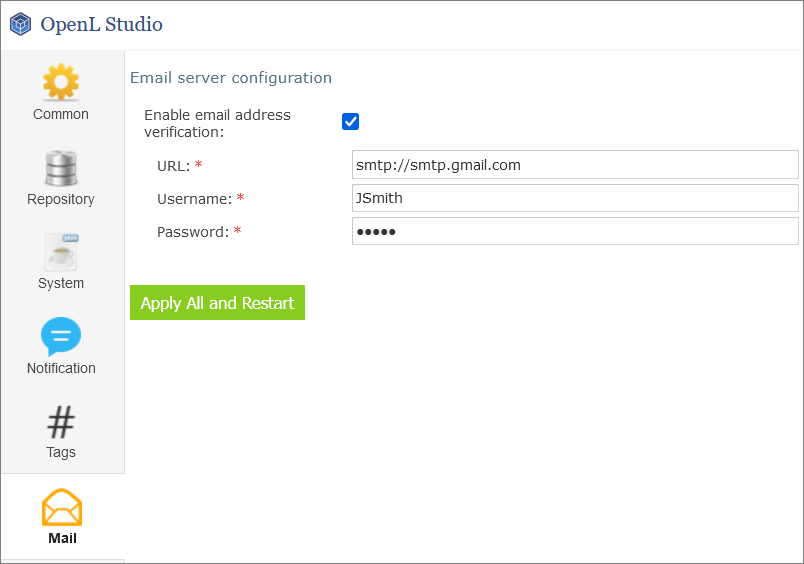
Defining verification emails sender
If the user email is not verified, a red exclamation mark is displayed next to this user email in the user list.

A user with unverified email
-
If the verification email is not received for some reason, to resend it, in the Users tab, open the user record and click Resend.
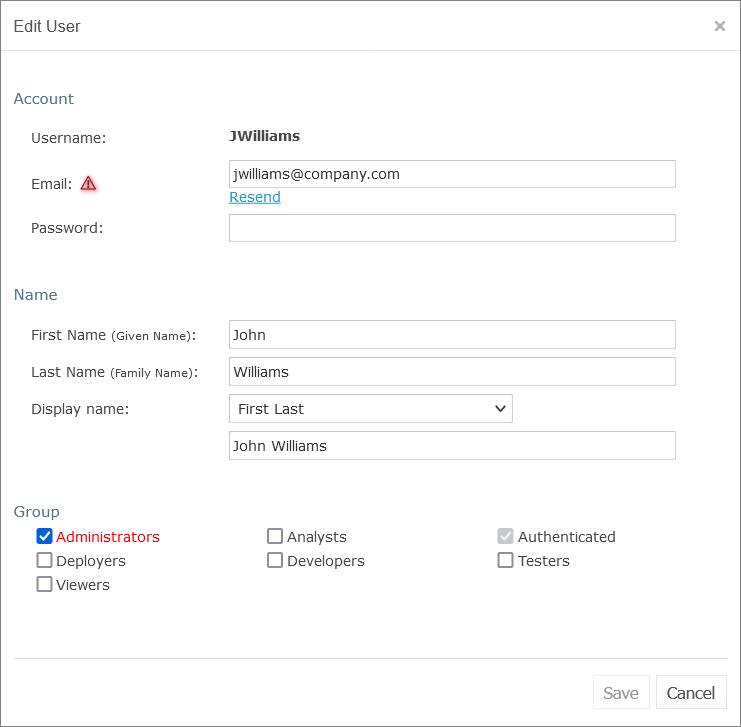
Resending a verification email
A user can resend the verification email on his or her own by clicking the username in the top right corner, selecting User Details, and clicking Resend.
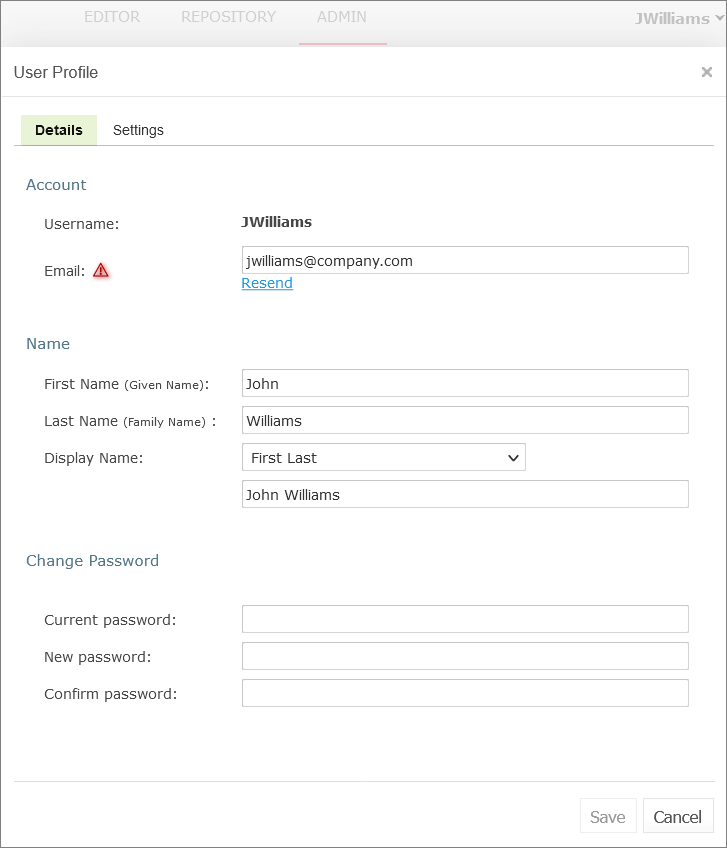
A user initiating verification email resending
The verification email resembles the following:
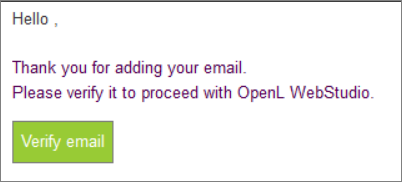
Verification email example
Appendix A: ZIP Project Structure
ZIP projects described in this section can be imported into OpenL Studio. The following topics are included:
Single Project Structure
A single project must be archived into ZIP file and have the following structure:
my-project.zip:
    rules.xml                       OpenL Tablets project descriptor
    rules-deploy.xml               OpenL Tablets project deployment configuration
    *.xlsx                               Excel files with rules
OpenL Tablets project descriptor and project deployment configuration are optional and can be skipped in a single project structure.
Single Project Structure #2
For a special case when an archive contains a single folder in the root, use the following structure:
my-project.zip:
    my-         project              Folder with OpenL Tablets project inside
        rules.xml
        rules-deploy.xml
        *.xlsx
This type of archive is supported by OpenL Studio only.
Appendix B: OpenAPI Project Generation Algorithm
OpenAPI document describes all API endpoints, their parameters, request bodies, responses, and so on. Based on this document, OpenL Tablets generates the corresponding spreadsheets and data type models. The result of generation is two modules, Algorithms and Modules, with Excel files inside. These two models are always generated even if there are no rules or modules in the project.
The following topics are included:
- Generation Features
- Table Generation Details
- OpenAPI to OpenL Type Transformation
- Generated Annotation Template Class
Generation Features
OpenL Tablets generates exactly one corresponding data table, or spreadsheet table, or spreadsheet result for each path described in the Open API file.
The following topics are described in this section:
- Parameters
- Responses
- Request Body Model Decomposition
- Inheritance and Polymorphism Using OneOf, AllOf, and AnyOf
Parameters
The OpenAPI specification provides multiple places where properties for the endpoint can be located. These properties can be defined as path parameters, that is, a list of parameters applicable to all operations described under this path, or described for one of the operation parameters. OpenAPI project generation algorithm merges all these parameters and uses them as input parameters for a corresponding generated spreadsheet table.
Responses
The OpenAPI specification allows describing multiple operations for one path, such as GET, PATCH, or DELETE. An example is as follows.
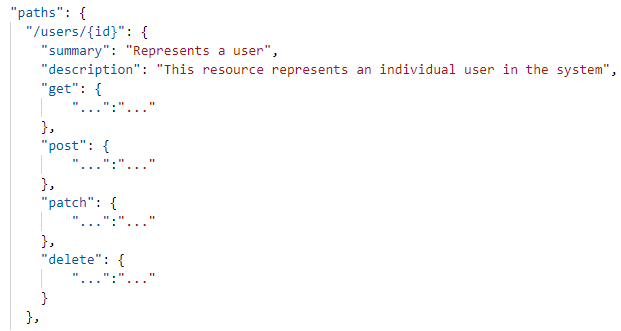
Example of the path with multiple operations
The OpenAPI format supports multiple HTTP codes, such as 200, 400, and 500, and different response media types, such as application/JSON, application/XML, and text/plain, and they all can be described for one path.
Just as for operations, only one HTTP code and media type can be used for spreadsheet generation. The algorithm selects API responses based on the HTTP codes definition as follows:
- If 200 is found, use it.
- If DEFAULT is found, use it.
- If no 200 or DEFAULT code status is found, the first found http code is used for table generation.
The priority of media types is as follows:
- Application/JSON
- Text/Plain
- If there is no such media type defined, the first found media type is used for generation process.
Important note: While for generation only one response code or media type can be processed, for filtration and spreadsheet results determination, all codes and media types are considered.
Request Body Model Decomposition
If the request body is used only once per all OpenAPI schema and it has more than one field, it is decomposed to its fields. If this schema is a child, parent, or a field of another schema, it is not expanded.
An example of the OpenAPI schema with decomposed request body is as follows.
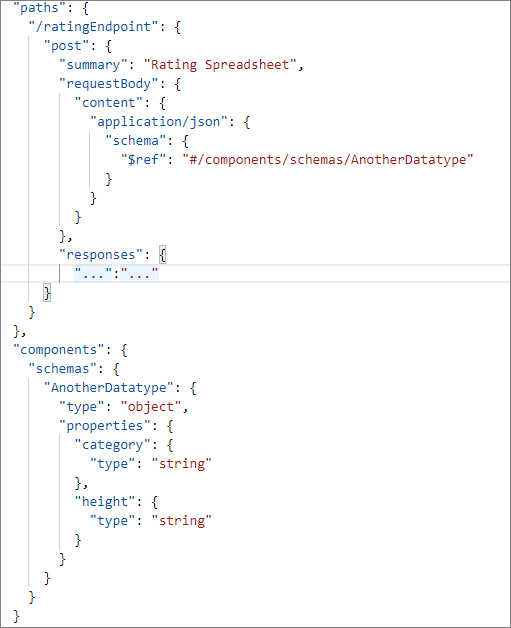
Request body schema to be decomposed
An example of request body decomposition result is as follows.
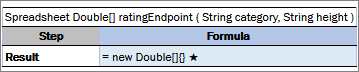
Generated spreadsheet with a decomposed schema in parameters
In this example, the AnotherDatatype schema is decomposed to its fields.
Inheritance and Polymorphism Using OneOf, AllOf, and AnyOf
The following keywords are responsible for the inheritance and polymorphism in the OpenAPI schema:
| Keyword | Description |
|---|---|
| AllOf | Used for model extending. The principle is the same as for nesting classes in Java. |
| OneOf, AnyOf | Reserved for future use. If a schema with these features is used, the corresponding schema is replaced by the Object type. |
An example of a schema with included nesting is as follows:
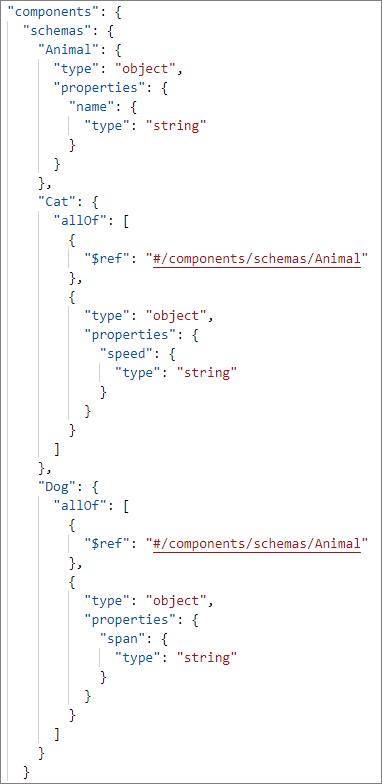
Example of nesting in the OpenAPI schema
An example of result is as follows.
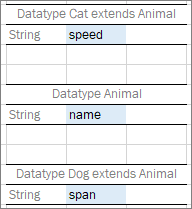
Example of generated datatypes
Table Generation Details
The OpenAPI project generation algorithm produces tables based on the OpenAPI path details. The following table types are available:
- spreadsheet table
- data table
- datatype table
The following topics are included in this section:
Decision Making
An OpenL Tablets project can be generated from any OpenAPI file. It is also possible to upload the OpenAPI schema generated by the OpenL Tablets Rule Services and thus upload the project with the following features:
-
project with enabled RuntimeContext
If any path in the OpenAPI document has an input parameter with a link to DefaultRulesRuntimeContext as #/components/schemas/DefaultRulesRuntimeContext, the generated project will contain the corresponding setting and RuntimeContext will be enabled.

The enabled option for providing runtime context
The DefaultRulesRuntimeContext input parameter is extracted from input parameters for generated spreadsheets. If any path contains RuntimeContext as a parameter, the generated project will have enabled runtime context. If there is any path without runtime context, the generated spreadsheet will be marked as non-OpenL Tablets rule, not included in the included methods regexp, and available only in the generated service AnnotationTemplate class.
An example of a schema with partially provided runtime context is as follows.
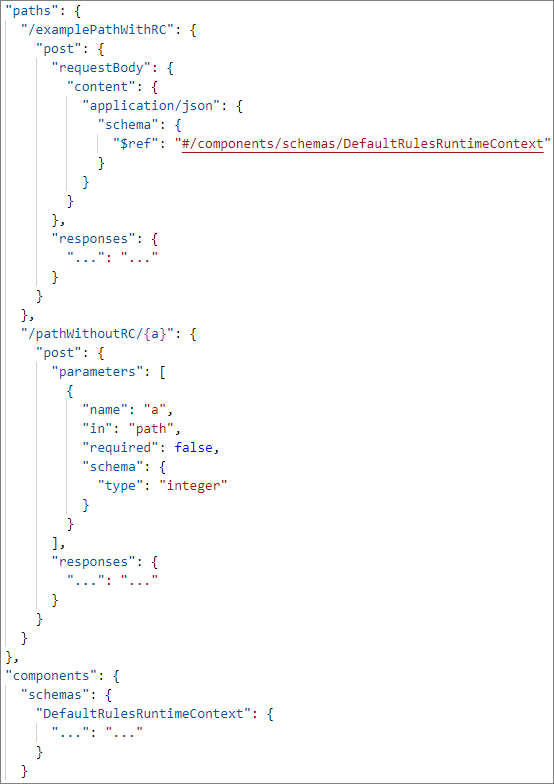
Example of partially provided runtime context
Based on this schema, the examplePathWithRC path with the POST operation is included in the exposed methods, but pathWithoutRC/{a} path is not included.
-
project with allowed variations
If the OpenAPI schema contains all schemas named Variation, NoVariation, VariationsPack, ArgumentReplacementVariation, ComplexVariation, DeepCloningVariation, JXPathVariation, and VariationResult, it is considered that the OpenAPI file is generated from the project with variations support enabled.
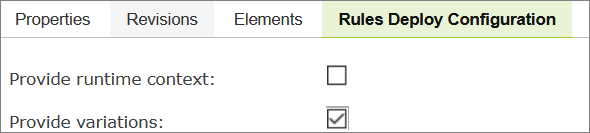
The enabled option for providing variations
All paths which contain variations will be ignored and a generated project will also have enabled variations.
Data Table
The path is recognized as a data table model if the following conditions are met:
- The path starts with the “/get” prefix.
- The path returns an array of potential OpenL Tablets data types or simple types, such as String or Integer.
- No input parameters or operations are marked as “GET”.
- One input parameter DefaultRulesRuntimeContext and operation are marked as “POST”.
Spreadsheet Results
The path is converted to the spreadsheet result if the schema used in response is used only in responses through all the OpenAPI schema, and there is no reference from potential datatypes to this schema.
In addition, if there is a schema in the OpenAPI document that has a reference to a potential spreadsheet result type and this schema does not participate in datatypes, the schema is marked as a spreadsheet result.
An example of the schema with the spreadsheet result that is not returned by any path is as follows.
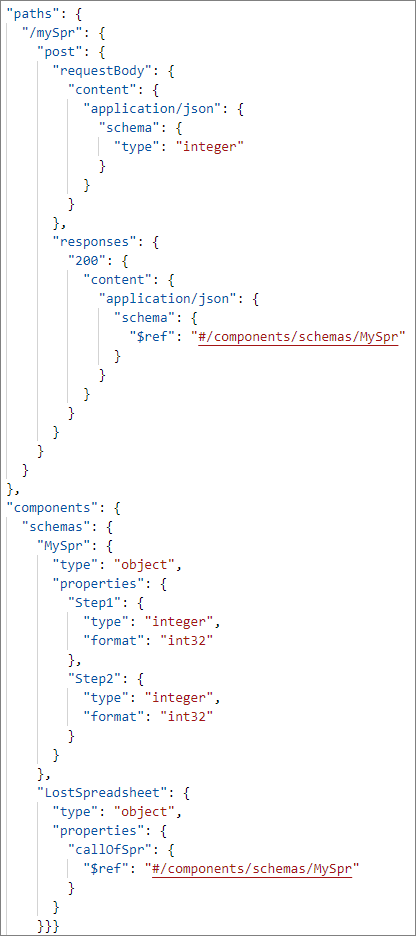
An example of a schema with two spreadsheet results
The result of generation is as follows.
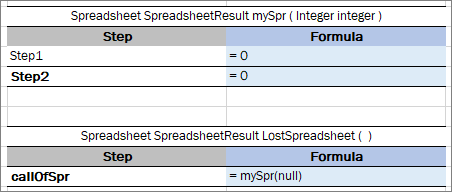
Lost spreadsheet generation result
The LostSpreadsheet is generated because it has a reference to the mySpr spreadsheet result, which is converted as a spreadsheet result call. Nevertheless, this LostSpreadsheet is not included in the Included Methods section not to break full validation of the project.

Module settings
Spreadsheet Tables and Datatypes
If a path response returns a primitive schema type or a schema participating in data tables or requests, the corresponding path is marked and generated as a spreadsheet, and the returning schema is generated as an OpenL Tablets data type.
Step Default Values
Spreadsheet tables and spreadsheet result table steps are presented by fields of the schema returned in the Response section of the OpenAPI path.
-
If a step is a primitive type, the default value for a corresponding type is set as a value of the step.
Default values are retrieved from the OpenAPI schema. If a default value is not present, the following values are set:
Type Default value in a cell Integer = 0 Long = 0L Double = 0.0 Float = 0.0f Boolean = false String = “” (empty string) Date = new Date() Object = new Object() -
If a step is an OpenL Tablets datatype, a new instance creation is called.
- If a step is an OpenL spreadsheet call, it is called with default input parameters.
OpenAPI to OpenL Type Transformation
The following table describes correlation between types described in the OpenAPI schema and types that will be generated by OpenL Tablets.
| OpenAPI type (format) | OpenL generated type |
|---|---|
| Integer (int32) | Integer |
| Integer (int64) | Long |
| Integer(no format) | Integer |
| String | String |
| String (date/date-time) | Date |
| Number(float) | Float |
| Number (double) | Double |
| Number(no format) | Double |
| Boolean | Boolean |
Note: Parameters of the GET operation for the path are converted to primitive types, such as int, float, double, long, and Boolean. An example of such schema is described in the GET operation.
Generated Annotation Template Class
Names for generated datatypes, spreadsheet tables, and data tables are retrieved from the OpenAPI schema. There is no limitation for names in the OpenAPI specification. Names for spreadsheets and data types are generated from the path of the OpenAPI schema which can include path variables, such as path/{a}/{b}/{c} or /api/v1/example. Not all characters in the path are allowed in spreadsheet names because names of the OpenL Tablets rules, data tables, and data types must follow Java naming conventions.
The OpenL OpenAPI generation functionality can transform invalid table names into correct ones but in this case, the original paths are lost, and reconciliation is done with errors. To avoid this situation, in addition to the generated modules, OpenL Tablets generates an additional template class written using a Groovy script, which makes it easy to update.
Original paths are stored in the generated service interface and OpenL Rule Services will provide the endpoint with the same URL as in the original OpenAPI structure.
The annotation template class will be applied by OpenL Tablets Rule Services due to automatically generated property in the rules-deploy.xml available at Repository > Project > Rules Deploy Configuration.
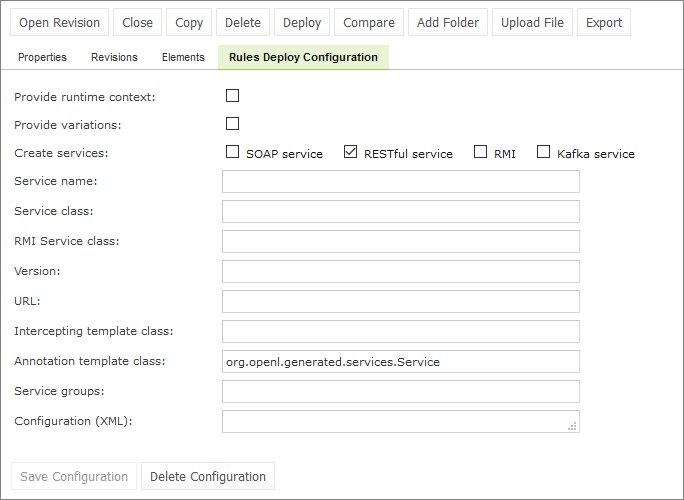
Example of project properties with annotation template class
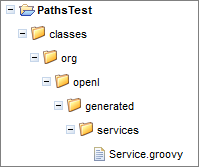
Example of the generated Groovy file location
By default, the script is saved to classes/org/openl/generated/services/Service.groovy and the script name reflects the same location.
An example of the OpenAPI JSON file with the annotation template class generated script is as follows.
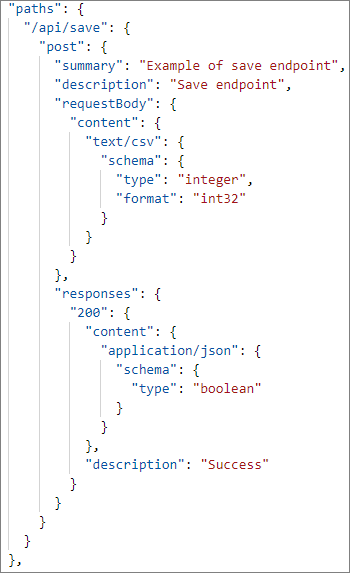
Path which requires script generation
In this example, the file contains the path name “/api/save” and the path itself contains illegal characters for a spreadsheet table name.
An example of the generated spreadsheet table is as follows.
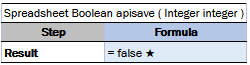
Example of the formatted path name
The api/save path is transformed to the apisave spreadsheet table name.
An example of the generated script is as follows.
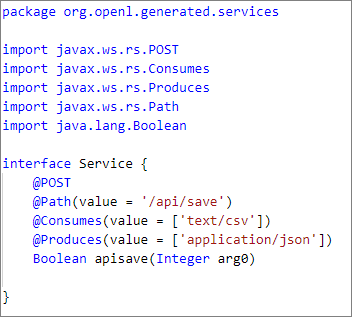
Example of the generated Groovy script
Original path is present in the generated service interface, and this service is presented by OpenL Tablets Rule Services. Endpoint will be available via the same path as for the original OpenAPI structure.
Appendix C: Access to OpenL Studio for Experienced Users
OpenL Studio configuration example is available at http://localhost:8080/webstudio/web/config/application.properties.
Internal API documentation for OpenL Studio is available at http://localhost:8080/webstudio/rest/api-docs.
Release 5.27
OpenL Tablets Documentation is licensed under a Creative Commons Attribution 3.0 United States License.